Are you dreaming of a vibrant, patchwork quilt but intimidated by complex patterns and time-consuming techniques? Then prepare to be delighted! This tutorial will guide you through creating a stunning scrappy jelly roll quilt with surprising ease. Perfect for beginners, this project utilizes pre-cut fabric strips (jelly rolls) to significantly reduce prep time and simplify the sewing process, allowing you to focus on the joy of creating a beautiful, personalized quilt. No more struggling with fussy cutting or intricate piecing – this method is all about quick assembly and maximum impact.
Forget complicated instructions and hours of meticulous work! This scrappy jelly roll quilt is designed for speed and satisfaction, making it the ideal project for both newcomers to quilting and seasoned crafters seeking a fun, fast project. Let's dive right into the simple, step-by-step process and begin transforming your fabric scraps into a cherished heirloom.
Preparation and Safety Guidelines
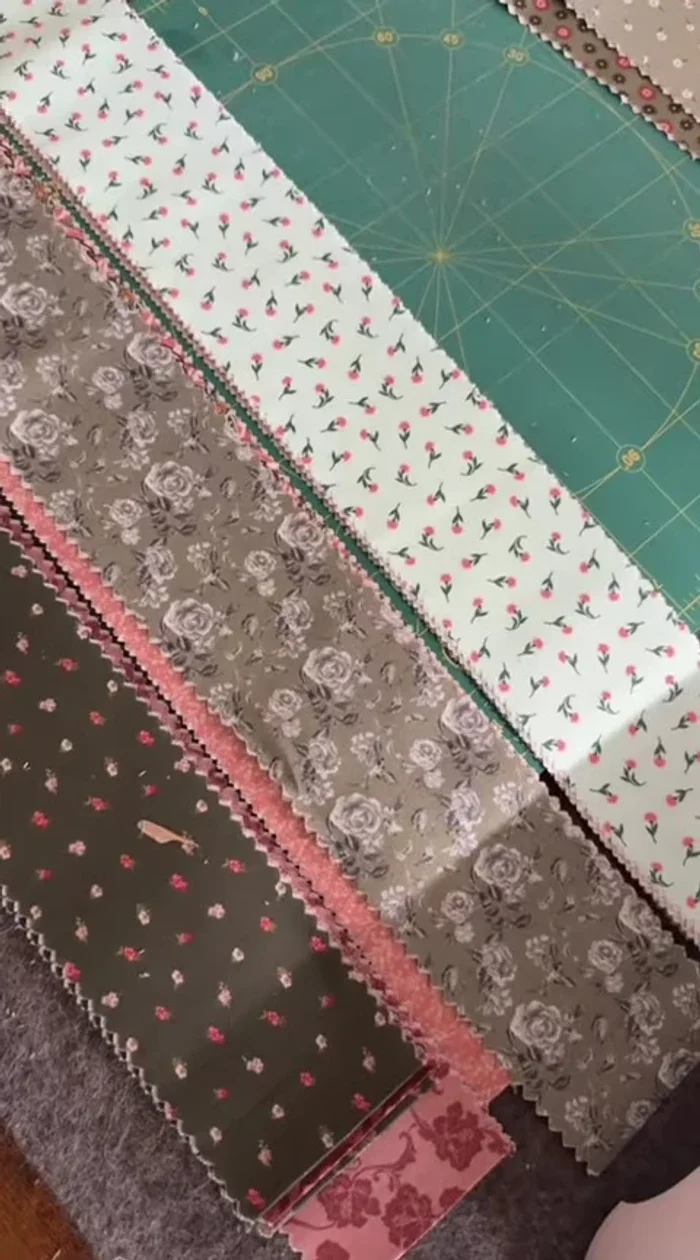
- Jelly roll fabric
- Ruler
- Sewing machine
- Rotary cutter (optional)
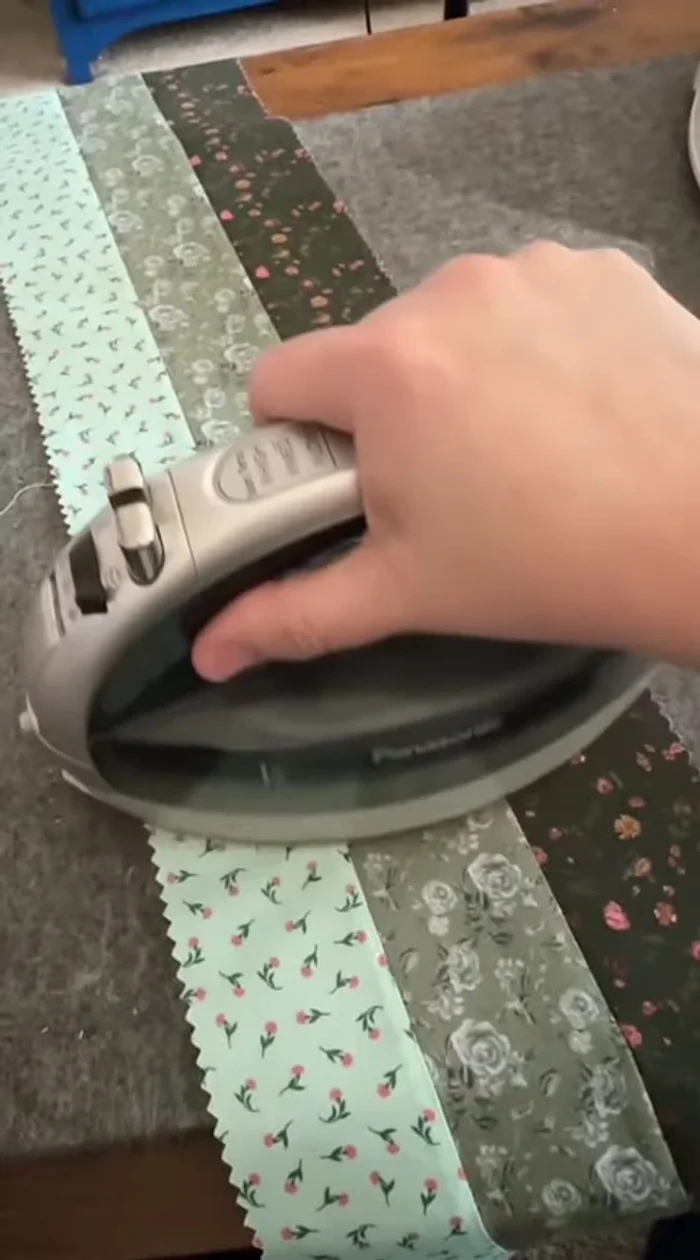
- Iron & ironing board
- Always use sharp rotary cutter blades and a self-healing cutting mat to prevent accidents and ensure clean cuts. Dull blades increase the risk of slipping and injury.
- When using a sewing machine, keep fingers away from the needle area. Use a seam guide or ruler to maintain consistent seam allowances and avoid accidental needle pricks.
- Handle your fabric carefully to avoid snags or tears, especially when working with delicate fabrics. Pre-wash your fabrics if possible to prevent shrinkage and color bleeding later.
Step-by-Step Instructions
Prepare Strips
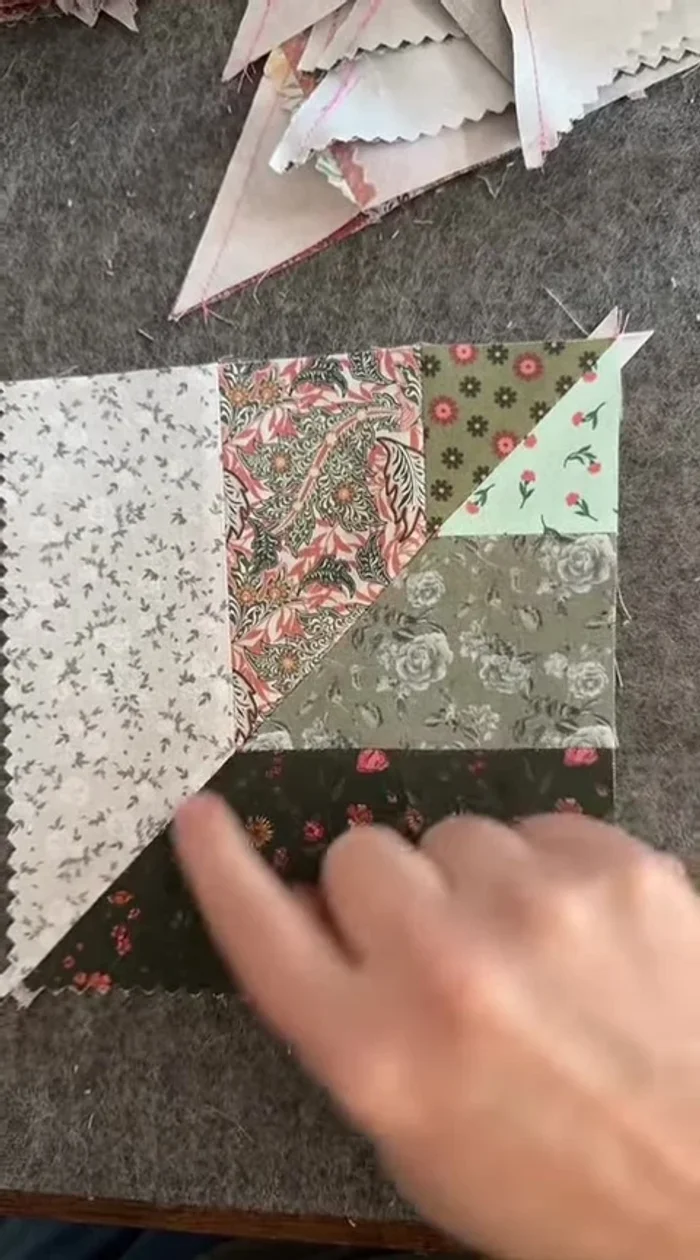
- Divide jelly roll strips into light, medium, and dark colors.
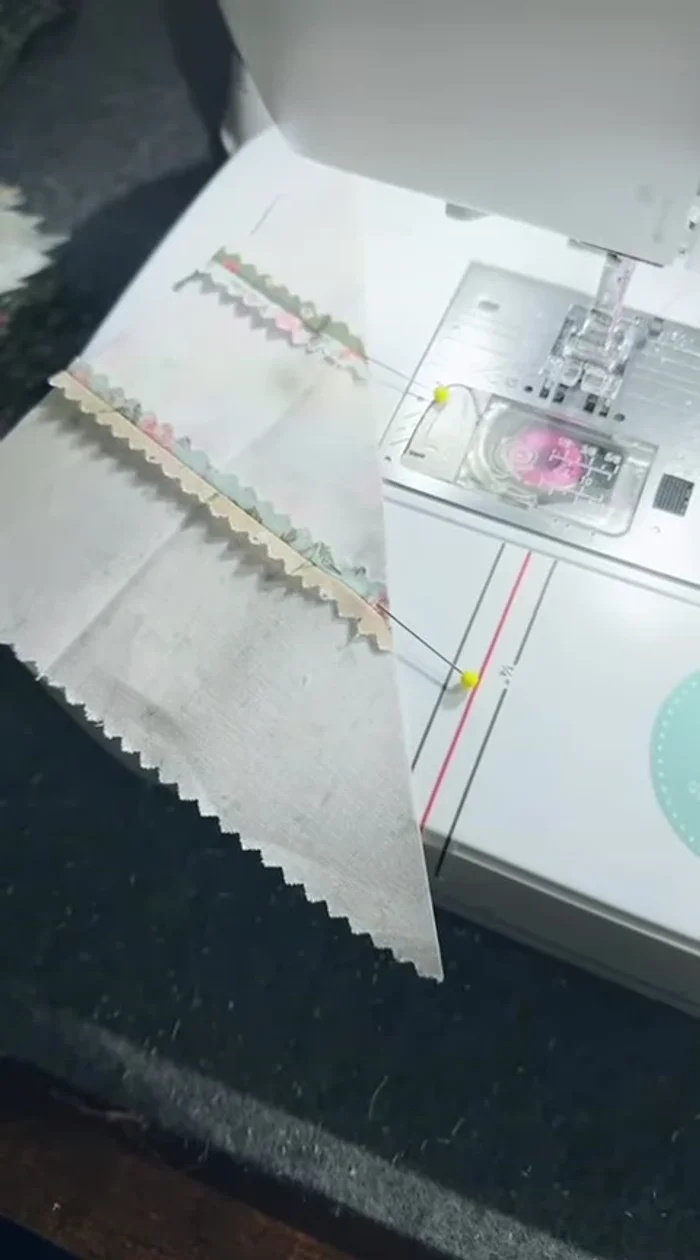
- Sew strips together (light-medium-dark), press seams.
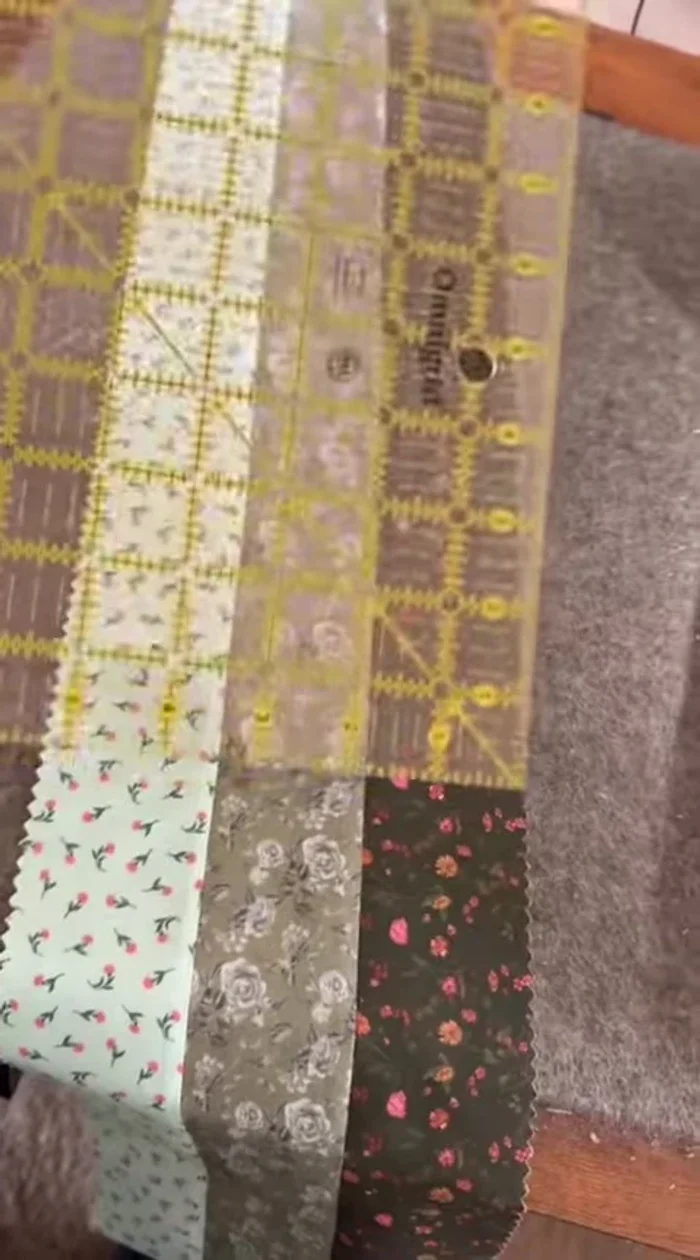
- Cut sewn strips into squares (e.g., 6 1/2" x 6 1/2"). Keep leftover fabric for future projects.

Prepare Strips Cut and Arrange Squares
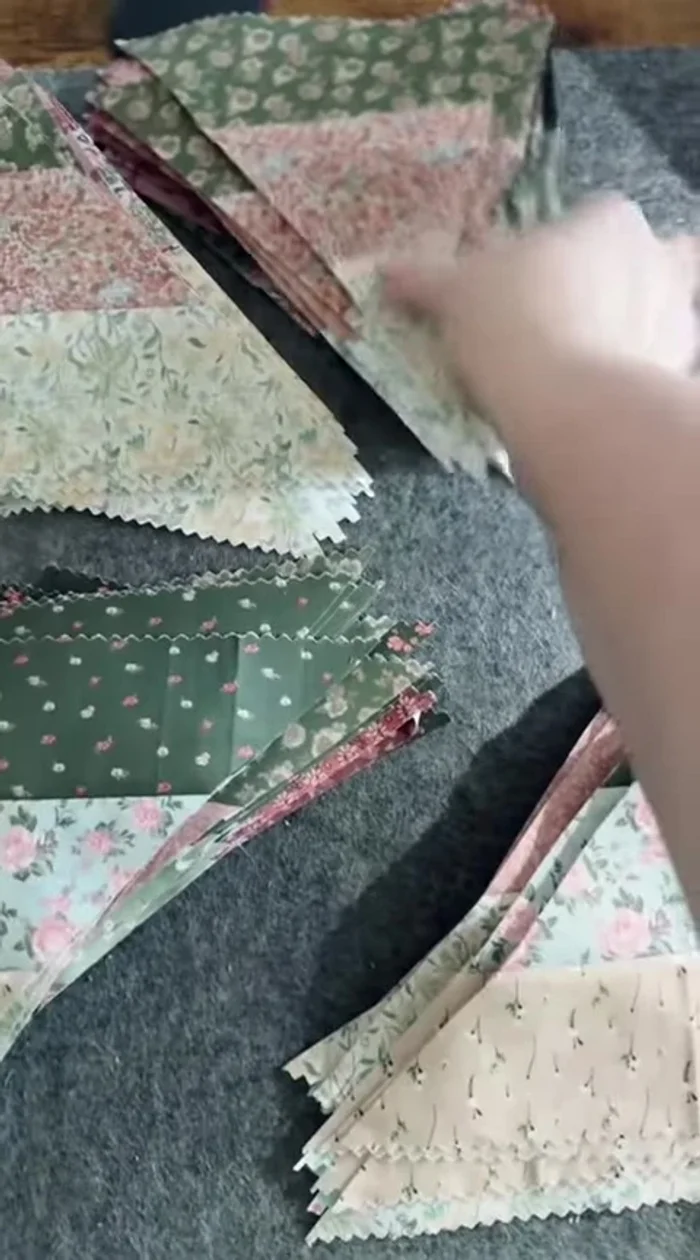
- darks at top, lights at bottom. Cut half the squares off to the right, half to the left.
Cut and Arrange Squares Pair and Sew Squares
- Combine a right-cut square with a left-cut square to create a light/dark combination. Repeat until all squares are paired.
- angled cuts are on the bias and will stretch).
Pair and Sew Squares Square Up and Assemble Blocks
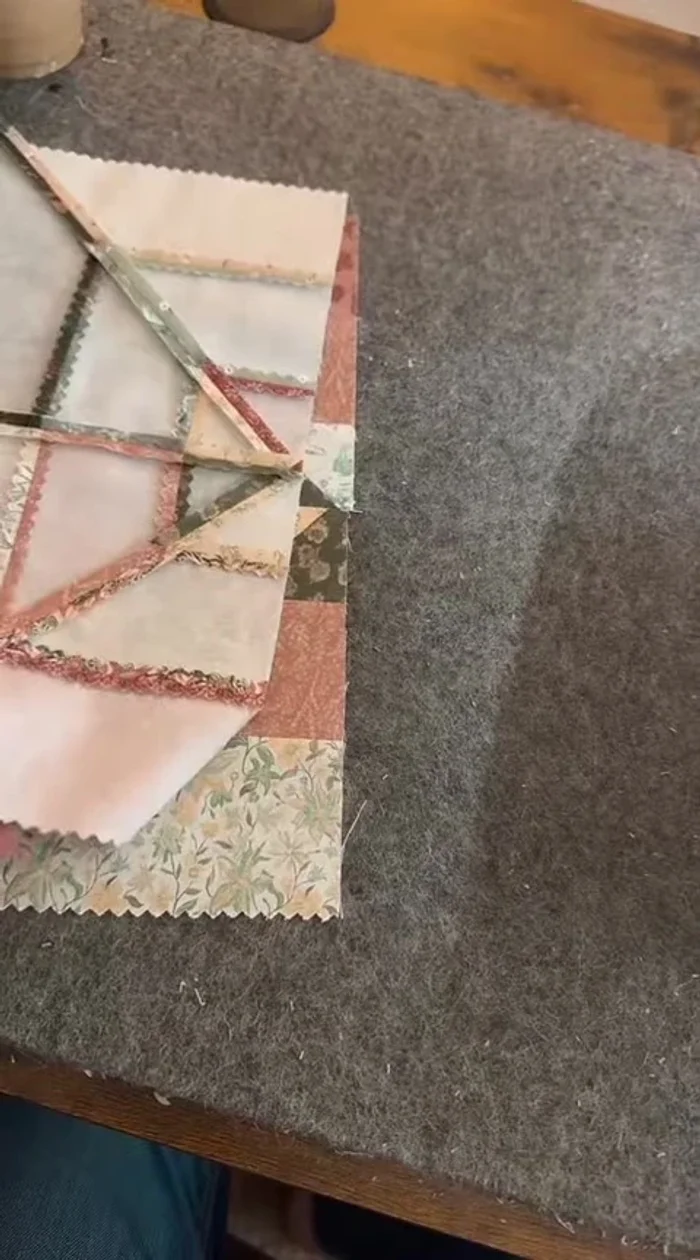
- Square up blocks to 6" x 6". Ensure seams are aligned for even blocks.
- Sew blocks together in rows, matching seams. Then sew rows together to form the quilt top. Trim to final size (11 1/2" x 11 1/2" blocks for a 4x4 baby quilt).
Square Up and Assemble Blocks

Read more: Sew a Lined Expandable Storage Bag: Easy Tutorial
Tips
- Save leftover fabric scraps for other projects!
- Match seams when sewing blocks together for a cleaner finish.
- Be careful not to stretch the bias-cut fabric while sewing.