Are you tired of overflowing closets and disorganized storage? Do you crave a stylish and practical solution for toting everything from craft supplies to groceries? Then look no further! This easy tutorial will guide you through creating your own lined, expandable storage bag – a versatile and surprisingly simple sewing project perfect for beginners and experienced sewers alike. Imagine the satisfaction of making a customized bag that perfectly fits your needs, all while showcasing your own unique style. This project utilizes readily available materials and straightforward techniques, making it a rewarding experience from start to finish.
Forget expensive, mass-produced storage solutions; you'll be amazed at how easily you can create a durable and aesthetically pleasing bag. This tutorial will provide clear instructions and helpful tips to ensure a flawless outcome. So gather your fabric, thread, and notions, and let's get started! Ready to sew your way to a more organized life? Follow the step-by-step instructions below to begin crafting your own expandable storage bag.
Preparation and Safety Guidelines
- Cotton fabric (outer and lining)
- Fusible batting
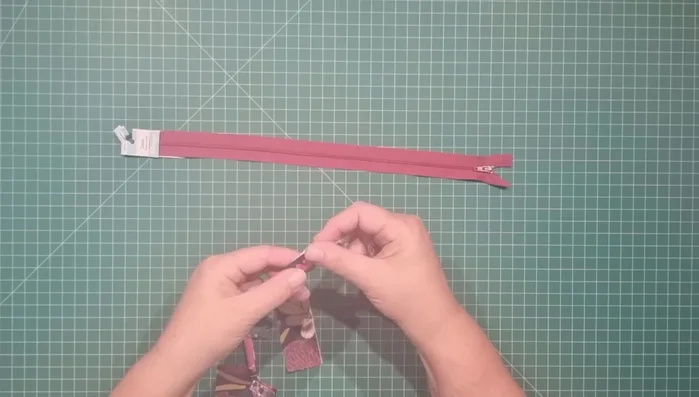
- 14-inch dress zipper
- Sewing machine
- Scissors
- Pins or clips (optional)
- Double-sided tape (optional)
- Seam ripper
- Iron
- Use sharp sewing machine needles and appropriate thread weight for your fabric to prevent breakage and ensure clean stitches. Blunt needles can damage fabric and cause injury.
- Always unplug your sewing machine before changing needles, making adjustments, or cleaning. This prevents accidental injury and damage to the machine.
- Be mindful of your fingers when working with the sewing machine needle and presser foot. Keep fingers away from the needle path to avoid accidental pricks and injuries.
Step-by-Step Instructions
Prepare Materials
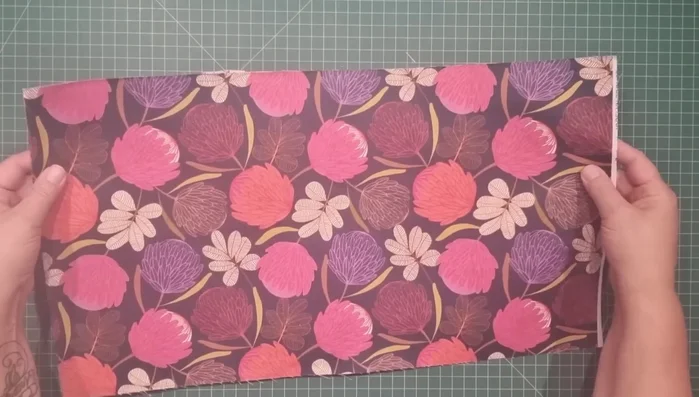
- Cut outer fabric (12" x 22"), lining (12" x 22.5"), handle (2.5" x 12"), zipper tabs (1.5" x 3"), and fuse lightweight batting to outer fabric.

Prepare Materials Create Handle and Zipper Tabs
- Fold handle strip in half lengthwise, fold raw edges in, fold in half again, and stitch down both long edges. Prepare zipper tabs similarly.
Create Handle and Zipper Tabs Prepare and Attach Zipper
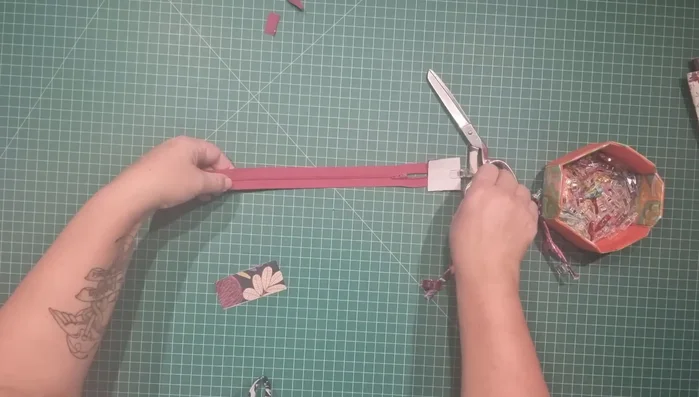
- Cut off excess zipper tape from both ends, leaving the metal pull tabs. Attach zipper tabs to zipper ends, placing fabric right sides together and securing with clips, then stitch.
Prepare and Attach Zipper Attach Zipper to Fabric
- Measure 11 inches from the edge of zipper. Use double-sided tape or pins to secure the zipper to the top edge of the outer fabric, aligning centers. Repeat with lining (right sides together). Stitch across the top.
Attach Zipper to Fabric Top Stitch Zipper
- Top stitch along the top edge of the zipper, attaching outer fabric and lining, only stitching from side seam to side seam on the outer fabric side. Avoid stitching over zipper tabs. Repeat on both sides.
Top Stitch Zipper Attach Handles and Tab
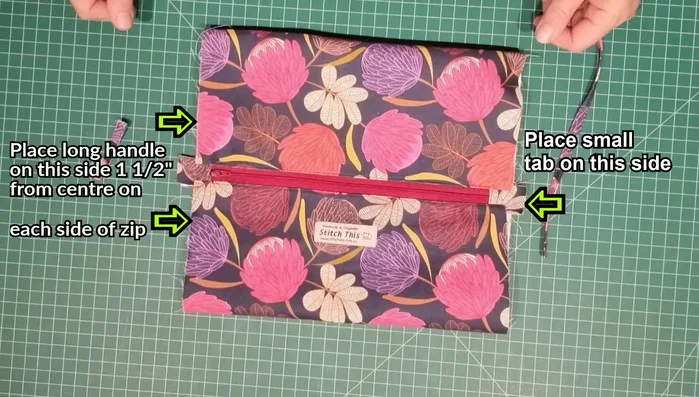
- Place handle pieces 1.5" from the center of each side, and attach tab to top of zipper on one side. Stitch in place.
Attach Handles and Tab Prepare False Bottom Seam
- Create a false seam at the bottom of the bag by slightly opening the bottom seam allowance( about half an inch) before turning the bag right side out.
Prepare False Bottom Seam Clip, Fold, and Stitch Sides
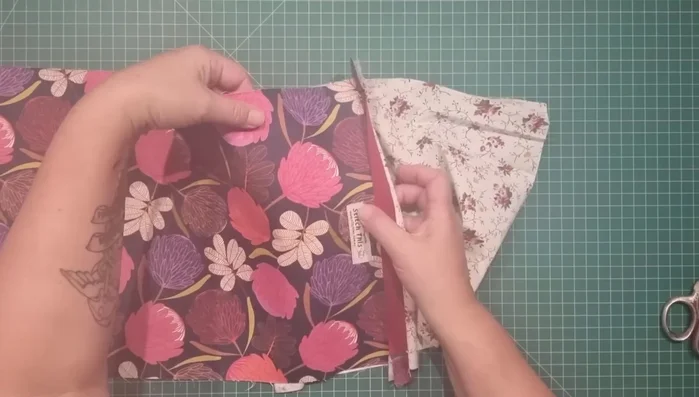
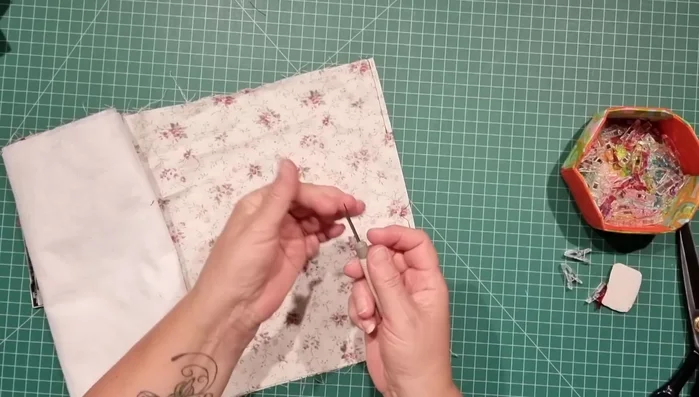
- Mark center point on both main fabric and lining. Clip lining and main fabric at center points to match zip. Fold outer fabric edges up 2 inches on both sides; repeat with lining. Stitch down the sides, leaving openings at zipper ends.
Clip, Fold, and Stitch Sides Close Openings at Zipper Ends
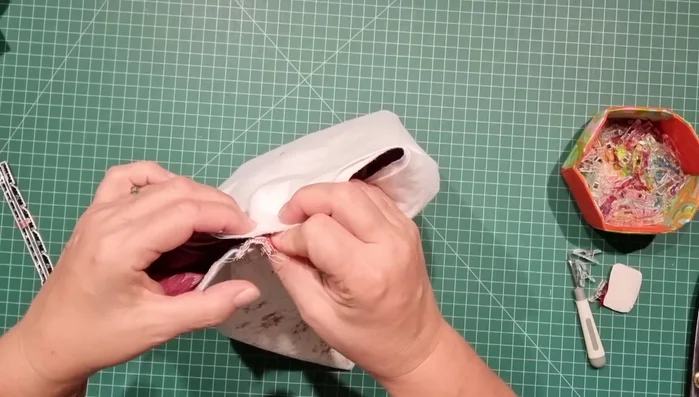
- Stitch together all the layers where the zipper ends meet, ensuring seams from both sides of the fabric overlap. Stitch up to the zipper tabs but not over them.
Close Openings at Zipper Ends Finishing Touches
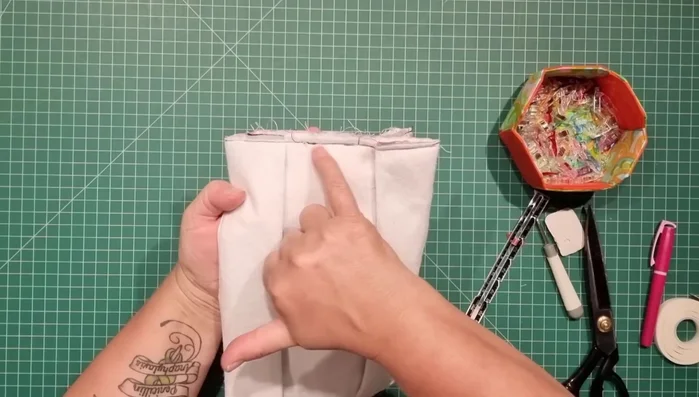
- Trim corners. Turn bag right side out. Press seams at the top edges and snap them together to finish the corners. Close the false bottom seam by machine stitching.
Finishing Touches


Tips
- Use a zipper foot for closer stitching to the zipper teeth if desired.
- Double or triple stitch over the zipper teeth for extra durability.