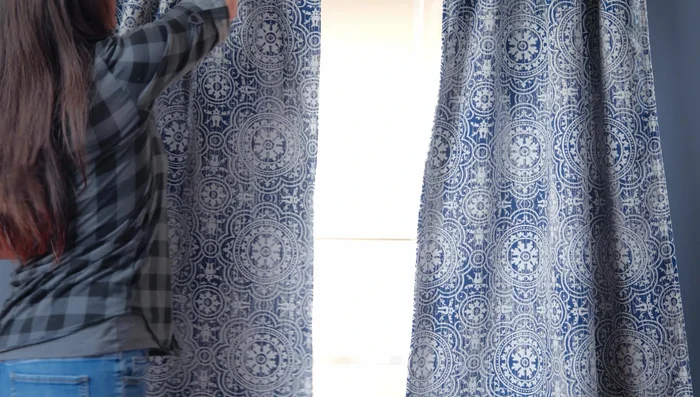
Are you tired of relentless sunlight streaming through your windows, disrupting your sleep or preventing you from enjoying a perfectly dark movie night? Pesky light beams can be a real nuisance, especially in bedrooms or home theaters. But what if we told you there's a simple, elegant solution that doesn't involve complicated hardware or expensive blackout blinds? This guide will show you how to create beautiful, functional rod pocket curtains with a built-in blackout liner, effectively banishing those unwelcome light rays and transforming your space.
These custom-made curtains offer both style and practicality, providing a degree of light control you can adjust to your needs. They are surprisingly easy to sew, even for beginners, and offer a fantastic way to personalize your home decor. Ready to learn how to craft your own perfect darkness? Let's dive into the step-by-step process and begin sewing your way to blissful, light-free serenity.
Preparation and Safety Guidelines
- Fabric (heavyweight recommended)
- Blackout drapery lining fabric
- Sewing machine
- Pins
- Clips
- Basting tape
- Chalk
- Measuring tape
- Scissors
- Iron
- Ironing board
- Deluxe magnetic sewing guide
- Always unplug your iron before handling the blackout liner or any fabric. Ironing can cause burns if not handled carefully.
- Use caution when working with sharp sewing needles and pins. Keep them out of reach of children and pets. Store them safely in a designated container.
- Ensure your sewing machine is properly threaded and adjusted before starting the project to avoid potential fabric snags and damage. If you are unsure, consult your sewing machine's manual.
Step-by-Step Instructions
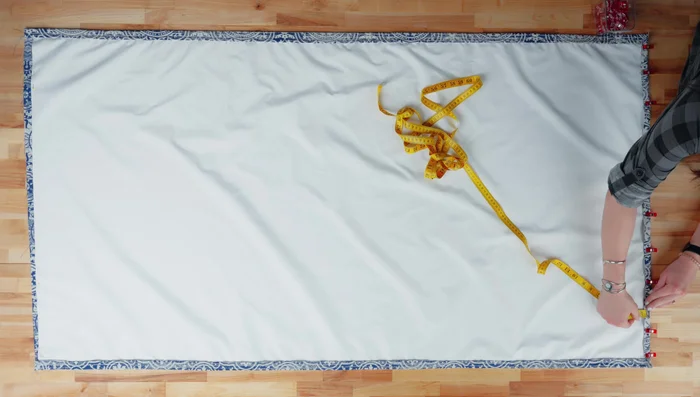
Measure and Calculate
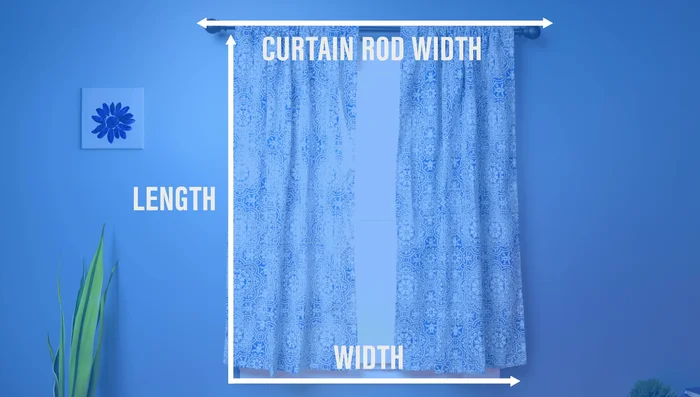
- Measure your window's width and length at its widest point and curtain rod. Determine your desired curtain length.
- desired length + 12 inches, desired width + 4 inches per panel. This video uses length + 9 inches.

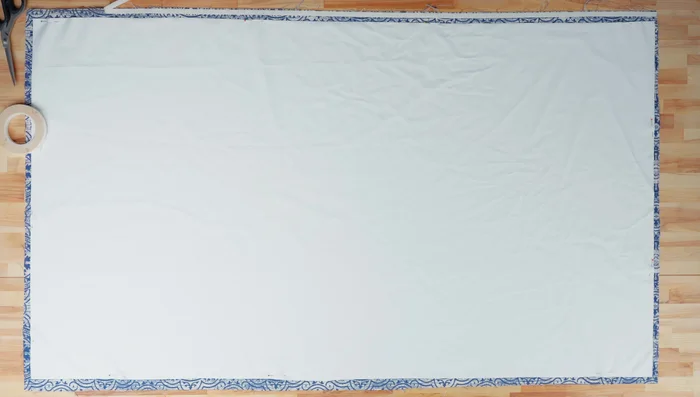
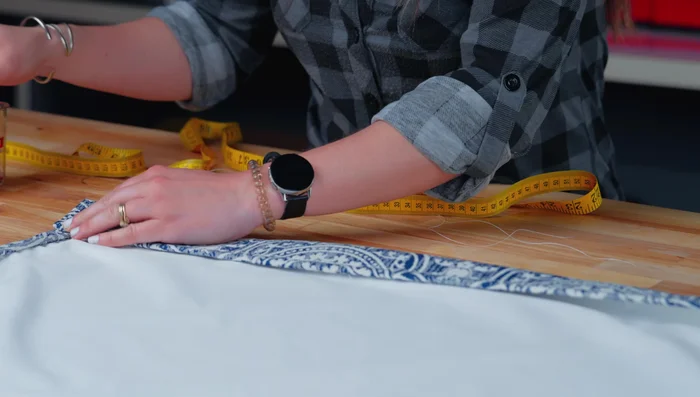
Measure and Calculate Cut Main Fabric
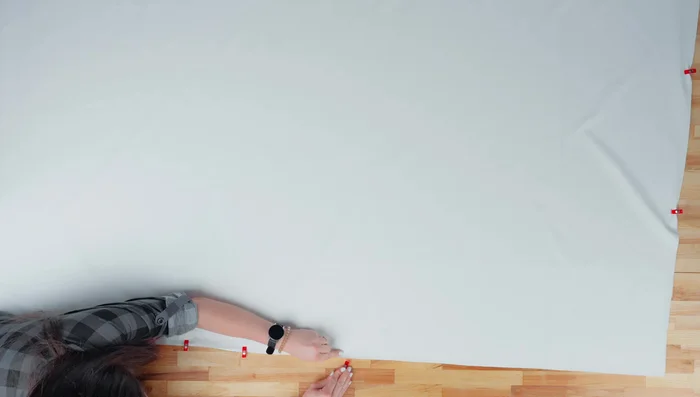
- Cut your main fabric to the calculated size. Fold it in half with right sides together, aligning grainline. Pin and mark length along the fold to the opposite edges. Cut the fabric along these marks.
Cut Main Fabric Cut Blackout Liner
- Repeat cutting process for the blackout liner fabric, but use clips instead of pins for blackout materials.
Cut Blackout Liner Layer and Pin Fabrics
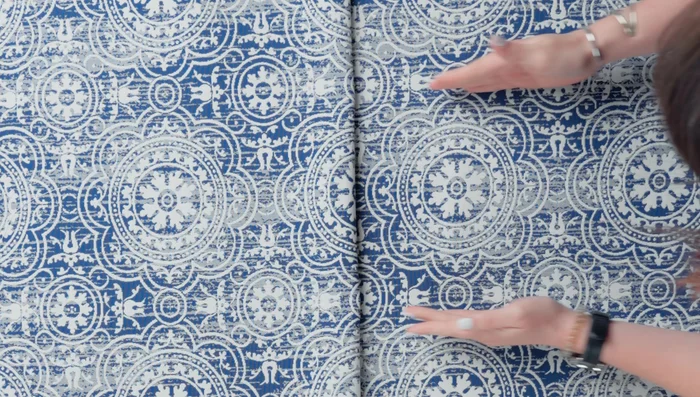
- Layer one fabric panel (wrong side up) and one blackout liner panel (right side up) in the middle. Pin the layers together (clips won't reach).
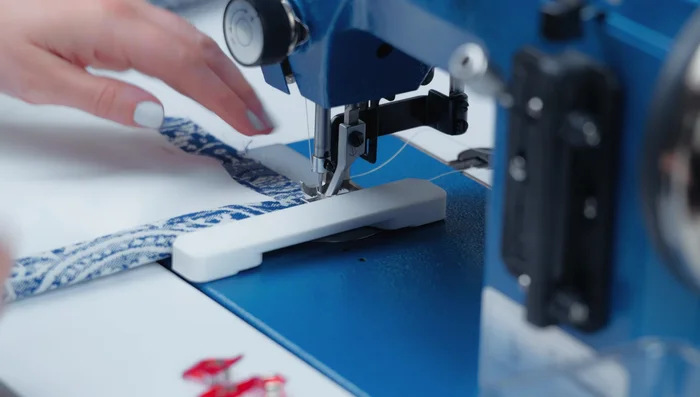
Layer and Pin Fabrics Prepare Side Seams
- Use basting tape to fold and secure 1-inch seams along both side edges. Fold again, for another 1-inch seam; clip in place.
Prepare Side Seams Sew Side Seams
- Sew both side seams with a 3/4-inch seam allowance, backstitching at the beginning and end.
Sew Side Seams Hem Bottom
- Fold the bottom hem inward 1/2 inch and clip.
- Sew the bottom hem with a 1/2-inch seam allowance.
Hem Bottom Prepare Top Pocket
- Fold the top inward 3 inches; clip. Fold the sides in another 3 inches to enclose the liner. Clip.
- Use a sewing guide with a 3-inch seam allowance for the top pocket. Top stitch 1/4 inch or less from the bottom side of the pocket.
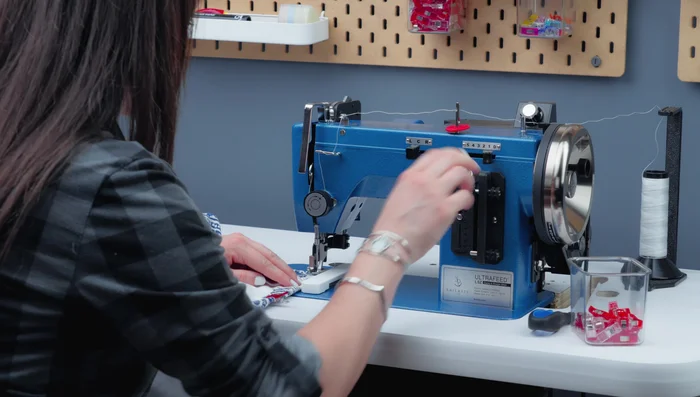
Prepare Top Pocket Sew Top Pocket
- Fold the bottom inward 2 1/2 inches, ensuring the liner is also folded in. Hand sew the top using a whip stitch or machine sew with a 1/2-inch seam allowance.
Sew Top Pocket Repeat for Second Panel
- Repeat steps for the second panel.
Repeat for Second Panel


Read more: Sew a Lined Expandable Storage Bag: Easy Tutorial
Tips
- Use heavier fabrics; they hang better, wrinkle less, and insulate better.
- Use a chalk color you can easily see. Mark lightly.
- Choose a blackout liner color close to your main fabric.