Cozy up this winter with a wonderfully warm and incredibly easy-to-make no-sew fleece tie-knot blanket! Forget complicated stitching and time-consuming projects – this DIY masterpiece requires only a few simple steps and readily available materials. Perfect for beginners or anyone short on time, this project allows you to create a personalized, snuggly throw in a fraction of the time it would take to sew a traditional blanket. Imagine the satisfaction of crafting a beautiful, functional item without even picking up a needle and thread! You'll be surprised how quickly you can transform two fleece fabrics into a cozy masterpiece.
This tutorial guides you through the process of creating your own unique tie-knot blanket, resulting in a soft, luxurious, and surprisingly durable throw. Ready to get started and wrap yourself in the warmth of your handmade creation? Let's dive into the easy step-by-step instructions below!
Preparation and Safety Guidelines
- Two coordinating colors of fleece
- Roller
- Sharp scissors
- Ruler (or yardstick)
- Masking tape or washi tape (optional)
- Always supervise young children when working with fleece fabric, as long strands can pose a choking hazard.
- Use sharp scissors to ensure clean cuts and prevent fraying. Avoid pulling or tugging at the fleece, which can cause it to stretch or tear.
- Be mindful of potential tripping hazards created by loose fabric pieces during the crafting process. Keep your workspace clean and tidy.
Step-by-Step Instructions
Prepare Fleece Pieces
- Trim selvage edges from both fleece pieces. Ensure both pieces are the same size (length and width) using whole numbers for measurements.
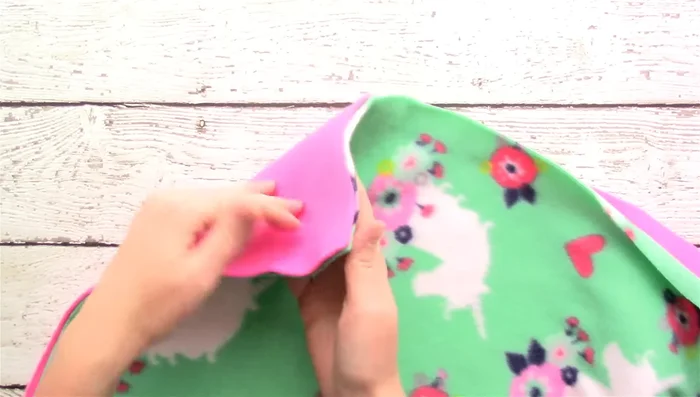
- Lay the fleece pieces out with wrong sides together.
- Measure 5 inches up from each corner and cut a 5x5 inch square from each corner.

Prepare Fleece Pieces Mark and Cut Fringe
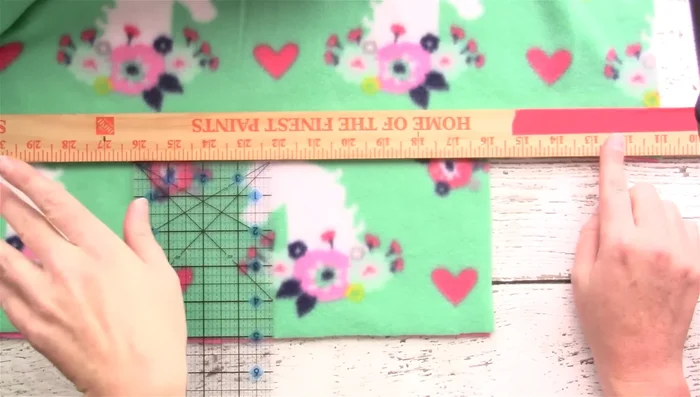
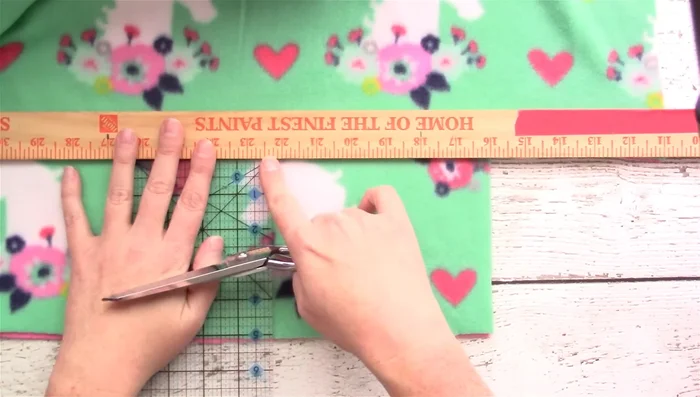
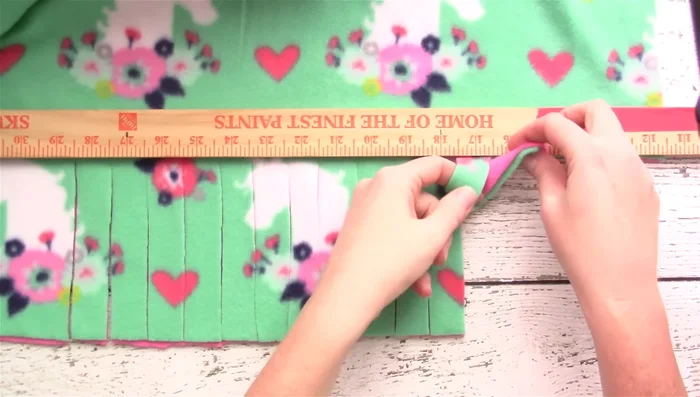
- Use a yardstick (or masking tape) to create a straight line across the blanket from one corner to the opposite corner.
- Cut 1-inch wide strips, 5 inches deep, along the entire edge of the blanket.
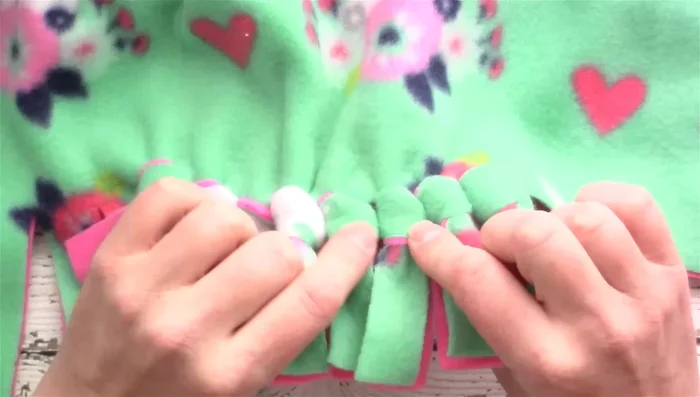
Mark and Cut Fringe Tie the Knots
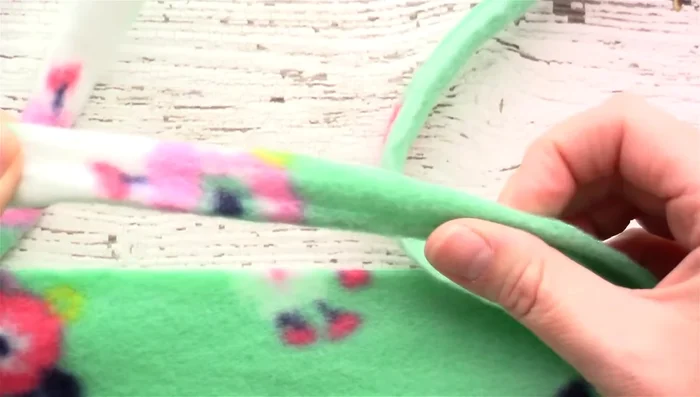
- Lift up both pieces of fringe, create a loop, and push the two pieces of fabric through the loop to make a knot. Push the knot up near the base of the fabric.
- Repeat step 6 until all fringe pieces are tied.
Tie the Knots

Read more: Sew a Lined Expandable Storage Bag: Easy Tutorial
Tips
- Use whole numbers for blanket measurements to avoid issues with the fringe.
- A yardstick helps ensure straight cuts.
- Make sure the knots are secure and tidy.