Are you tired of constantly dropping your precious phone or keys? Do you yearn for a stylish and secure way to keep your belongings close at hand? Then look no further! This guide will show you how to create a charming and surprisingly sturdy toadstool-shaped wrist strap – a perfect blend of whimsy and practicality. Forget fumbling with bulky lanyards or worrying about losing your essentials; this adorable accessory offers a unique and reliable solution to everyday carrying woes. The design is incredibly simple, utilizing readily available materials, and the finished product is surprisingly strong and comfortable to wear.
This delightful DIY project requires minimal crafting experience and can be completed in a fraction of the time it takes to search for a lost item. We'll be using a simple yet effective method ensuring your toadstool wrist strap is not only aesthetically pleasing but also securely holds your belongings. Ready to get started on creating your own magical toadstool wrist strap? Let's dive into the step-by-step instructions!
Preparation and Safety Guidelines
- Elastic
- Fabric
- Safety Pins
- Sewing Machine
- Scissors
- Iron
- Tailor's Chalk
- Always supervise children during crafting and ensure they do not put any part of the completed wrist strap in their mouths. Small parts pose a choking hazard.
- Use strong, non-toxic materials. Avoid anything that could fray easily or contain harmful chemicals, especially if the strap will be worn by children or pets.
- Test the strength of the finished wrist strap before use. Ensure it can securely hold the intended object without breaking or coming undone.
Step-by-Step Instructions
Prepare Materials
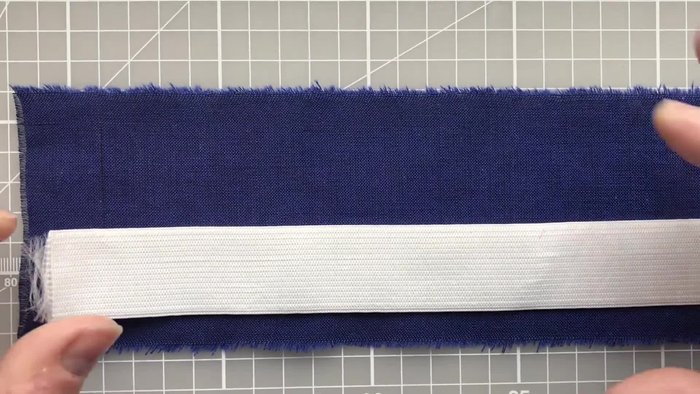
- Measure and cut elastic (25cm) and fabric (8cm x 50cm).

Prepare Materials Create the Fabric Casing
- Fold fabric in half (right sides facing), pin, and machine stitch along the long edge (approx. 0.5cm from edge).
- Press and turn the casing right side out. Secure threads at the beginning and end.
Create the Fabric Casing Insert Elastic
- Thread elastic through casing using a safety pin.
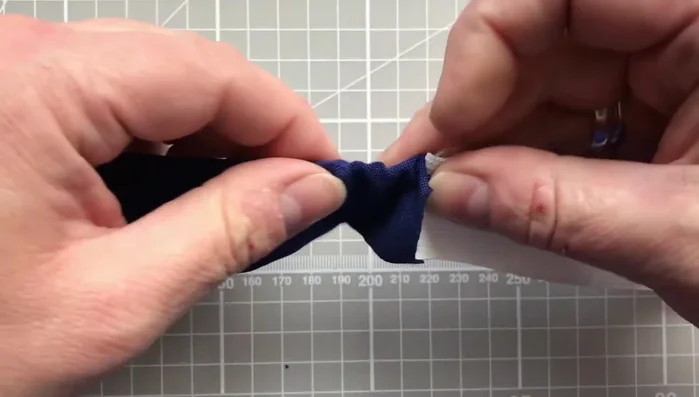
- Once elastic is fully threaded, use a safety pin to prevent it from pulling through, approximately 2 cm from each end.
Insert Elastic Secure Elastic Ends
- Machine stitch across the elastic ends to secure them within the casing.
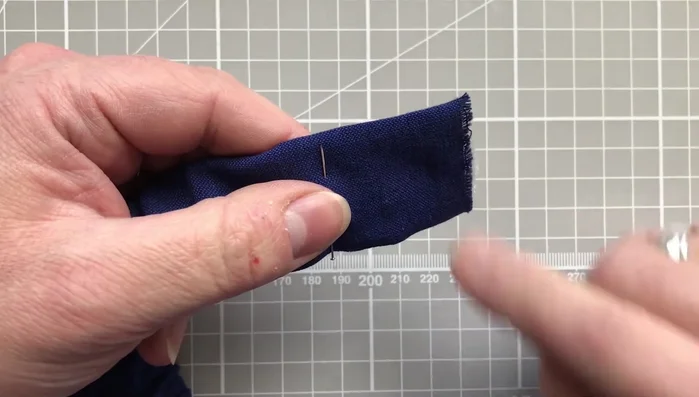
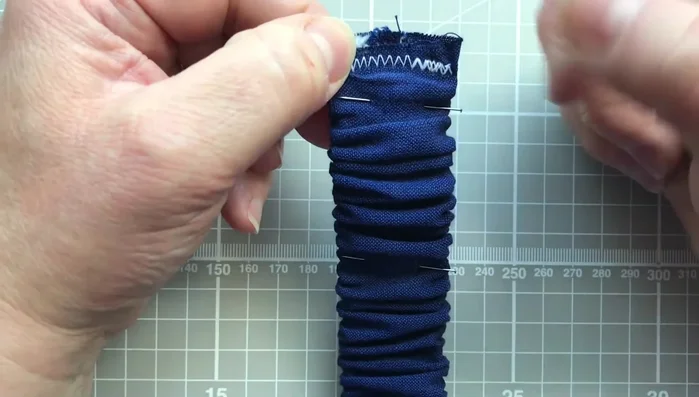
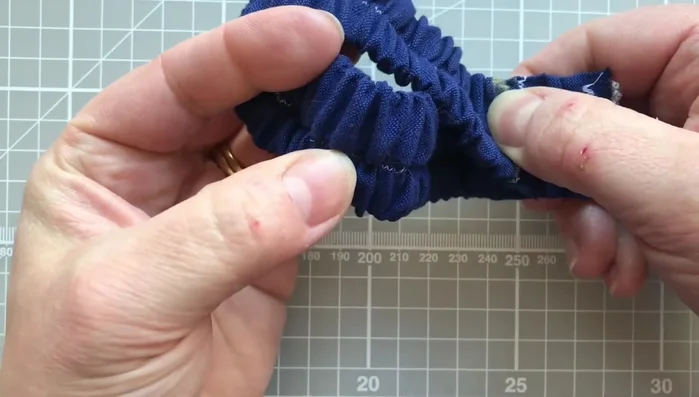
Secure Elastic Ends Distribute and Secure Gathers
- Mark and evenly distribute the gathers along the strap, using pins to secure them. (approx. 1.5cm from one end, 4cm from the other)
- Machine stitch a line of zigzag stitches down the center of the strap using pins as guides. Stretch the fabric between pins to keep the gathers even while stitching.
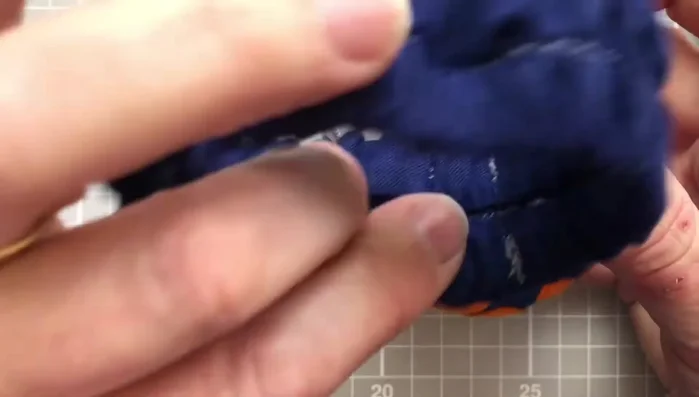
Distribute and Secure Gathers Join Strap Ends
- Join the ends of the strap with a straight stitch and trim excess fabric. Secure the raw edges of the strap to prevent fraying
Join Strap Ends Attach to Toadstool
- Attach the finished strap to the toadstool lid using hand-sewing techniques.
Attach to Toadstool


Read more: Sew a Lined Expandable Storage Bag: Easy Tutorial
Tips
- Use a contrasting thread color for visibility during the process, but switch to a matching color for the final stitches.
- Reverse stitch at the beginning and end of each seam to secure the threads.
- Use a zigzag stitch for seams involving stretch materials.
- Be careful when machine stitching over pins to avoid damaging your machine.