Tired of staring at the same old pillow shams? Ready to inject some fresh style and personality into your bedroom without breaking the bank? Then you're in the right place! This easy DIY pillow sham tutorial will guide you through creating beautiful, custom-made shams for both queen and king-sized pillows, using readily available materials and simple sewing techniques. Whether you're a seasoned sewer or a complete beginner, this project is perfectly achievable, promising satisfying results and a significant boost to your bedroom's aesthetic appeal.
Forget expensive, mass-produced options! With just a little time and effort, you can craft luxurious pillow shams tailored to your exact taste and fabric preferences. From choosing the perfect fabric to the final stitch, we’ll walk you through every step of the process, ensuring a professional-looking finish. Ready to transform your bedroom? Let's dive into the step-by-step instructions below!
Preparation and Safety Guidelines
- Fabric (2/3 yard for front, 1/4 yard for fabric B, 2/3 yard for fabric C for Queen; adjustments for King), Cotton Batting (2/3 yard), Ribbon Lace (optional), Sewing Machine, Walking Foot (recommended), Iron, Pins
- Always use sharp scissors or a rotary cutter to ensure clean cuts and prevent fabric from fraying excessively. Dull blades can lead to uneven cuts and injuries.
- Before sewing, pre-wash and dry your fabric to prevent shrinkage after the pillow sham is completed. This will ensure a proper fit.
- When using a sewing machine, be mindful of your fingers and keep them away from the needle. Always use a sewing machine needle appropriate for your fabric type.
Step-by-Step Instructions
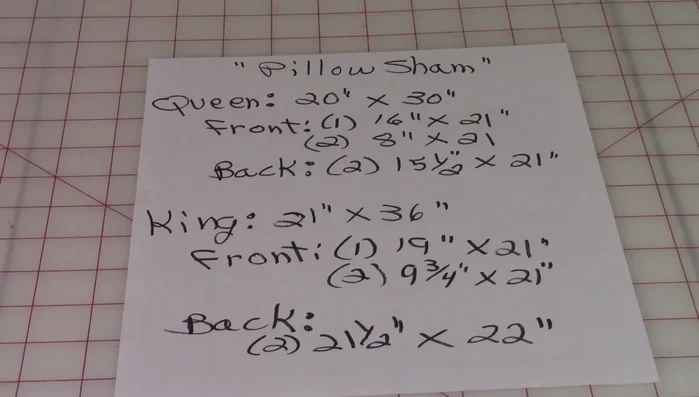
Measure and Cut Fabric
- 20in x 30in becomes 21in x 31in; adjust for King size).
- Cut fabric for the front (one large piece), and two smaller side pieces. Cut two pieces for the back. (Dimensions provided in the video based on the chosen pillow size)

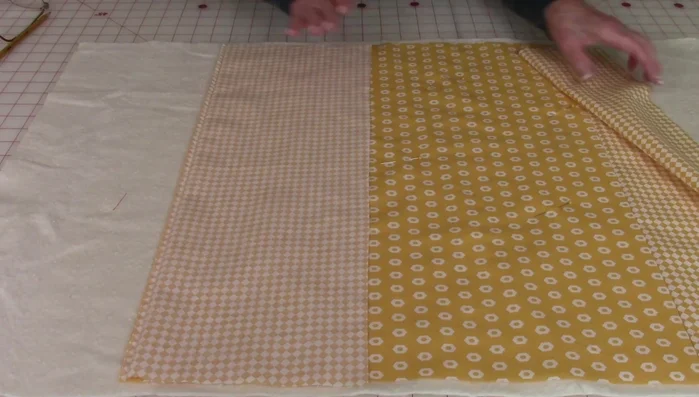
Measure and Cut Fabric Assemble the Front Piece
- Place the smaller pieces onto the sides of the larger front piece, aligning edges. Pin and stitch 1/4 inch along the seams. Press the seams to the back.
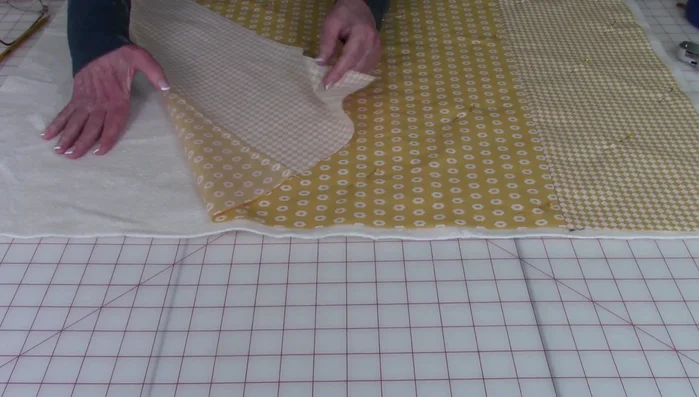
Assemble the Front Piece Quilt the Front
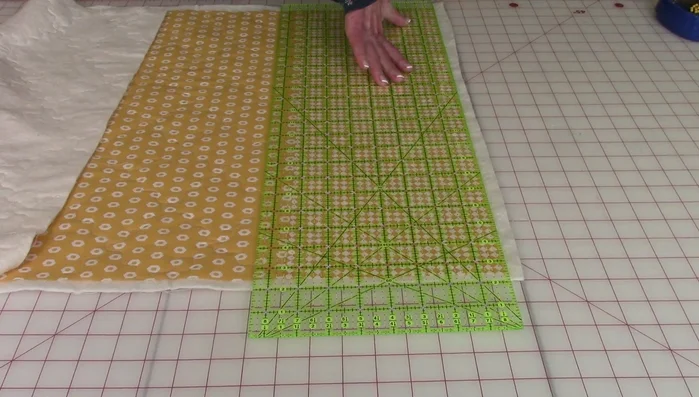
- Position the stitched front piece on top of the cotton batting, smoothing out the edges. Pin the layers together.
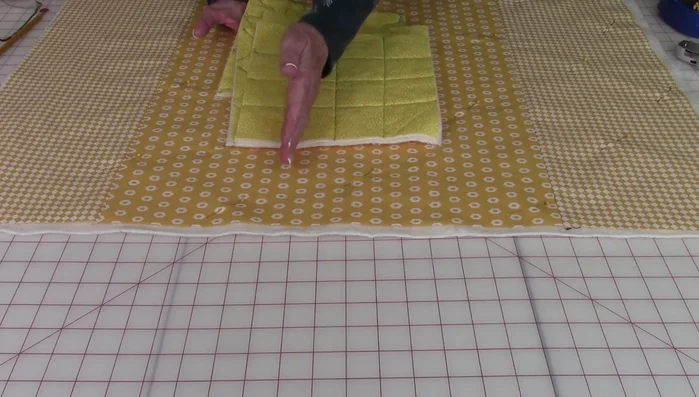
- straight lines, diagonals, or serpentine stitch. A walking foot is highly recommended to prevent fabric shifting and puckering.
- Trim excess batting.
Quilt the Front Add Optional Lace
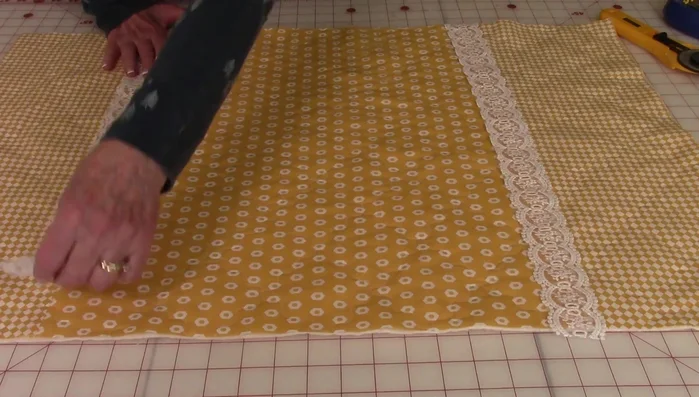
- Place the lace (if using) over the center seam and pin it down. Stitch along each side of the lace, trimming excess ribbon.
Add Optional Lace Prepare Back Pieces
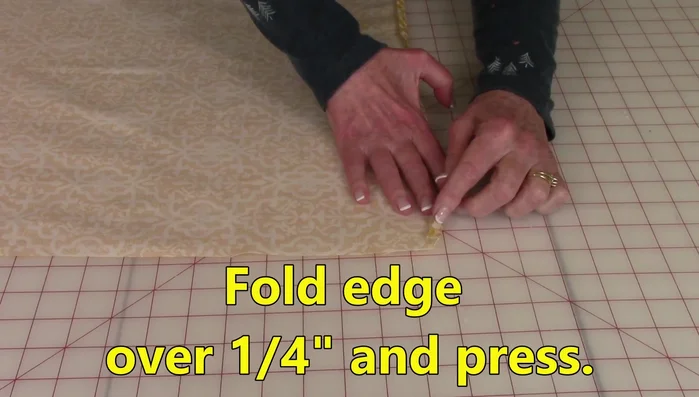
- Fold over the center edge of each back piece 1/4 inch, press, fold again 1/4 inch and press. Stitch close to the folded edge on both pieces.
Prepare Back Pieces Assemble and Stitch
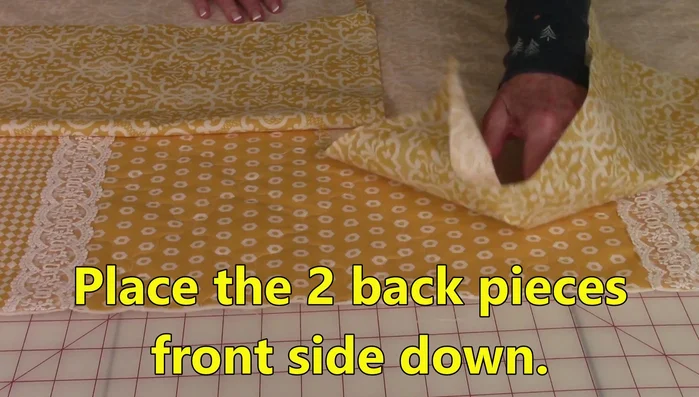
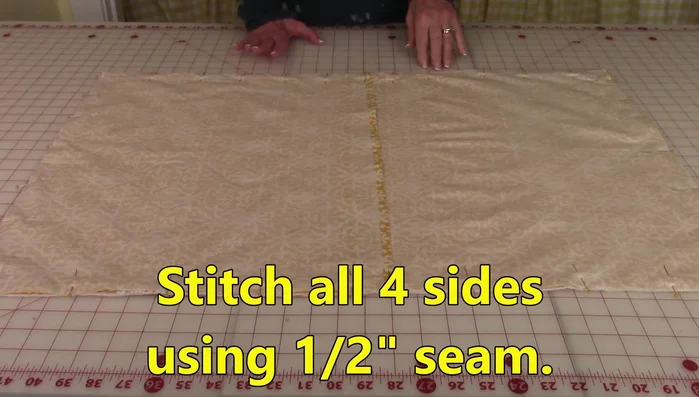
- Place the front piece (right side up) on top of the two back pieces (right side down), overlapping the back pieces to align edges. Pin around all four sides.
- Stitch a 1/2 inch seam around all four sides. Double stitch along the center back seam where the back pieces overlap for added strength.
Assemble and Stitch Finish and Insert Pillow
- Trim the excess fabric from the corners, leaving about 1/8 inch. Turn the sham right side out, and poke out the corners using your fingers. Insert the pillow.
Finish and Insert Pillow


Read more: Sew a Lined Expandable Storage Bag: Easy Tutorial
Tips
- Always cut the cotton batting slightly larger than the front pillow piece to easily accommodate any shifting during quilting.
- Use a walking foot for even feeding and to prevent puckering during quilting.
- Double stitch the center back seam for added durability.