Mother's Day is just around the corner, and what better way to show your appreciation than with a heartfelt, handmade gift? Forget generic store-bought presents; this year, let's craft something truly special – an adorable, personalized jewelry pouch! This delightful project is not only a charming way to express your love but also a surprisingly simple and fun DIY activity perfect for all skill levels. Imagine your mother's delighted smile as she receives this unique, lovingly crafted keepsake, designed to protect her precious jewelry and reflect your personal touch. It's a gift that speaks volumes about your care and attention.
This tutorial will guide you through the process of creating a stunning jewelry pouch, perfect for holding necklaces, earrings, or bracelets. From choosing the right fabric and embellishments to mastering the simple sewing techniques, we'll walk you step-by-step through creating a truly one-of-a-kind gift your mom will adore. So gather your crafting supplies and let's get started on this delightful Mother's Day project!
Preparation and Safety Guidelines
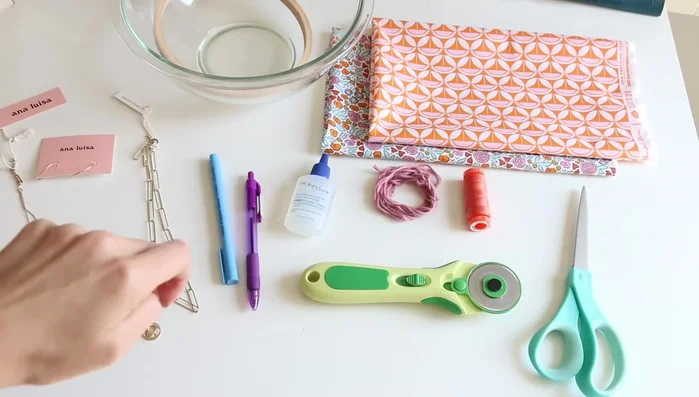
- Two fat quarters of fabric
- Marking tool (pen or water-soluble pencil)
- Fray check or fray guard
- Ribbon, cord, yarn, or string
- Coordinating thread
- Fabric scissors or rotary cutter
- Glass bowl or embroidery hoop (for tracing circles)
- Iron
- Sewing machine
- Safety pin
- Adult supervision is required, especially when using sharp tools like scissors or needles. Keep these tools out of reach of children.
- Always use appropriate safety measures when working with hot glue guns. Allow glue to cool completely before handling.
- If using fabric dyes or paints, ensure proper ventilation and wear gloves to protect your skin.
Step-by-Step Instructions
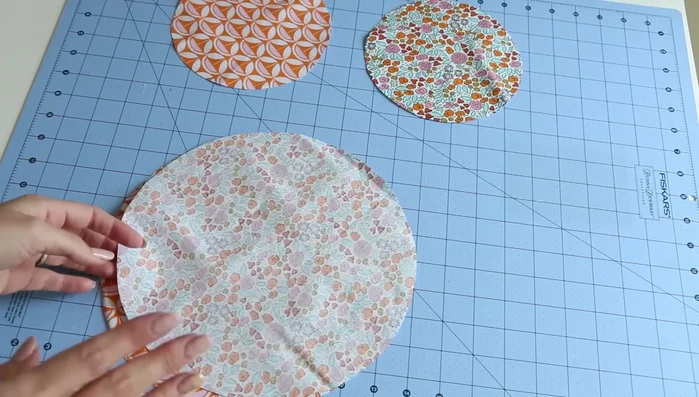
Prepare Fabric Circles
- Using a glass bowl (10 inches) or embroidery hoop (6.5 inches), trace two large and two small circles on each fabric piece. This allows you to create two pouches from two fat quarters, or one pouch from one fat quarter.

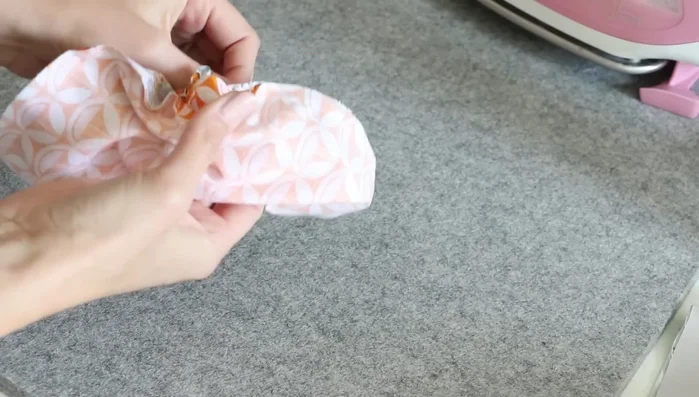
Prepare Fabric Circles Sew and Turn
- Place one large and one small circle from each fabric together, right sides facing. Pin, and sew around the edges using a 5/8 inch seam allowance, leaving an opening to turn the fabric right side out.
- Turn the sewn pieces right side out through the opening. Use your fingers to roll the seam allowances to the outside, creating a flat edge. Press with an iron to smooth the seams and remove wrinkles.
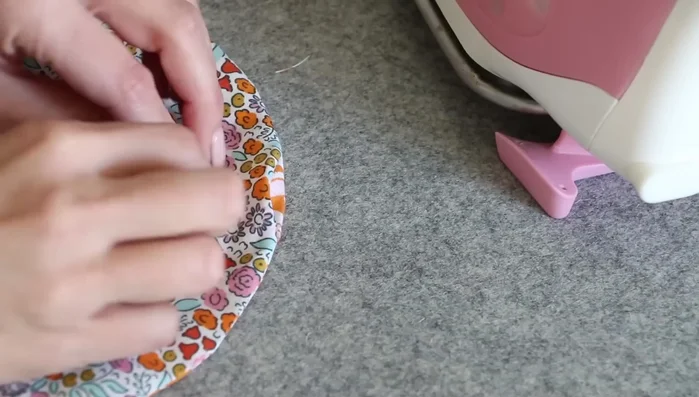
Sew and Turn Close Opening
- Fold the raw edges of the opening inward, aligning them carefully. Press and sew around the edge of the circle to close the opening using a similar seam allowance as before.
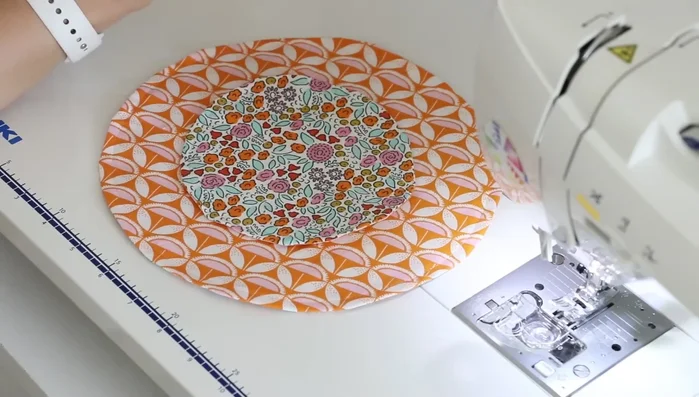
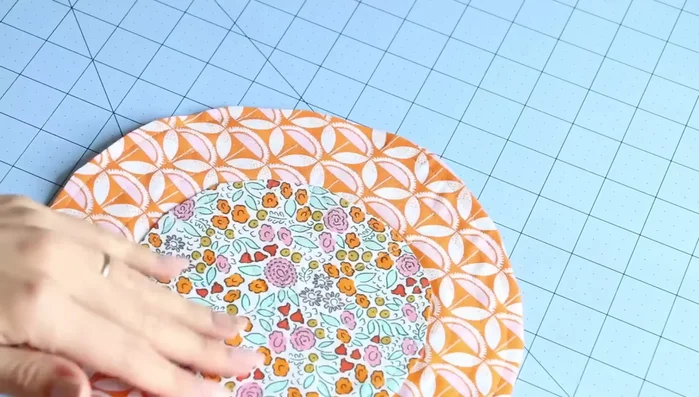
Close Opening Attach Inner Circle and Create Pockets
- Center the smaller circle on top of the larger circle and pin. Sew along the previously drawn lines to create pockets; four pockets are suggested.
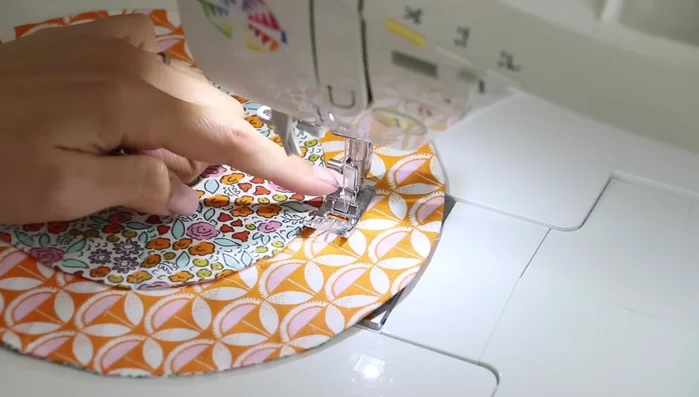
Attach Inner Circle and Create Pockets Create Drawstring Casing
- Using the sewing machine, sew along the inner edge of the large circle, creating a channel for the drawstring. Sew twice to ensure the casing is secure and wide enough for the cord or ribbon.
Create Drawstring Casing Secure Casing
- Apply fray check to the edges of the drawstring casing to prevent fraying. Allow to dry.
Secure Casing Insert Drawstring
- Make small slits on the outer fabric of the casing, being careful not to cut the inner fabric. Thread a safety pin onto one end of your cord or ribbon and use it to thread the casing all the way around. Repeat with the other end of the cord.
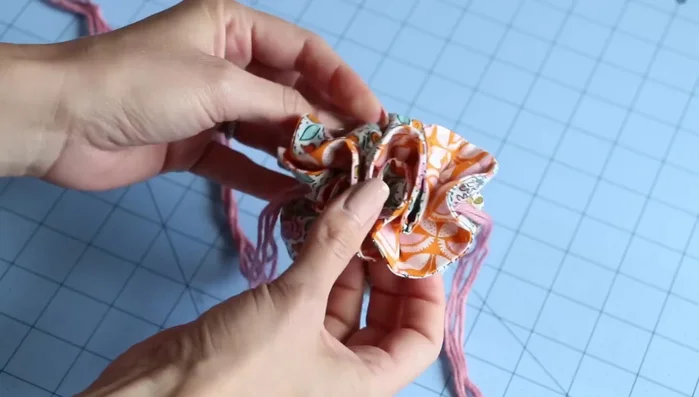
Insert Drawstring Finish and Tie
- Pull the cord or ribbon to gather the pouch, tie securely and trim the ends of your cord or ribbon.
Finish and Tie
Read more: Sew a Lined Expandable Storage Bag: Easy Tutorial
Tips
- Use a water-soluble pen for marking fabric circles, making it easy to remove after sewing.
- Use a rotary cutter or fabric scissors for precise circle cuts.
- Finger pressing and ironing help flatten seams and give a professional look.
- Use pins to center the small circle accurately on the large one before sewing.
- When creating the drawstring casing, sew two rows to create a sturdy and wider channel for your cord or ribbon.