Tired of searching for the perfect napkin holder that fits your table's aesthetic and your family's needs? Why settle for generic when you can create a custom-sized, charming napkin basket yourself? This easy sewing tutorial will guide you through crafting a unique napkin holder tailored to your exact specifications, ensuring it complements your dining space perfectly. Whether you're aiming for a rustic farmhouse look, a sleek modern design, or something whimsical and playful, this project offers the flexibility to personalize your creation.
Forget overpriced store-bought options; this DIY project is surprisingly simple and uses readily available materials, making it a cost-effective and satisfying endeavor. From choosing your fabric to the final stitching, we'll provide clear instructions and helpful tips to ensure you achieve a beautiful and functional result. Let's dive into the step-by-step process and begin crafting your dream custom-sized napkin holder!
Preparation and Safety Guidelines
- Fabric (lining and outside)
- Cotton batting or heavy iron-on fusible interfacing
- Rickrack (optional)
- Sewing machine
- Scissors
- Ruler
- Pins
- Always use sharp scissors and pins to avoid accidental pricks and injuries. Handle your sewing machine with care, keeping fingers clear of moving parts.
- Choose fabrics appropriate for frequent washing and potential spills. Pre-wash fabrics before sewing to prevent shrinkage after completion.
- If using a sewing machine, ensure you are familiar with its operation and safety features before starting. If unsure, seek assistance from someone experienced with sewing machines.
Step-by-Step Instructions
Measure and Calculate Fabric Dimensions
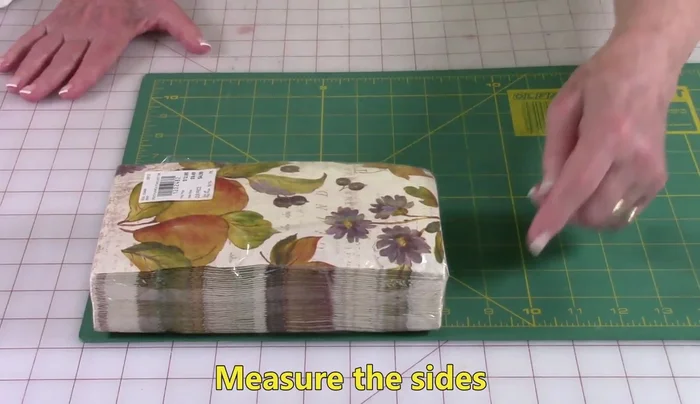
- Measure the length and width of your napkins. Add ½ inch seam allowance, and then add another ¼ inch for extra wiggle room. This ensures your napkins fit comfortably.

Measure and Calculate Fabric Dimensions Cut Fabric Pieces
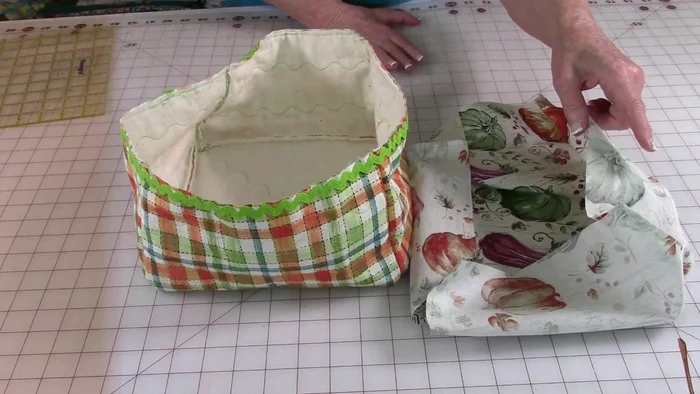
- Based on your measurements, cut the fabric pieces. You'll need one bottom piece and two side pieces for both the lining and outer fabric. Cut the pieces with the selvedge edges together for efficiency.
Cut Fabric Pieces Assemble Outer Fabric
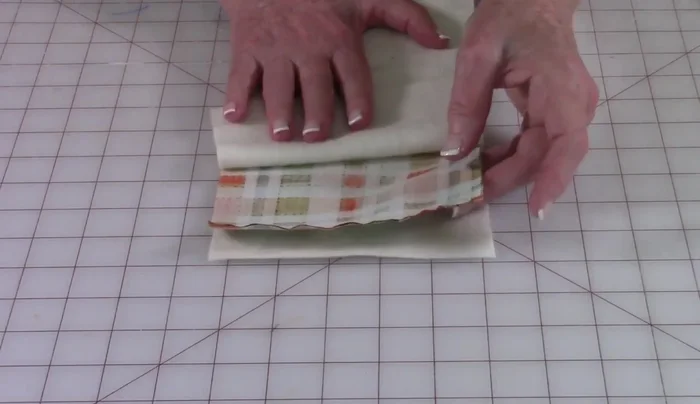
- Layer cotton batting between two outer fabric pieces. Stitch all sides together, leaving a ¼ inch unstitched at the bottom edge.
Assemble Outer Fabric Assemble Lining Fabric
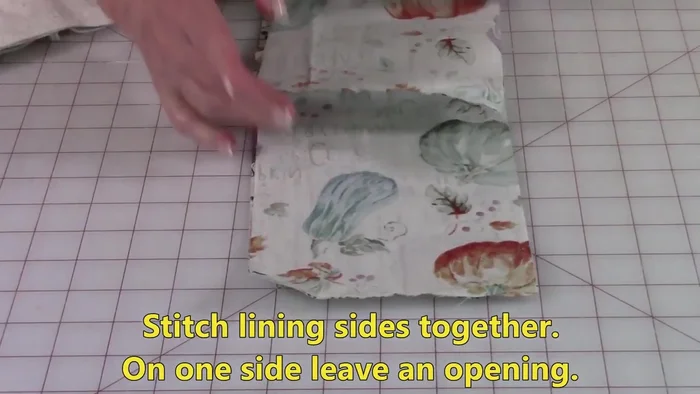
- Stitch the lining fabric pieces together in the same way as the outer fabric, but leave an opening of about 3 inches on one side for turning.
Assemble Lining Fabric Decorative Stitching on Outer Fabric
- Add decorative stitching (e.g., serpentine stitch) to the outer fabric to secure the layers and add a nice touch. This is optional but recommended.
Attach Bottom to Outer Fabric
- Attach the bottom piece of the outer fabric to the sides using stitching. Stitch ¼ inch from the edges, ensuring corners are aligned.
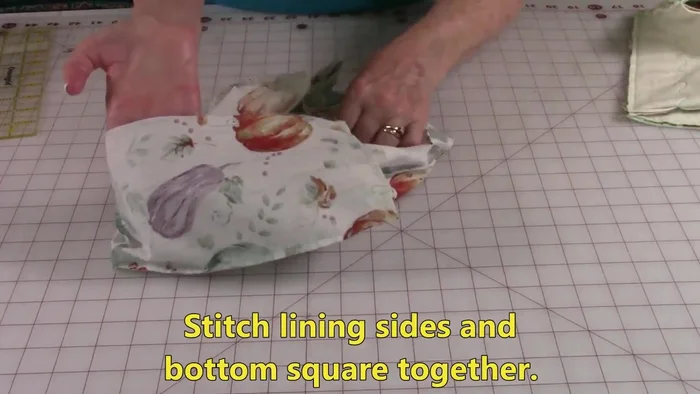
Attach Bottom to Outer Fabric Attach Bottom to Lining Fabric
- Attach the lining bottom and sides together, mimicking the process for the outer fabric.
Attach Bottom to Lining Fabric Attach Rickrack to Outer Fabric
- Stitch rickrack along the top edge of the outer fabric, leaving a small gap for turning.
Turn and Finish Outer Fabric
- Turn the outer fabric right side out through the gap left in the lining, then pin and stitch close to the edge, creating a clean finish.
Attach Lining to Outer Fabric
- Insert the lining into the outer fabric, matching side seams. Pin and stitch along the top edge, sewing right over the rickrack stitching line.
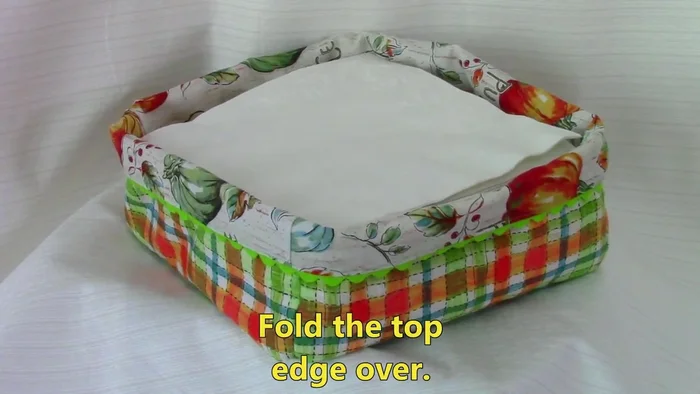
Attach Lining to Outer Fabric Final Touches and Napkin Insertion
- Fold over and neatly finish the top edge. Insert your napkins.
Final Touches and Napkin Insertion


Read more: Sew a Lined Expandable Storage Bag: Easy Tutorial
Tips
- Always add extra seam allowance to avoid any issues with fit.
- Cutting fabric with selvedge edges together is a time-saving tip.
- Use decorative stitching to add a personalized touch and extra strength.
- When attaching the lining to the outer fabric, pull on the rickrack to ensure even fabric distribution and prevent overlapping.