Tired of generic cosmetic bags that look just like everyone else's? Ready to unleash your creativity and add a personal touch to your everyday essentials? Then get ready to discover the magic of Cricut Infusible Ink and transform plain cosmetic bags into stunning, personalized works of art! This exciting technique allows you to create vibrant, long-lasting designs that won't crack or peel, resulting in a truly unique and stylish accessory. Imagine carrying a bag that perfectly reflects your personality, featuring your favorite quotes, vibrant patterns, or even a cherished photograph.
This tutorial will guide you through the process of crafting your own personalized cosmetic bags, step by step. We'll cover everything from choosing the right materials and designing your perfect image to mastering the infusible ink transfer process and finishing touches. Get ready to dive in and create a cosmetic bag that's as individual as you are!
Preparation and Safety Guidelines
- Cricut Explorer 3 cutting machine
- Design Space (connected device)
- Infusible Ink
- Card stock
- Butcher paper
- Cricut EasyPress 3
- Cutting mat
- Lint roller
- Always use a heat-resistant surface like a Cricut EasyPress mat when using Infusible Ink. Direct heat on unprotected surfaces can cause damage.
- Infusable Ink is permanent. Test your design on a scrap piece of your chosen fabric before applying it to your final cosmetic bag to ensure you are happy with the result and placement.
- Proper ventilation is important. Work in a well-ventilated area as the Infusible Ink process can produce some fumes.
Step-by-Step Instructions
Design Preparation
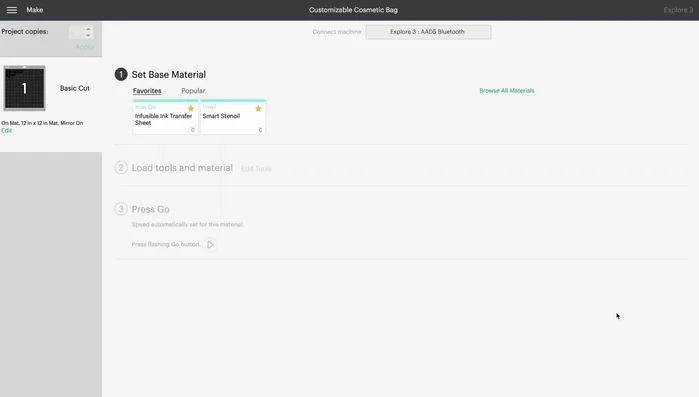
- Prepare the design in Cricut Design Space. Customize the name and attach the leaf image.
- Mirror the design and select Infusible Ink as the material.

Design Preparation Cutting the Design
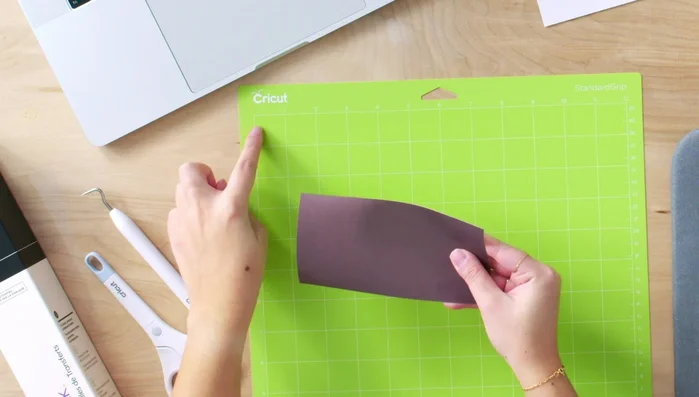
- Place the Infusible Ink sheet onto the cutting mat.
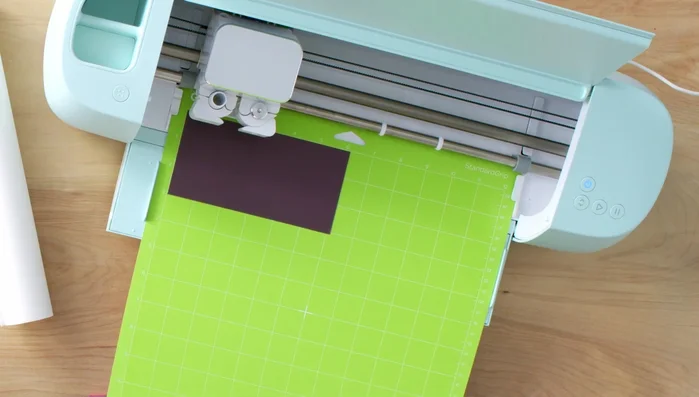
- Load the mat into the Cricut machine and press the 'Go' button.
- Unload the mat and carefully remove the cut Infusible Ink design.
Cutting the Design Weeding the Design
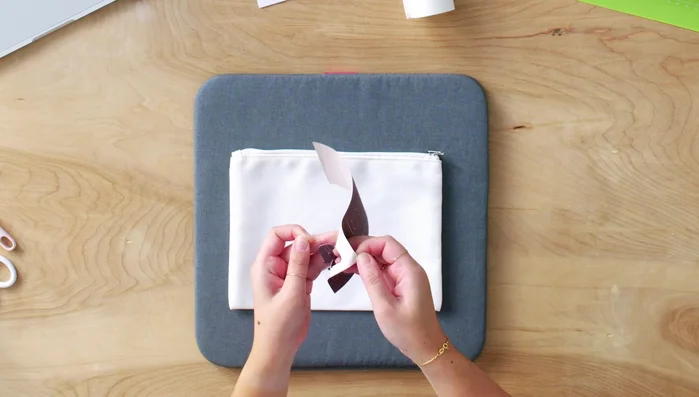
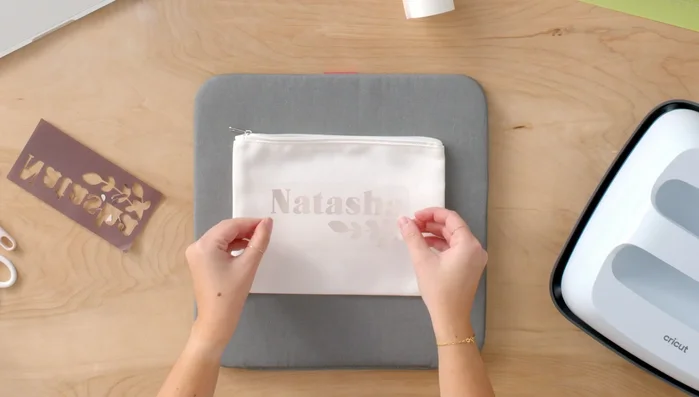
- Weed the excess Infusible Ink material from the liner.
Weeding the Design Preparing the Cosmetic Bag
- Place card stock inside the cosmetic bag to protect it.
- Clean the cosmetic bag with a lint roller.
Applying the Design
- Center the weeded Infusible Ink design onto the cosmetic bag.
- Cover with butcher paper to protect the EasyPress.
- Apply heat using the Cricut EasyPress 3 with settings from the Cricut Heat app.
Applying the Design

Read more: Sew a Lined Expandable Storage Bag: Easy Tutorial
Tips
- Store your mats underneath your cutting machine.
- A pre-press helps remove moisture and prevents ghosting.
- Don't move the EasyPress once applied to prevent ghosting.