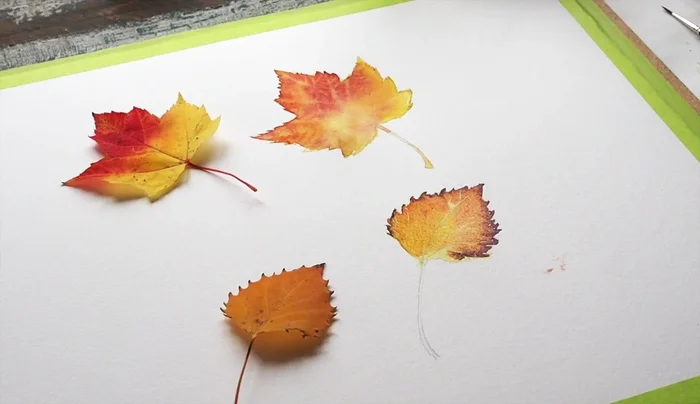
Autumn's vibrant tapestry of falling leaves offers endless inspiration for artists, and watercolor is the perfect medium to capture their fleeting beauty. The delicate translucence of leaves, the subtle variations in color from fiery reds to golden yellows, and the intricate details of their veins all present a unique challenge and reward for watercolorists. Mastering the art of realistic fall leaf painting requires a nuanced understanding of color mixing, layering techniques, and the skillful manipulation of water and pigment. This isn't about simply painting a brown leaf; we're diving deep into achieving breathtaking realism.
This guide will delve into expert watercolor techniques to help you unlock the secrets of painting incredibly lifelike autumn leaves. We'll explore methods for creating realistic textures, achieving convincing color gradations, and capturing the delicate interplay of light and shadow. Prepare to be amazed as we walk you through a step-by-step process that will transform your autumnal paintings from simple representations to stunning works of art.
Safety Guidelines
- Watercolor paints can stain clothing and surfaces. Always wear old clothes and work on a protected surface like a plastic tablecloth or palette.
- Watercolor paints are non-toxic but should be kept away from children and pets. Wash hands thoroughly after use.
- Clean your brushes thoroughly after each use with plenty of water to prevent the colors from mixing and drying hard in the bristles.
Methods: Wet-on-Wet Watercolor Layering for Luminous Leaves
Tools Needed
- Watercolor paints (Hansa yellow, Gamboge yellow, Permanent red, Alizarin crimson, Burnt sienna, Raw sienna, Burnt umber, Violet, Ultramarine blue, Prussian blue)
- Brushes (Size 8 or 10 round brush, Size 1 fine-tipped synthetic rigger)
- 2H pencil
- Masking fluid
- Hair dryer
- Kleenex or tissue
Step-by-Step Instructions
Leaf Preparation
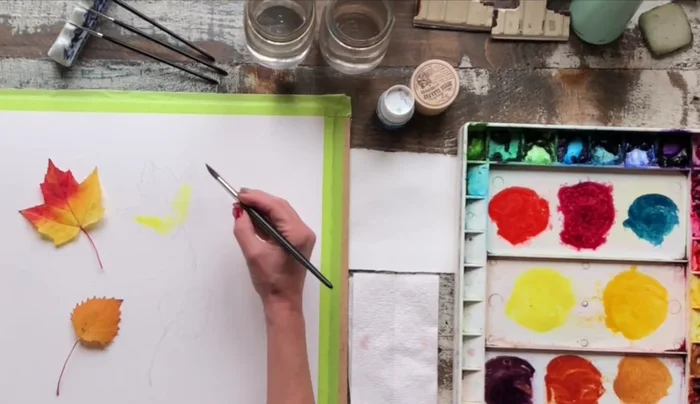
- Pre-wet the leaf area on watercolor paper with a large round brush.

Leaf Preparation Base Color Application
- Apply Hansa yellow as a base color, keeping the brush point towards the outer contours for clean edges.
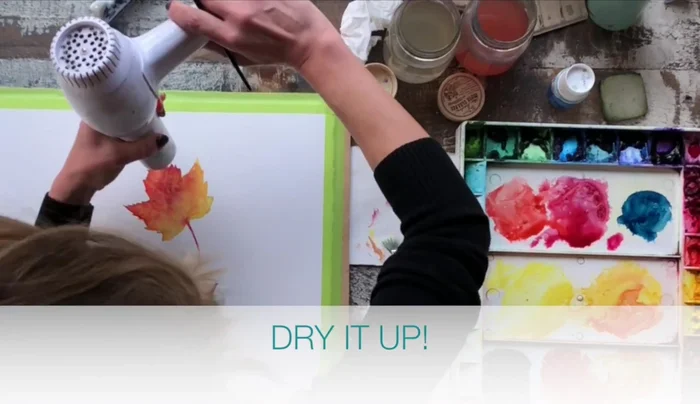
Base Color Application Drying and Masking
- Let the base layer dry completely (speed up with a hair dryer).
- Apply masking fluid to preserve fine details like veins (use a stiff synthetic rigger, and apply sparingly).
Drying and Masking Wet-on-Wet Layering (First Pass)
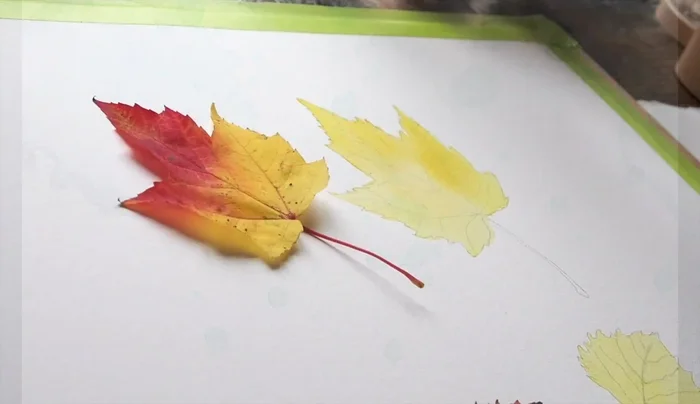
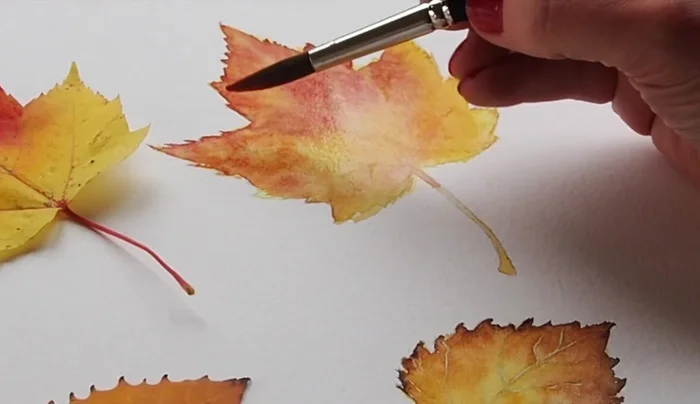
- Re-wet the dried leaf to allow colors to flow and bleed.
- Apply Gamboge and Permanent red for an orangey tone, then Permanent red and Alizarin crimson for deeper reds, blotting and letting the colors spread naturally.
- Add Raw Sienna while the leaf is still wet for a natural look.
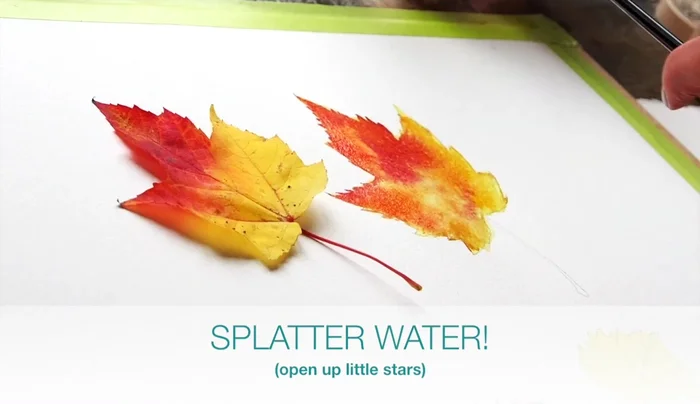
- Splatter water into the paint that's starting to dry to create texture.
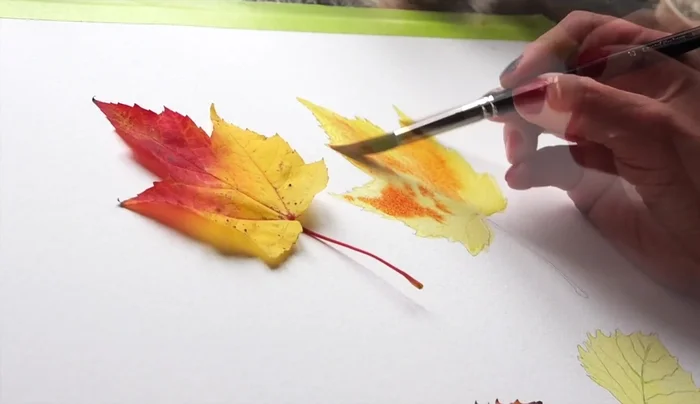
Wet-on-Wet Layering (First Pass) Applying Color Over Masking Fluid
- Apply more color once the masking fluid is completely dry, using Alizarin crimson and Permanent red.
Applying Color Over Masking Fluid Rewetting and Detailing
- Re-wet the leaf to open up the paint and reveal the underpainting, adding more watery yellow paint where needed.
Rewetting and Detailing Masking Fluid Removal
- Remove the masking fluid once completely dry.
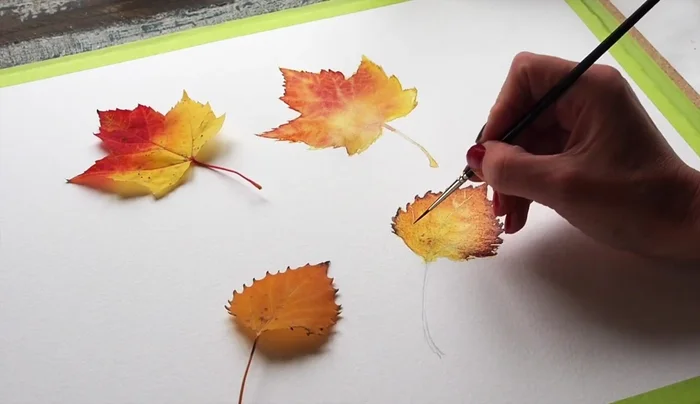
Masking Fluid Removal Touch-ups and Harmonization
- Do touch-ups and glazing to harmonize colors and add depth.
Touch-ups and Harmonization


Tips
- Always point your brush towards the outer contours for cleaner edges.
- Use transparent yellows like Gamboge for a luminous effect.
- Start with lighter layers and work your way to darker layers.
Methods: Pushing Technique for Crisp Contours
Tools Needed
- Watercolor paints (Burnt sienna, Burnt umber violet mixture, Gamboge)
- Round brush
Step-by-Step Instructions
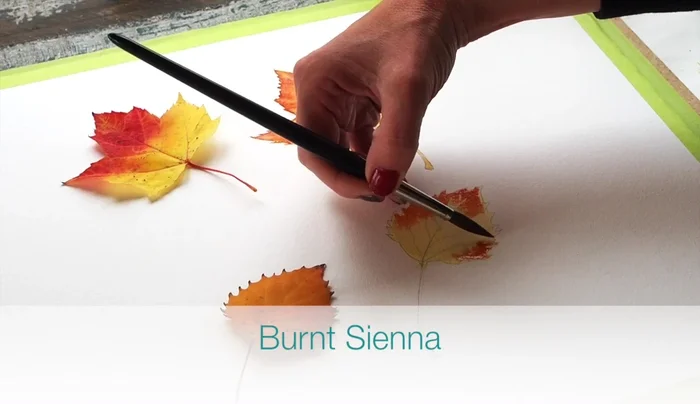
Base Layer Application
- Apply a layer of Burnt Sienna.
Base Layer Application Pushing Technique: Initial Application
- Flood the area with water and push it up against the edges of the pigment to create crisp contours.
- Add Burnt Umber violet mixture, letting it flow naturally.
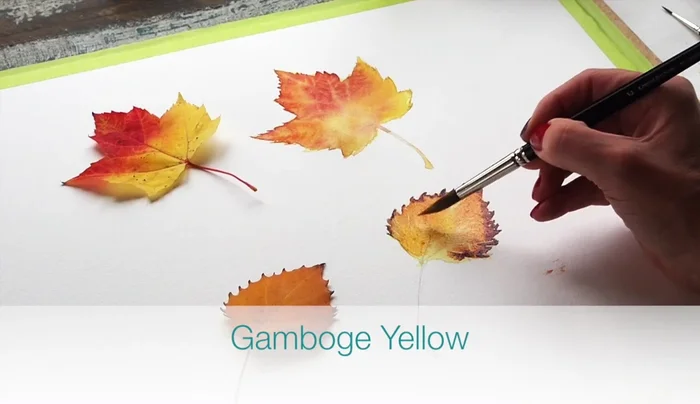
Pushing Technique: Initial Application Pushing Technique: Gamboge Application
- Apply wetter Gamboge, pushing and picking up the paint to create hard edges.
- Continue to push and pick up wetter paint to enhance hard edges.
Pushing Technique: Gamboge Application Final Touches
- Add freckles and flaws to the leaf edges.
Final Touches


Tips
- The pushing technique creates crisp contours by pushing wet paint against the edges.
- Pushing and picking up the paint, rather than dragging, enhances hard edges.
Methods: Dry Brush Technique for Added Texture
Tools Needed
- Watercolor paints (Burnt umber violet mixture, Raw Sienna)
- Brush
Step-by-Step Instructions
Dry Brush Texture
- Apply Burnt Umber violet mixture with a dry brush on a completely dry leaf to add texture.
- Use Raw Sienna with the side of the brush to create texture by skimming across the paper's natural texture.
Dry Brush Texture


Tips
- Dry brush technique requires a dry paper surface and minimal paint on the brush.
- Dry brush is easier with textured paper.
- Use a dry brush to add texture and build up darker colors around veins to make them pop.
Read more: Ultimate Stenciling Techniques: Achieve Professional Results with These Easy Steps