Transform ordinary jars into stunning, personalized candle holders with this easy DIY mosaic project! Forget mass-produced decorations; unleash your creativity and craft unique pieces that perfectly complement your home décor. Using readily available materials and a simple technique, you can create beautiful mosaic candle jars that add a touch of handmade charm to any space, whether it's a cozy living room, a rustic farmhouse, or a modern apartment. Imagine the warm glow of candlelight filtering through your custom-designed mosaic, a testament to your artistic skills and a unique conversation starter.
This simple guide will walk you through each stage of creating your own mosaic candle jar, from gathering supplies to admiring your finished masterpiece. Get ready to embrace your inner artist and discover the surprisingly simple and rewarding process of creating these enchanting pieces. Let's dive into the step-by-step process now!
Preparation and Safety Guidelines
- Canning jar (pint or quart size)
- Mosaic glass gems
- E6000 super glue
- Candle
- Always work in a well-ventilated area. Candle making involves working with hot wax and potentially flammable materials.
- Never leave melting wax unattended. Use caution when handling hot wax and tools; burns are a serious risk.
- Ensure your chosen adhesive is suitable for both glass and the mosaic materials you are using. Follow the adhesive manufacturer's instructions carefully.
Step-by-Step Instructions
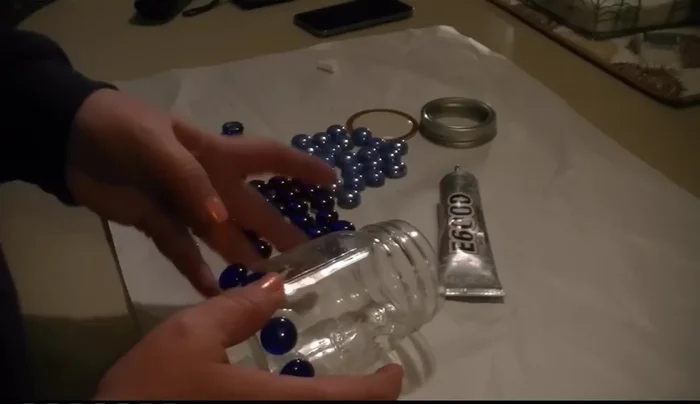
Plan your design
- Lay out your glass beads to visualize the arrangement. You can choose a random pattern or a more specific design.

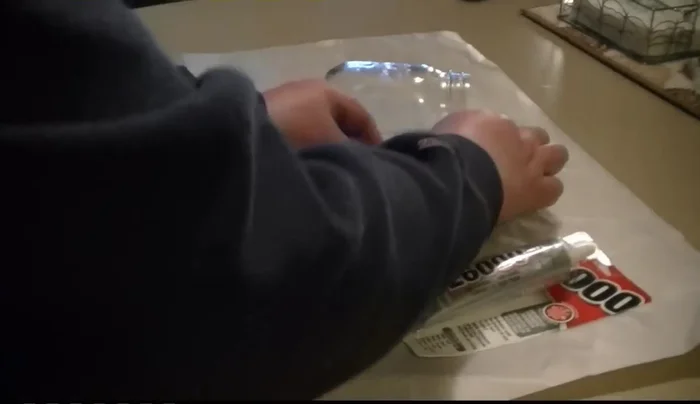
Plan your design Prepare the glue and beads
- Apply small dots of E6000 glue to 5-6 glass beads at a time.
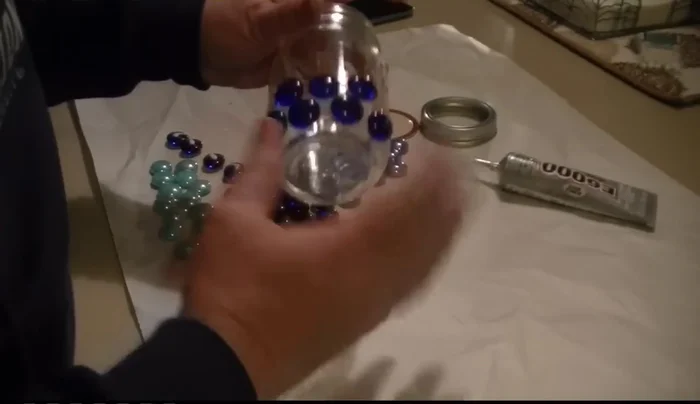
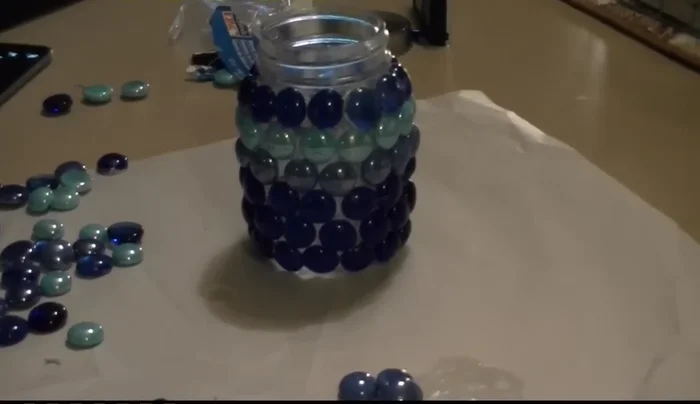
Prepare the glue and beads Apply beads to the jar
- Carefully place the glued beads onto the jar, staggering them between rows for a more visually appealing design. Press gently until they adhere.
- Focus on a small area at a time to avoid the beads sliding around before the glue sets. Hold each bead in place until it starts to stick.
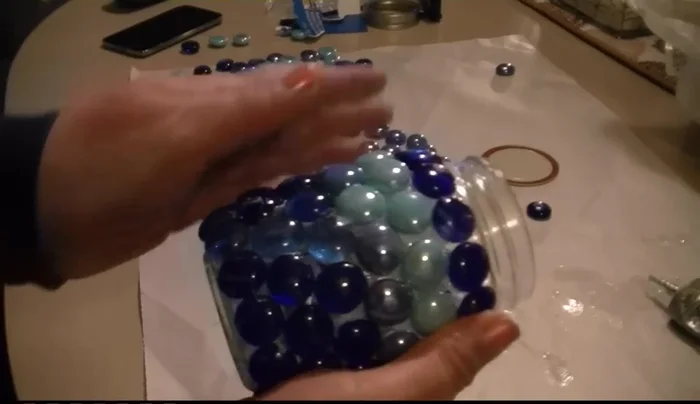
Apply beads to the jar Complete the mosaic
- Continue applying beads, adjusting and holding them in place until the entire jar is covered with your desired pattern. Be patient, as this takes time.
- Allow the glue to fully dry. You may need to hold the beads in place for a while until the glue sets.
Complete the mosaic Finishing touches
- Once completely dry, insert your candle and decorate the top with a ribbon or bow.
Finishing touches

Read more: DIY: Create Custom Canister Labels with Silhouette Cameo
Tips
- Use clear or translucent beads where the candle light will shine through for a better effect.
- Small dots of glue are easier to work with and less likely to cause the beads to slide around.
- Be patient and work slowly. The glue needs time to set.