Transform your garden into a dazzling mosaic with these stunning DIY glass bead stepping stones! Tired of bland pathways? Yearning for a unique, personalized touch to your outdoor space? Then look no further. This guide provides a comprehensive, step-by-step approach to creating beautiful, durable stepping stones that will add both charm and functionality to your garden, patio, or any outdoor area. Imagine the vibrant colors shimmering under sunlight, reflecting the beauty of your meticulously crafted creation. These aren't just stepping stones; they are miniature works of art, personalized to reflect your individual style and creativity.
Creating these breathtaking stepping stones is easier than you think, requiring only readily available materials and a bit of patience. From selecting the perfect beads to the final sealing process, we'll walk you through every stage, ensuring a successful and satisfying project. Ready to embark on this creative journey? Let's dive into the detailed, step-by-step instructions below.
Preparation and Safety Guidelines
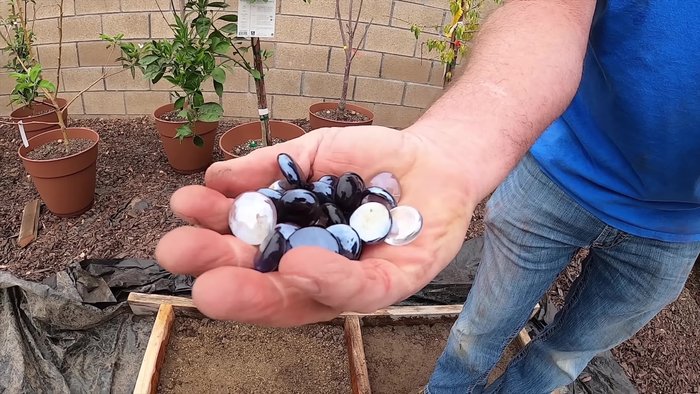
- Glass beads
- Pre-mixed concrete (or bag mix)
- Hand float (fiberglass)
- Trowel
- Horsehair broom
- Nylon brush
- Sealer
- Water
- Optional: Muratic acid, neutralizer
- Always wear safety glasses to protect your eyes from flying debris during mixing and while working with the glass beads.
- Work in a well-ventilated area as some cement mixes can release fumes. Consider wearing a dust mask as well.
- Use caution when handling broken glass beads. Dispose of them properly to avoid injury.
Step-by-Step Instructions
Prepare the Molds
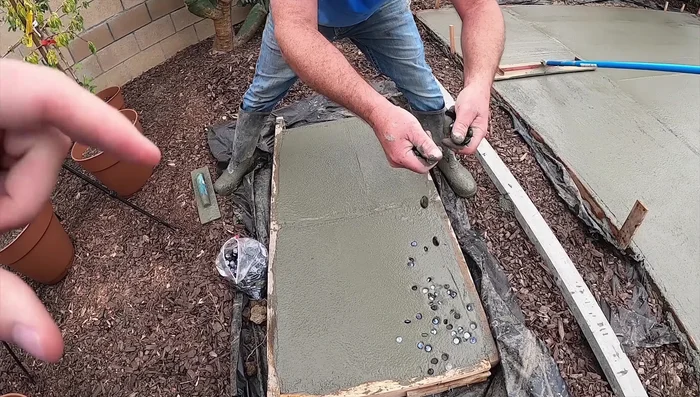
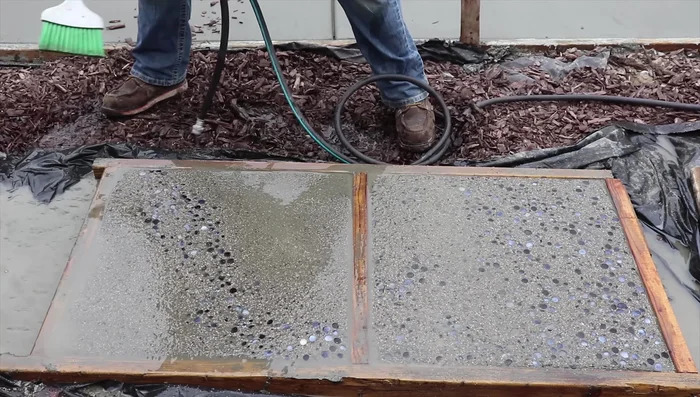
- Prepare the ground and lay out stepping stone molds.
Pour and Embed First Layer of Beads
- Mix or use pre-mixed concrete and pour it into the molds. Flatten with a hand float.
- Spread glass beads over the wet concrete. Allow some beads to sink, reserving some for a later, less wet layer. Consider a pattern for better visual appeal (lazy river pattern used in video)

Pour and Embed First Layer of Beads Initial Setting
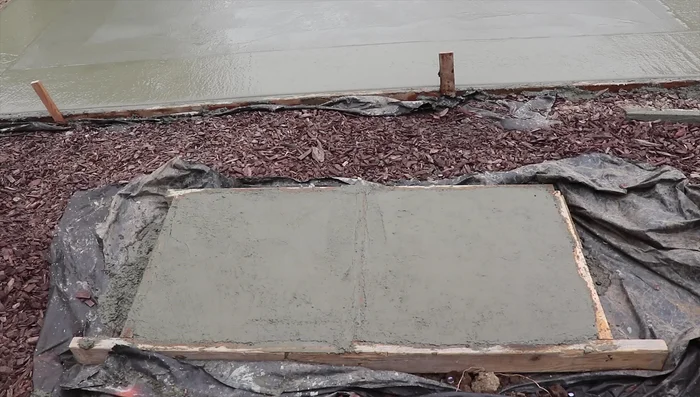
- Wait at least 4-6 hours (depending on weather) for the concrete to set partially.
Initial Setting Add Second Layer of Beads
- After partial setting (1+ hour), apply another layer of glass beads, focusing on the surface. Create your pattern at this stage if you haven't already.
Second Setting
- Allow to set for another 3-4 hours.
Second Setting Surface Finishing
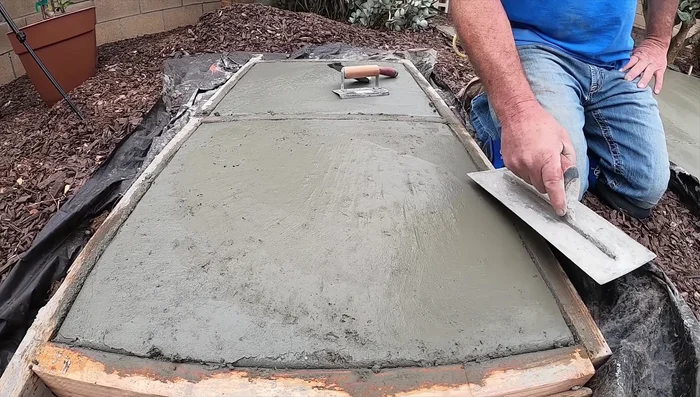
- Lightly trowel and edge the surface again. The goal is a perfectly smooth finish.
Surface Finishing Clean and Reveal Beads
- After another hour (total of 4-6 hours from initial pour), rinse the stepping stones to reveal the glass beads. Use a horsehair broom to loosen debris initially, then switch to a stiffer brush (nylon brush recommended by presenter) if needed to remove excess concrete.
Final Drying
- Let the stepping stones dry overnight.
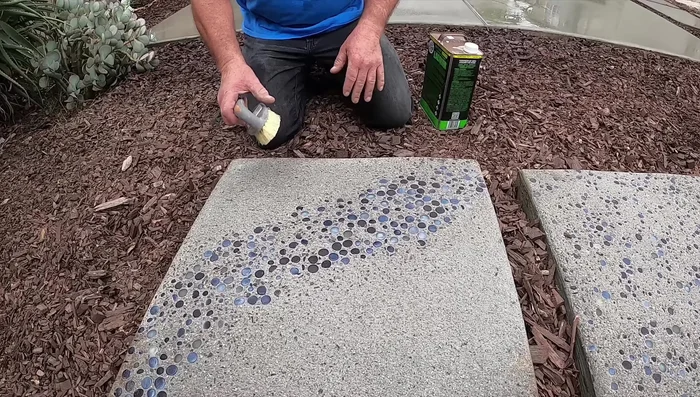
Final Drying Demolding and Cleaning
- Remove forms and clean stepping stones of any remaining residue.
Demolding and Cleaning Sealing and Protection
- Apply a sealer to protect and enhance the stepping stones.

Read more: DIY: Create Custom Canister Labels with Silhouette Cameo
Tips
- Use pre-mixed concrete for convenience, if you're not comfortable mixing your own.
- Don't wait too long to rinse, or the beads might be too set and difficult to reveal.
- A stiffer brush might be necessary to fully clean off excess concrete if you wait longer to rinse.
- Sealing the next day is possible for small areas, because moisture can escape, preventing the milky-white effect that often occurs. This method is faster than standard sealant application.