Transform ordinary dollar store finds into extraordinary home décor with this captivating DIY candelabra project! Tired of expensive, predictable home accents? This upcycling project proves that stunning, personalized pieces can be created on a shoestring budget, breathing new life into everyday items and showcasing your creative flair. Imagine the warm, inviting glow of candlelight emanating from a candelabra you crafted yourself, a testament to your resourcefulness and artistic vision. The elegance of this project belies its simplicity, proving that sometimes, the most beautiful things are born from the most unexpected beginnings.
Forget overpriced, mass-produced home décor; this guide will show you how to effortlessly create a sophisticated candelabra using readily available and affordable materials. We'll take you through each step, from gathering your supplies to the final, mesmerizing result. Ready to unlock your inner DIY artist and illuminate your home with this stunning, upcycled masterpiece? Let's dive into the step-by-step instructions!
Preparation and Safety Guidelines
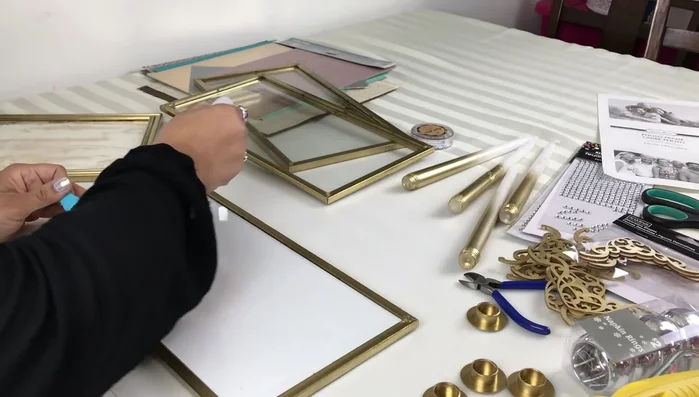
- Dollar Store picture frames
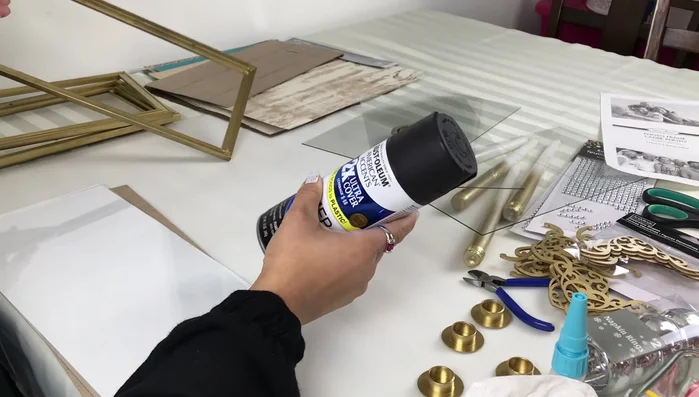
- Spray paint (black primer and metallic gold)
- Gorilla glue sticks
- Rapid Fuse glue (or E6000)
- Hot glue gun
- Decorative paper
- LED tea lights
- Corner appliques (optional)
- Ribbon or embellishments (optional)
- Sand, greenery, pearls, etc. (for styling)
- Napkin ring holders (optional)
- Always use battery-operated tea lights or LED candles instead of real flames to prevent fire hazards. Dollar store candles are often made of flammable materials.
- Ensure the candelabra is stable and placed on a level surface away from flammable materials like curtains or paper. Avoid placing it near anything that could easily be knocked over.
- Supervise children and pets around the candelabra, especially if using battery-operated lights with easily removable batteries.
Step-by-Step Instructions
Prepare the Frames
- Spray paint all frames with black primer, followed by metallic gold spray paint.

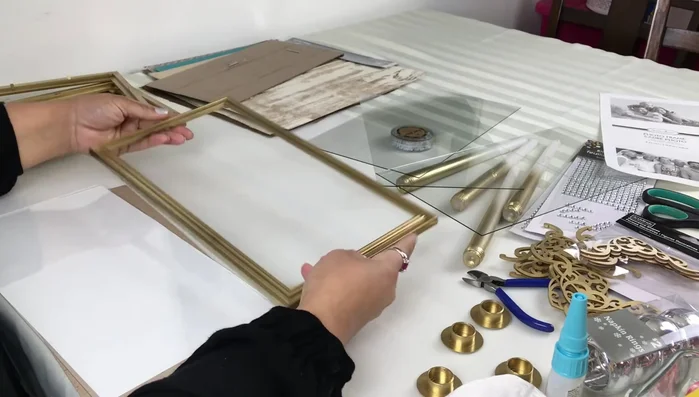
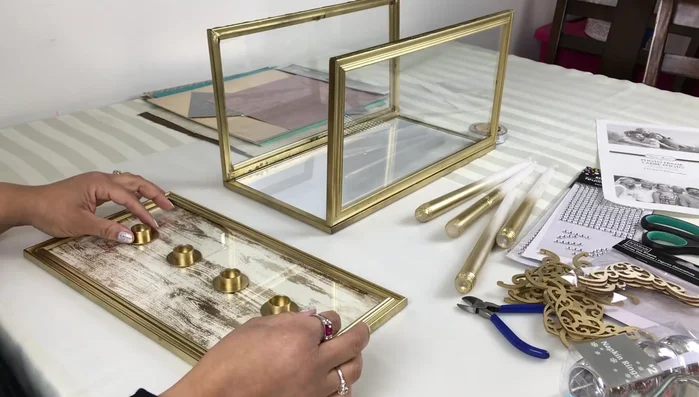
Prepare the Frames Assemble the Base
- Remove tabs from three frames. Attach the bottom frame (tabs removed) to the cardboard and paper, then insert the glass.
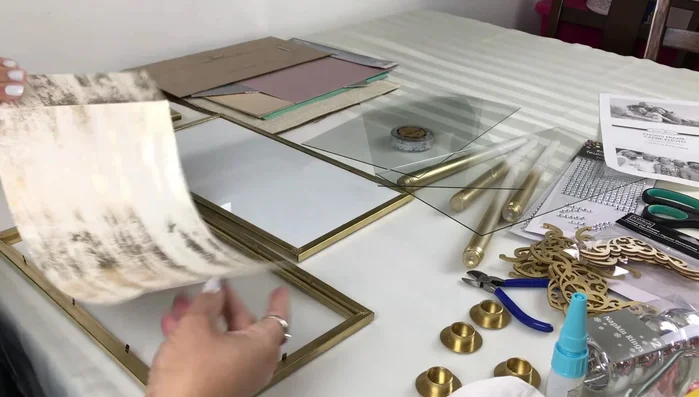
Assemble the Base Prepare the Top Piece
- Leave the tabs on one frame. Insert decorative paper and cardboard, then reinsert the glass.
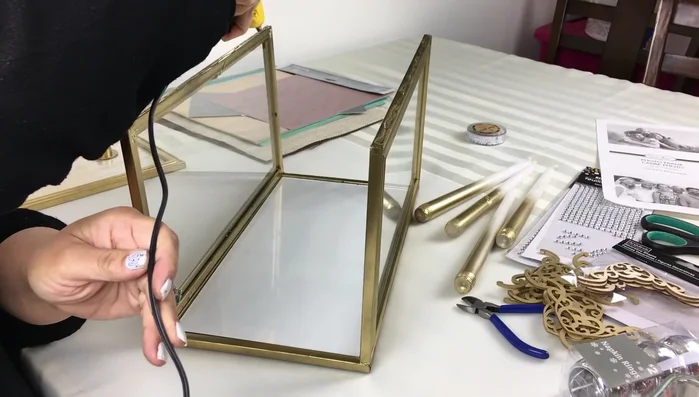
Prepare the Top Piece Assemble the Side Panels
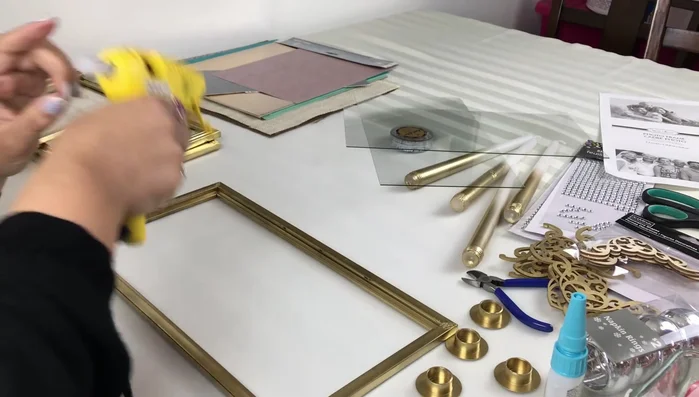
- Apply glue (Gorilla glue sticks recommended) to the corners of two frames (tabs removed). Insert the glass into the frames.
Assemble the Side Panels Attach Side Panels to the Base
- Use Rapid Fuse glue (or E6000) and hot glue to attach the side panels to the base frame, ensuring alignment.
Attach Side Panels to the Base Attach LED Lights
- Spray paint the bottom of the LED tea light pack and adhere them to the glass using hot glue.
Attach LED Lights Attach the Top Piece
- Apply hot glue to the top piece and attach it to the assembled base and side panels.
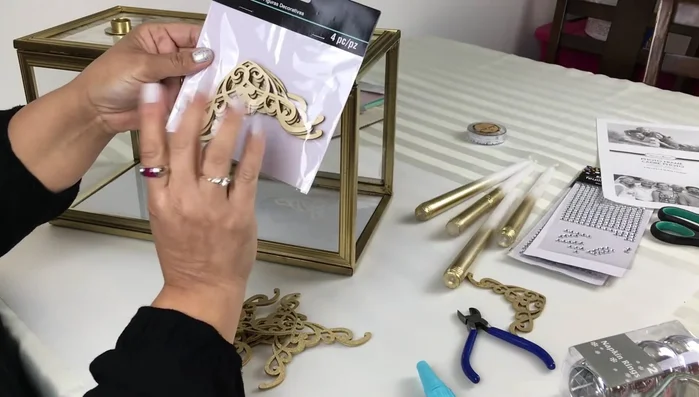
Attach the Top Piece Add Corner Appliques (Optional)
- Apply spray-painted gold corner appliques to each corner of the candelabra using hot glue.
Add Corner Appliques (Optional)
Read more: DIY: Create Custom Canister Labels with Silhouette Cameo
Tips
- Using a black primer before gold paint helps the gold adhere better and stand out.
- Rapid Fuse glue dries quickly, but you can also use E6000.
- Align all pieces carefully before the glue dries completely.
- Consider using a ruler to ensure accurate placement of the LED lights and appliques.