The Western Tanager, with its vibrant plumage of red, yellow, and black, is a captivating subject for any artist. Its bold colors and striking contrast make it an ideal candidate for an oil painting, challenging yet rewarding for both beginner and experienced painters. Capturing the bird's energetic spirit and the subtle nuances of its feathers requires careful observation and skillful application of paint. This tutorial will focus on translating the beauty of the Western Tanager onto canvas using oil paints.
This step-by-step guide will walk you through each stage of the process, from sketching the initial outline to adding the final details and achieving the rich texture of the feathers. We'll explore techniques for mixing vibrant colors, creating depth and dimension, and effectively rendering the intricate patterns of the bird's plumage. Get ready to unleash your inner artist and paint your own breathtaking Western Tanager!
Preparation and Safety Guidelines
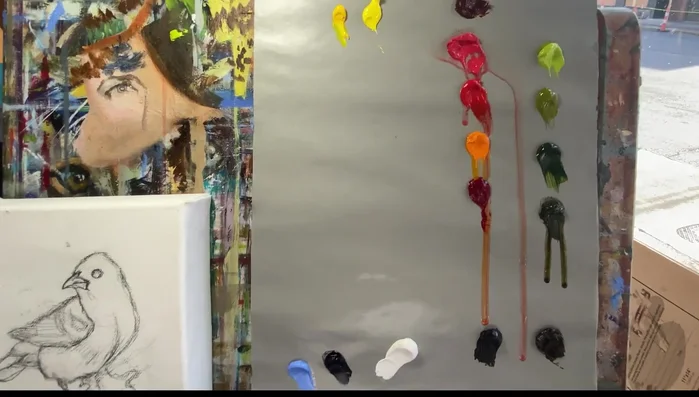
- Oil paints (various colors including cadmium yellow light, burnt sienna, vermilion, Siobhan paint red, French red, permanent orange, alizarin crimson, Mars black, cadmium green, sap green, Michael Harding's Italian umber green, Van Dyke brown, white, Dioxazine Purple, Michael Harding's King's blue), brushes (at least 3, including small round brush), palette knife, canvas, paint scraper
- Always work in a well-ventilated area when using oil paints and solvents. Oil paint fumes can be harmful if inhaled.
- Wear appropriate safety gear, including gloves and an apron, to protect your skin and clothing from paint and solvents.
- Dispose of used paint and solvents responsibly according to local regulations. Never pour them down the drain.
Step-by-Step Instructions
Sketching and Initial Background
- Sketch the Western Tanager.
- Block in the background with a neutral gray mix (King's blue, permanent orange, white).

Sketching and Initial Background Refining Bird Structure
- Refine the bird's structure and shape using the background paint.
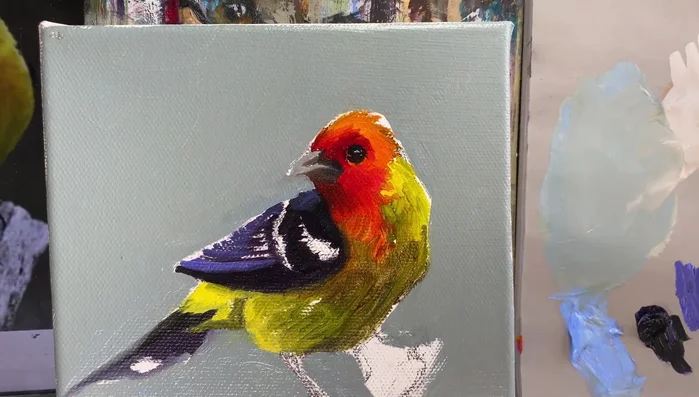
Refining Bird Structure Painting the Beak and Blocking in Colors
- Paint the beak, paying close attention to shape and detail.
- Block in the bird's colors, using impasto technique for texture.
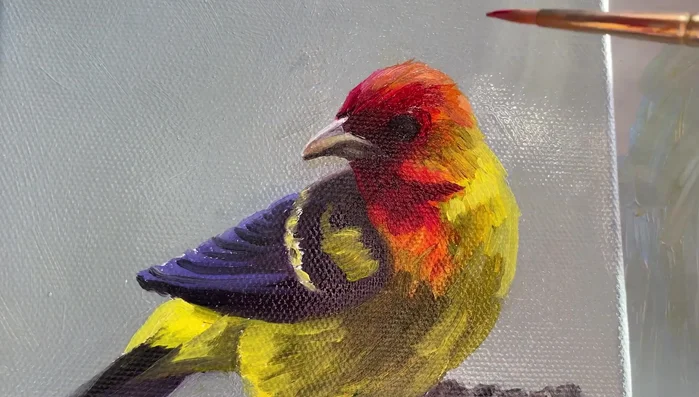
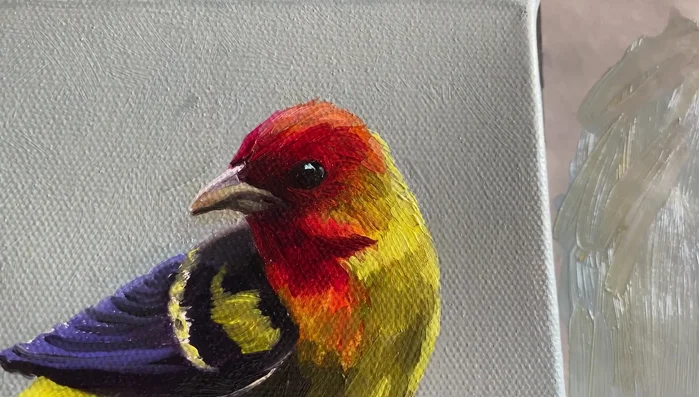
Painting the Beak and Blocking in Colors Adding Highlights and Details (Head)
- Add highlights to the bird's head using a mix of vermilion, permanent orange, and white.
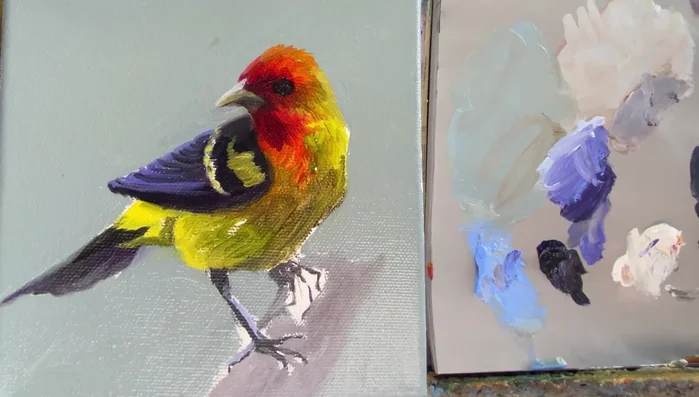
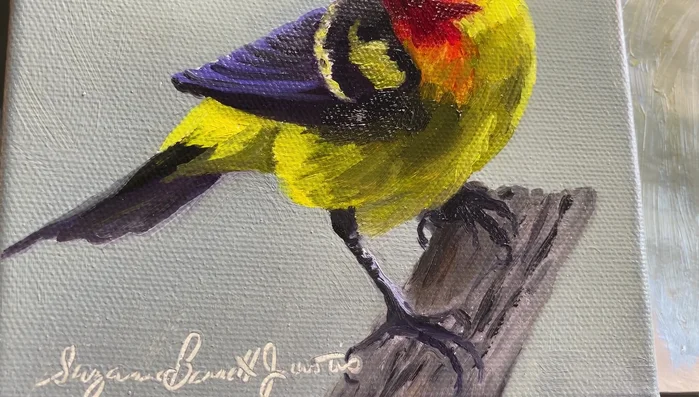
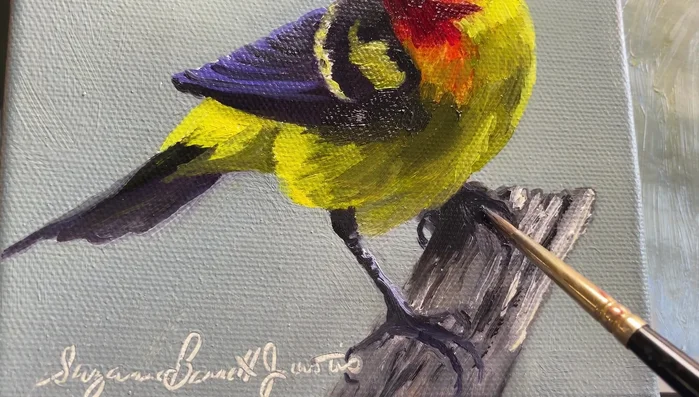
Adding Highlights and Details (Head) Refining Details (Feet, Log)
- Refine the details around the feet and log.
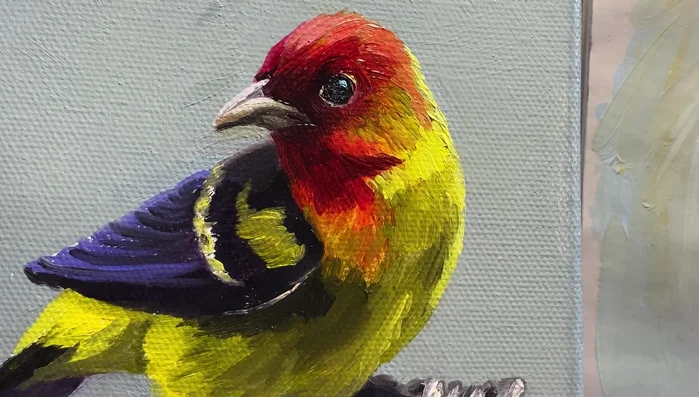
Refining Details (Feet, Log) Adding Fine Details (Wings, Eyes)
- Add details to the wings, eyes, and other features using smaller brush and light touches.
Adding Fine Details (Wings, Eyes) Final Highlights and Finishing Touches
- Add final highlights and details, paying attention to volume and texture.
Final Highlights and Finishing Touches Signing the Painting
- Sign your painting.
Signing the Painting

Read more: 7 Top Paint Color Trends for 2024: A Complete Guide with Free Downloadable Resource
Tips
- Oil paints are forgiving, allowing for corrections and adjustments.
- Impasto technique adds texture and substance to the painting.
- Use a mix of Phthalo blue and zinc white for eye shine.
- Control brush pressure to maintain a sharp point for fine details.