Your wedding day is one of the most significant events in your life, and the journey begins with the perfect invitation. A beautifully designed invitation sets the tone for your celebration, offering a glimpse into the style and personality of your special day. Learning to design your own invitations allows for complete creative control, ensuring your vision is flawlessly executed, and can even save you significant costs compared to professional printing services. Whether you envision elegant calligraphy, playful watercolor designs, or a modern minimalist aesthetic, this guide will empower you to bring your dream invitation to life.
This beginner's guide will walk you through the process of crafting stunning wedding invitations using Adobe Illustrator and Photoshop, two industry-standard design programs. From understanding the basics of typography and color palettes to mastering advanced techniques like creating custom textures and incorporating photographic elements, we'll cover everything you need to know. Let's dive into the step-by-step process and unleash your inner designer!
Preparation and Safety Guidelines
- Adobe Illustrator
- Adobe Photoshop
- Always save your work frequently in different file formats (AI and a backup like PDF or JPG) to avoid data loss. Illustrator files can be large and prone to corruption.
- Maintain high resolution (at least 300 DPI) for professional printing. Low-resolution images will appear blurry and pixelated on printed invitations.
- Check your spelling and grammar meticulously before finalizing the design. Typos on wedding invitations are easily noticed and can be embarrassing.
Step-by-Step Instructions
Setting up the Invitation
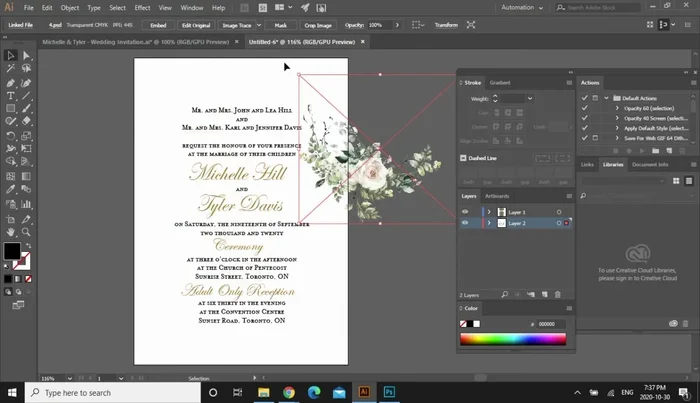
- Create a new file in Adobe Illustrator (5x7 inches).
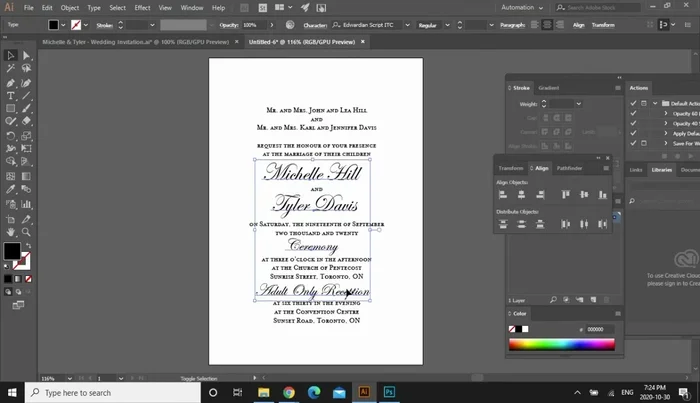
- Add the wedding invitation wording using the type tool. Experiment with fonts and alignment (center alignment recommended).
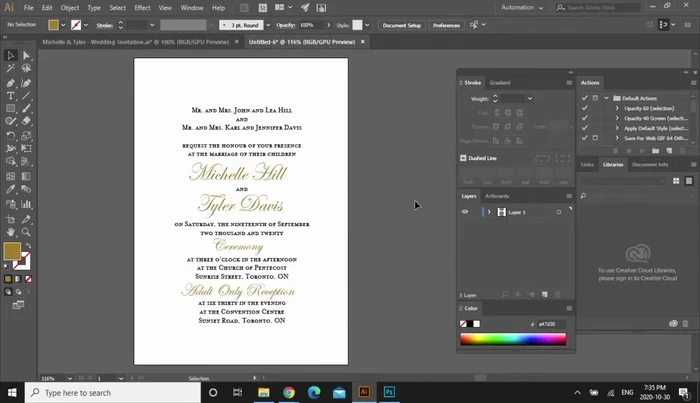
- Select and change the font color of the bride and groom's names to gold (or desired color).

Setting up the Invitation Preparing Floral Graphics in Photoshop
- Open the desired graphic in Photoshop. Crop and erase unnecessary parts to create corner florals. Save as a PSD file.
Preparing Floral Graphics in Photoshop Adding and Positioning Graphics in Illustrator
- Work in layers in Illustrator. Create a new layer for the graphics and place it below the text layer.
- Drag and drop the edited floral graphic into Illustrator. Resize and position as desired.
Adding and Positioning Graphics in Illustrator Mirroring and Completing the Design
- To mirror the floral element on the opposite corner, create a 5x7 rectangle (same size as invitation), make it transparent, and use it as a clipping mask with the floral graphic. Copy and paste the masked element to the opposite corner, rotating as needed.
Mirroring and Completing the Design Saving the Final Design
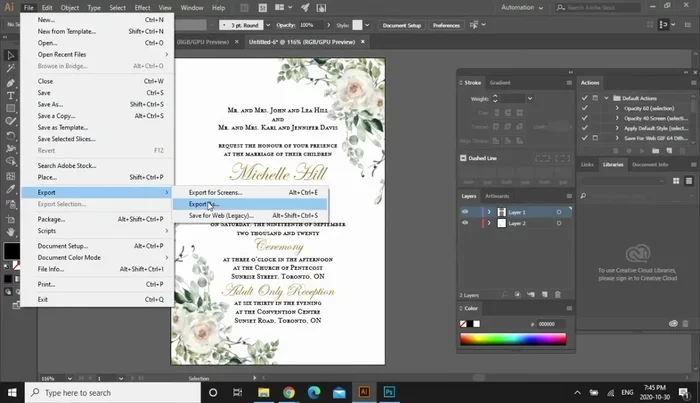
- Save the final design as a PDF or JPEG.
Saving the Final Design


Read more: Easy Origami Paper Box Tutorial: Step-by-Step Guide
Tips
- Work in layers to easily manage and edit different elements of the design.
- Use clipping masks to easily replicate and mirror design elements.
- Find standard wedding invitation wording online for inspiration.