Winter wonderlands, with their hushed beauty and ethereal glow, offer an irresistible subject for watercolor painting. The challenge lies in capturing the delicate interplay of light and shadow, the subtle textures of snow-dusted branches, and the misty atmosphere that hangs in the crisp winter air. This tutorial focuses on achieving that elusive, feathery effect, that soft, almost dreamlike quality so evocative of a snow-covered landscape. We'll explore techniques that go beyond simple washes, delving into the nuances of layering, blending, and manipulating the watercolor medium to create depth and a sense of gentle movement.
This step-by-step guide will take you through the process of transforming your blank page into a captivating winter scene, full of delicate details and a magical, almost misty atmosphere. From preparing your palette and choosing the right brushes to mastering the techniques of wet-on-wet and lifting color, we’ll unlock the secrets to creating a truly breathtaking winter wonderland watercolor painting.
Preparation and Safety Guidelines
- 300lb Winsor Newton professional rough texture watercolor paper (or any decent watercolor paper)
- Cobalt blue
- Alizarin crimson
- Yellow ochre
- Dioxidine purple
- Burnt umber
- Burnt sienna
- Payne's grey
- Five brushes (mop, three quarter inch flat, number 12 round, number six round, number three rigger)
- Table salt
- Clean water spray bottle
- Tissue
- Pencil
- Beige pastel pencil
- White gouache
- Always work in a well-ventilated area when using watercolors, as some pigments can release fumes.
- Protect your work surface with a waterproof covering. Watercolor can stain easily.
- Allow ample drying time between layers to prevent muddying your colors and maintain the feathery effect.
Step-by-Step Instructions
Background Wash
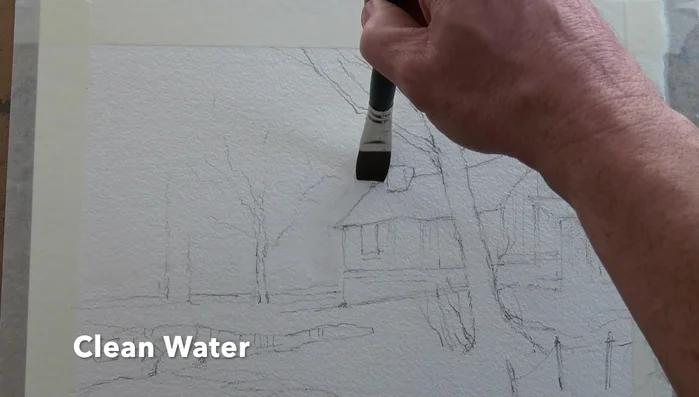
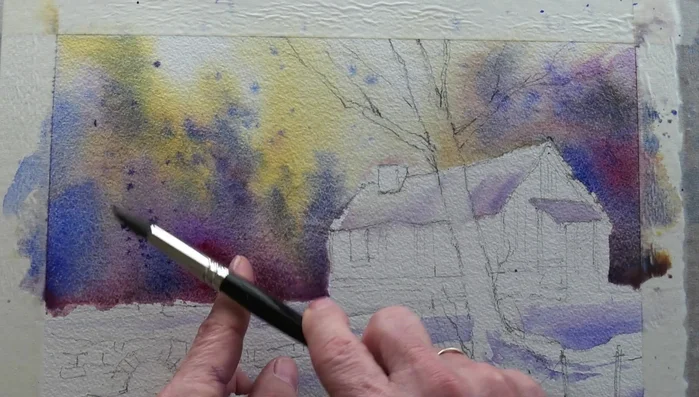
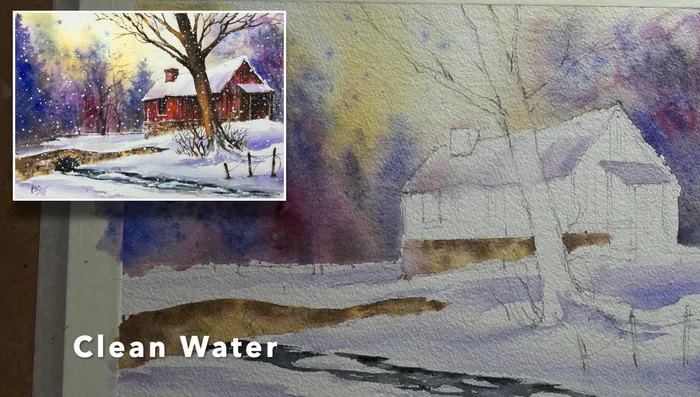
- Pre-wet the background with clean water using a flat brush.
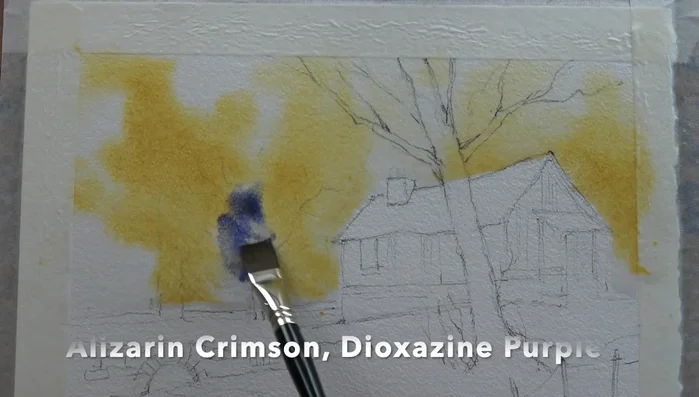
- Drop in yellow ochre, cobalt blue, alizarin crimson, dioxidine purple, letting them bleed wet-in-wet.
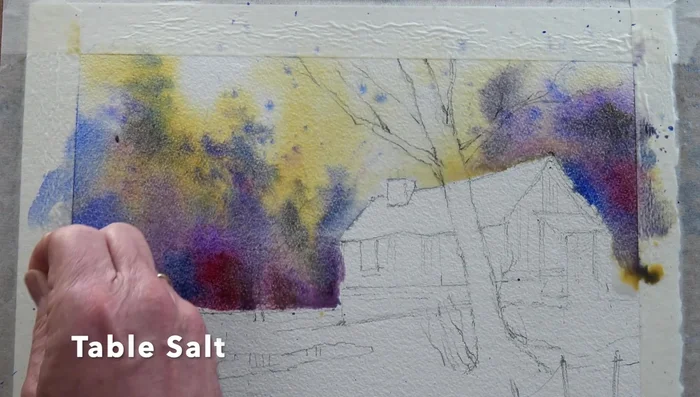
- Lightly sprinkle table salt into the wet wash for texture.

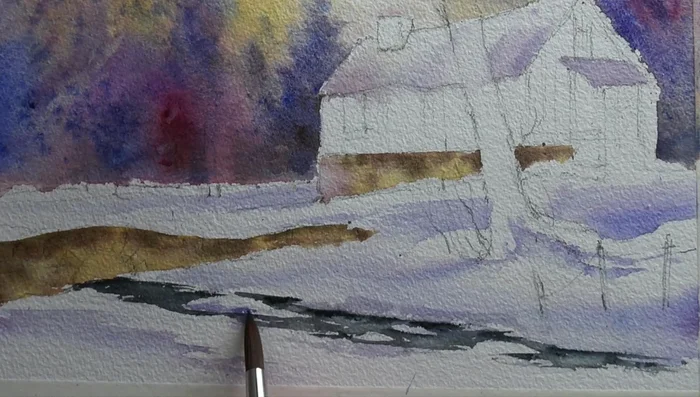
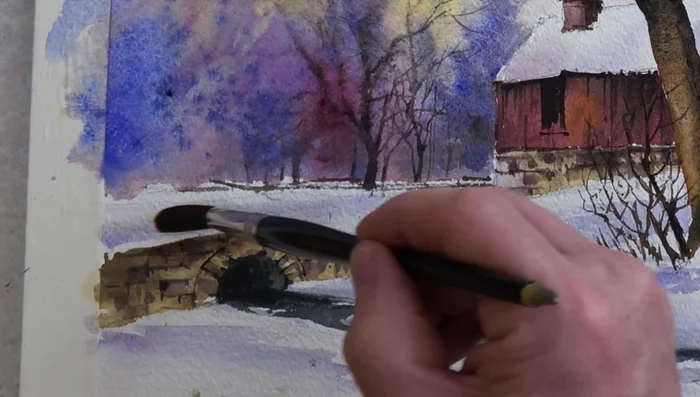
Background Wash Foreground and Shadows
- Part-wet the foreground with clean water for soft and hard edges, then drop in a mix of cobalt blue and dioxidine purple for snow shadows.
- Splat cobalt blue into the still-damp background.
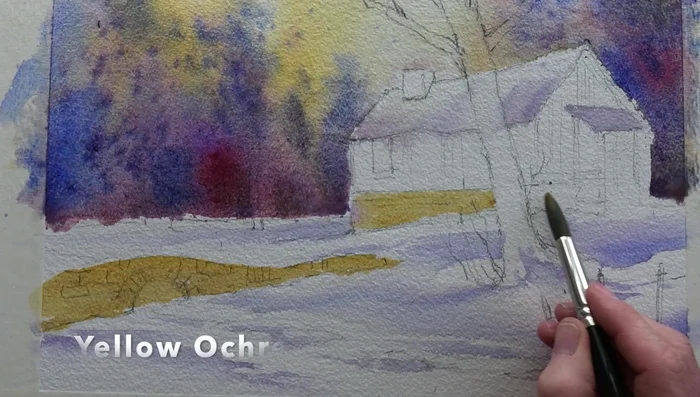
- Add yellow ochre, touches of burnt umber, and Payne's grey wet-in-wet.
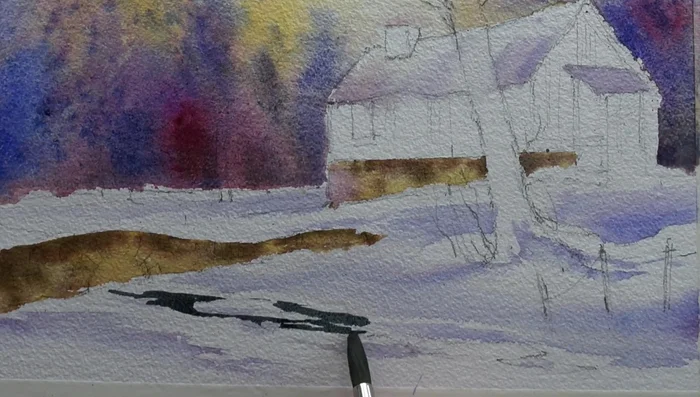
- Paint the stream using Payne's grey, leaving white islands for snow.
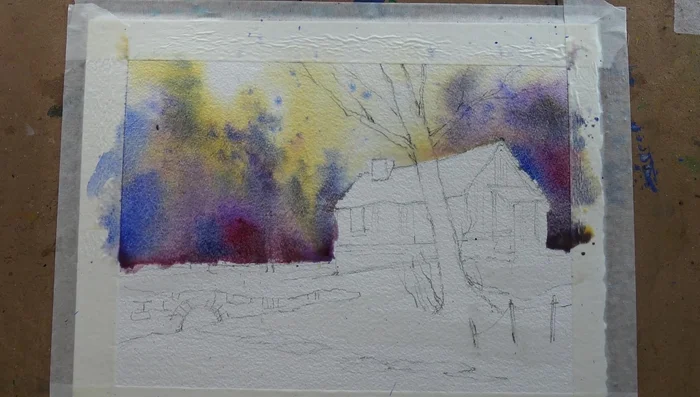
Foreground and Shadows Drying and First Details
- Let the painting dry completely.
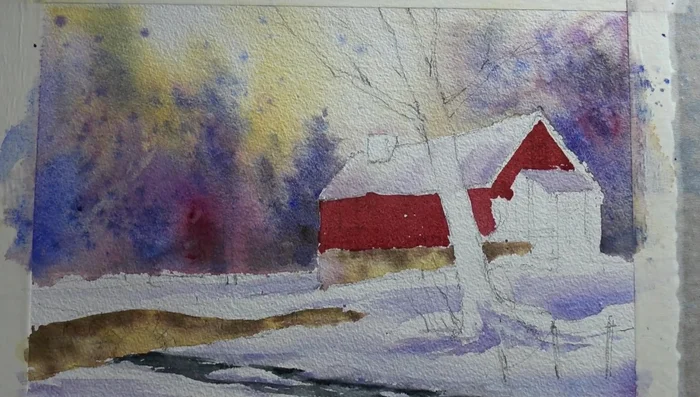
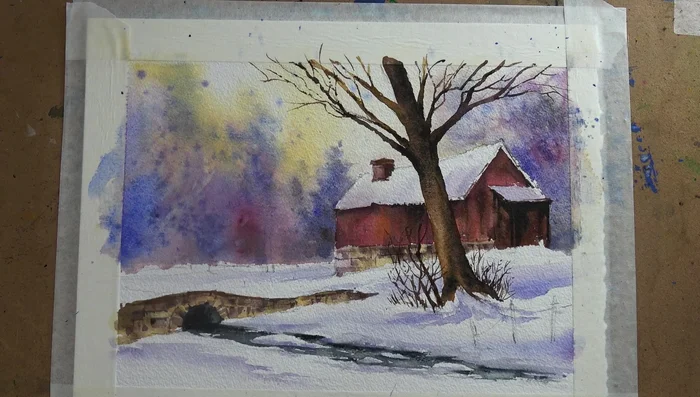
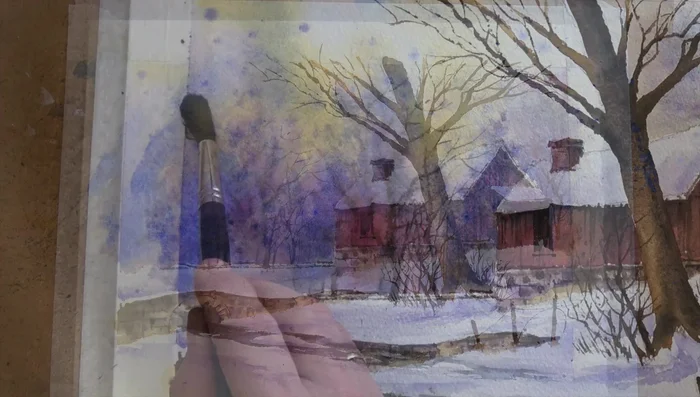
Cabin and Fir Tree
- Spray clean water on the side of the roof, blot with tissue, and paint in the fir tree with cobalt blue and Payne's grey.
- Add details with the purple snow shadow mix.
Cabin and Fir Tree Cabin Details
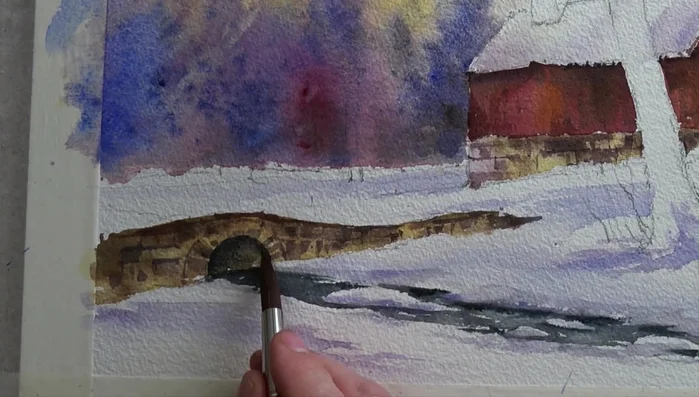
- Paint the cabin with a mix of alizarin crimson and burnt sienna, along with yellow ochre and burnt umber wet-in-wet.
- Add stone details with burnt umber.
- Use a creamy Payne's grey for the chimney.
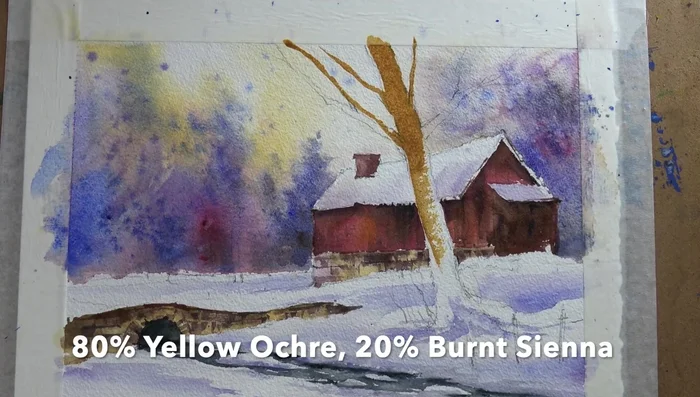
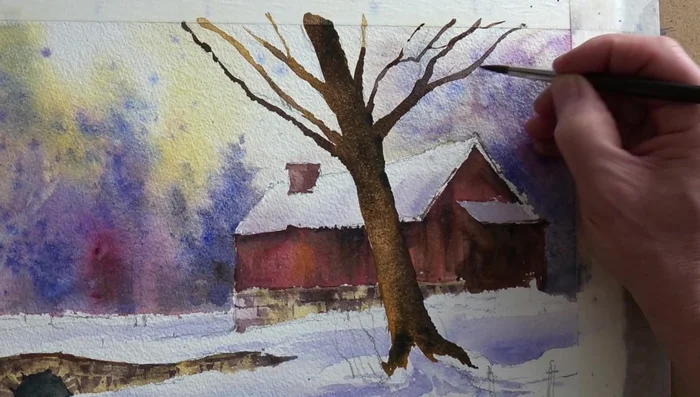
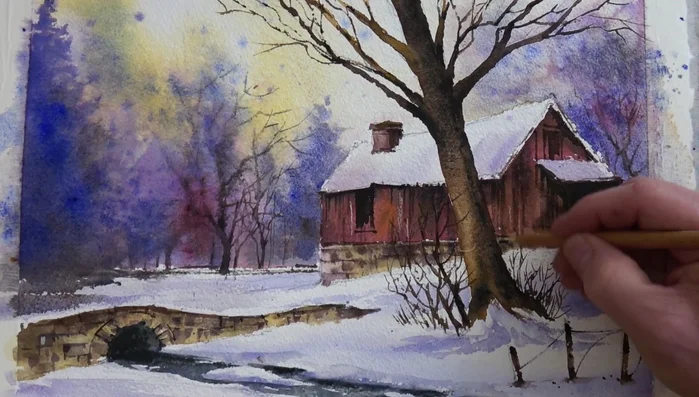
Cabin Details Large Tree
- Paint the large tree trunk and branches with a watery mix of yellow ochre and burnt sienna. Add darker mix of burnt umber and cobalt blue while still wet.
- Use a number six brush for smaller branches.
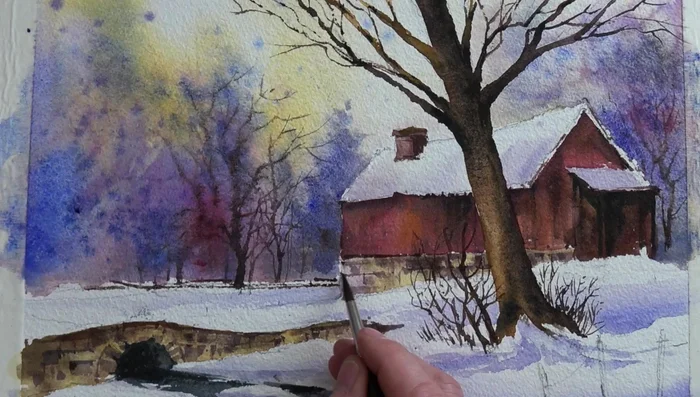
Large Tree Midground Trees
- Spray clean water on the mid-ground trees, then paint with number six brush for main trunks and number three rigger for smaller branches.
- Add details with a strong mix of the same color and number six brush.
Midground Trees Final Details and Highlights
- Add shadows on the porch with the same purpley snow shadow mix.
- Paint a wash of snow shadow color, leaving gaps to suggest snow.
- Add a large tree with a quick spray of water and a mix of cobalt blue and Payne's grey; add brown mix for soft edges.
- Use a beige pastel pencil for highlights.
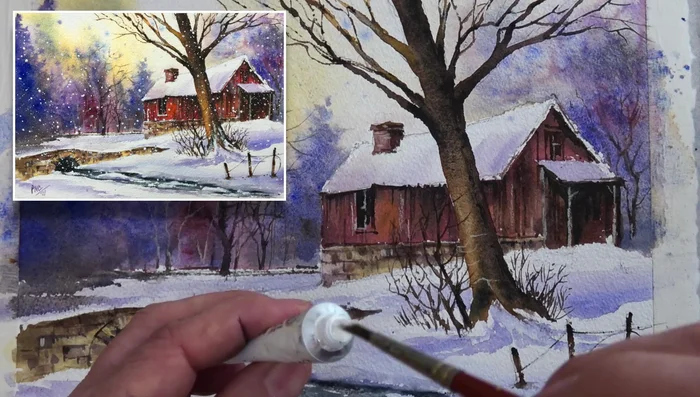
Final Details and Highlights - Add white gouache for snow dollops and blown snow effect.
- Create falling snow effect using a 50/50 mix of white gouache and water, varying the consistency for different sized snowflakes.
Final Details and Highlights


Read more: 7 Top Paint Color Trends for 2024: A Complete Guide with Free Downloadable Resource
Tips
- Salt creates subtle texture on 100% cotton paper, a more pronounced effect on pulp-based paper.
- Spraying and blotting creates soft edges.
- Wet-in-wet technique allows for blending and soft transitions.
- Using white gouache dry creates a blown snow effect.