Watercolor painting offers a captivating way to capture the beauty of the natural world, and sunsets are a particularly inspiring subject. Their vibrant hues and fleeting nature make them perfect for exploring the expressive possibilities of this medium. Even if you're completely new to watercolor, don't be intimidated – creating a stunning sunset landscape is more achievable than you might think! This tutorial focuses on simplifying the process, providing easy-to-follow techniques that will allow you to paint a breathtaking scene, even with minimal experience.
This beginner-friendly guide will walk you through each step, from preparing your materials to completing your vibrant sunset masterpiece. Forget complicated brushstrokes and complex color mixing; we'll focus on simple techniques that deliver impressive results. Let's embark on this creative journey together and discover the joy of capturing a mesmerizing sunset in watercolor. Ready to begin? Then let's move on to the step-by-step process outlined below.
Preparation and Safety Guidelines
- Watercolor paper (140lb cold press)
- Watercolor paints (Indian Yellow, Cadmium Yellow Pale, Cadmium Yellow, Cadmium Red, Burnt Sienna, Burnt Umber, French Ultramarine, Prussian Blue)
- Round brush #8
- Flat brush #8
- Always work in a well-ventilated area. Watercolor paints and mediums can release fumes.
- Protect your work surface. Watercolor can stain, so use a protective covering like a plastic sheet or a dedicated watercolor pad.
- Clean your brushes thoroughly after each use to prevent paint from hardening and ruining the bristles.
Step-by-Step Instructions
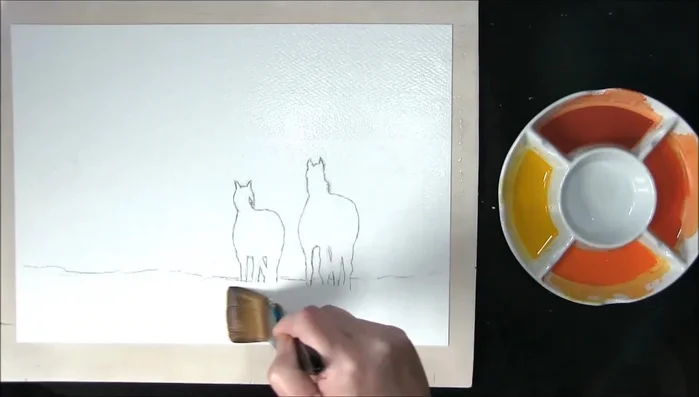
Prepare the Watercolor Paper
- Wet the paper with a damp brush to remove excess water, leaving a thin film. Brush along all four edges to minimize buckling.

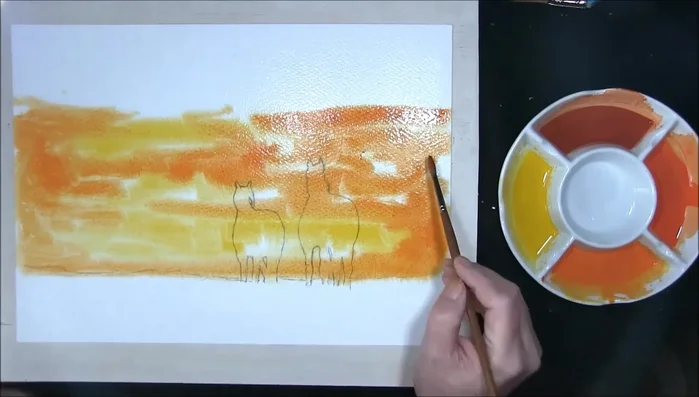
Prepare the Watercolor Paper Paint the Sunset Sky
- Mix Indian Yellow and Cadmium Yellow. Apply this mix to the top of the paper, creating horizontal strokes. Then, mix Indian Yellow, Cadmium Yellow Pale, and Cadmium Red to create an orange and add it below, blending the colors.
Paint the Sunset Sky Add and Blend Clouds
- Using a stronger mix of the orange with slightly more red, paint clouds by adding stronger strokes, leaving some areas lighter to show the sky through. Then use a larger, damp brush, mix of Cadmium Yellow, Cadmium Red, and Burnt Sienna to soften edges and create more clouds.
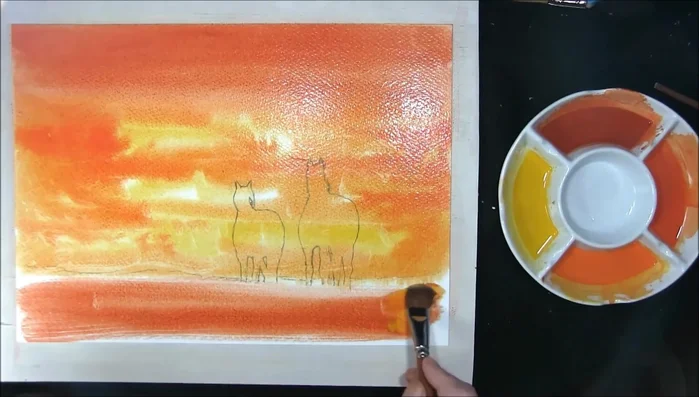
Add and Blend Clouds Unify Sky and Land
- Bring some of the sky colors down into the land area to connect the sky and land.
Unify Sky and Land Add Depth and Shadows
- Once the shine is gone from the paper (after about 10 minutes), use a #8 flat brush and stronger mixes of the colors used previously, painting darker areas in the clouds and stronger orange/red in the land.
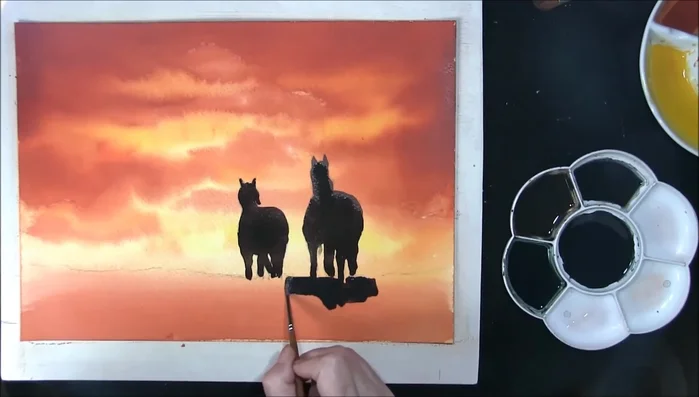
Add Depth and Shadows Paint the Horses
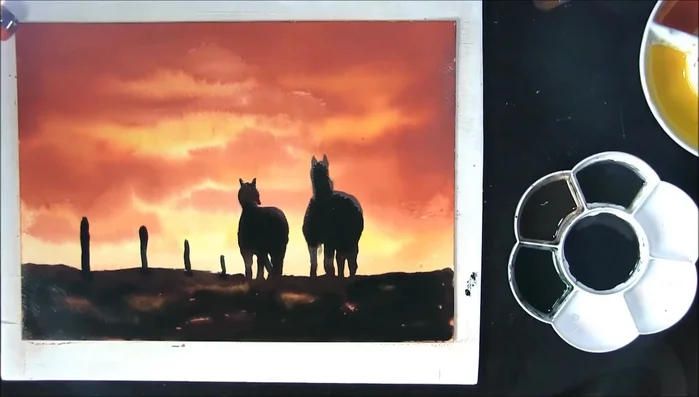
- Use a mix of Burnt Umber and French Ultramarine to paint the horses, leaving some areas lighter to show the sky through.
Paint the Horses Connect Horses to Land
- Use the same mix as the horses to connect their legs to the land, blending the colors. Then add stronger color using Prussian Blue and Burnt Umber to create depth and shadows.
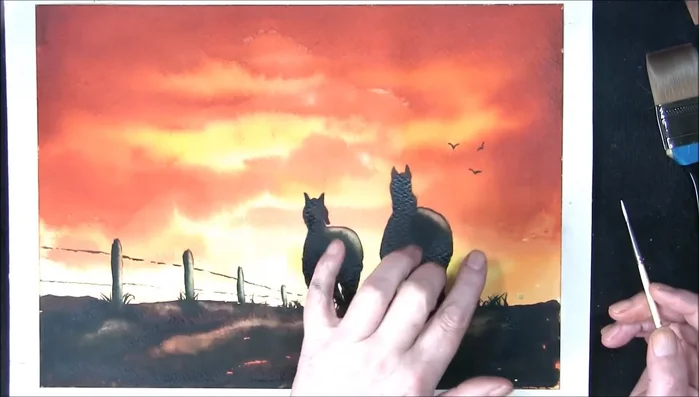
Connect Horses to Land Add Details and Textures
- Add fence posts and other details using stronger colors and a wet-on-wet technique (lift color with a clean, damp brush to create texture), allowing the under washes to show through.
Add Details and Textures Final Touches and Finishing
- Add a few birds, sign the painting, and optionally add a border.
Final Touches and Finishing


Read more: 7 Top Paint Color Trends for 2024: A Complete Guide with Free Downloadable Resource
Tips
- Minimize buckling by brushing along all four edges of the paper after wetting it.
- Work wet-on-wet for blending and soft edges. Let the paint dry slightly before adding stronger colors for depth.
- Remove excess paint from the edges to prevent runs and bleeding.
- The strength of color is important; once the paper is wet the paint dries much lighter.
- Use a damp brush to lift out paint and create texture.