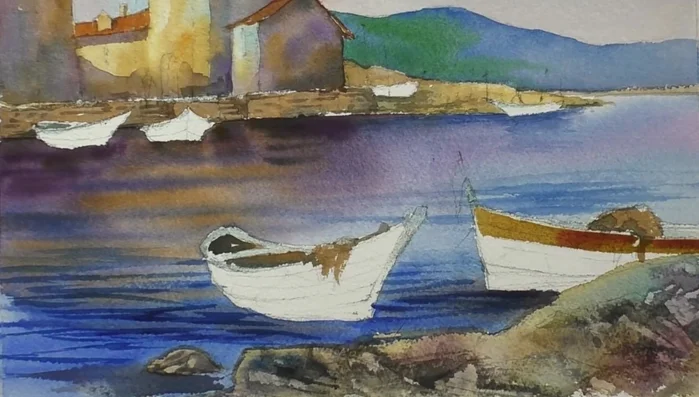
Capture the sun-drenched charm of a Mediterranean fishing village with this comprehensive watercolor painting tutorial! Imagine vibrant hues of turquoise water lapping against sun-bleached buildings, the rhythmic sway of fishing boats, and the warmth of a picturesque coastal scene – all brought to life on your canvas. This guide will equip you with the techniques and inspiration needed to paint your own breathtaking Mediterranean vista, regardless of your skill level. We’ll explore the use of color washes, layering techniques, and detail work to achieve a realistic and evocative portrayal of this iconic setting.
From sketching the basic composition to adding the final delicate touches, we'll guide you through each step of the process with clear explanations and helpful illustrations. Ready to embark on this artistic journey and create your own stunning Mediterranean masterpiece? Let's dive into the step-by-step instructions and unleash your inner artist!
Preparation and Safety Guidelines
- 300 pound Winsor Newton professional rough texture watercolor paper
- Cobalt blue
- Alizarin crimson
- Cadmium yellow
- Cadmium orange
- Yellow ochre
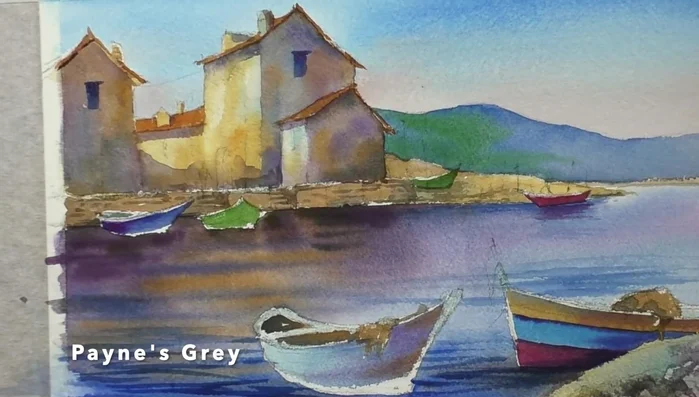
- Payne's grey
- Sap green
- Dioxazine purple
- Cerulean blue
- Burnt umber
- #12 round brush
- Three-quarter inch flat brush
- #3 rigger brush
- Mop brush
- Masking fluid
- Plastic credit card
- White pastel pencil
- Always use water-resistant tape to mask off areas you don't want painted, particularly when working with washes to prevent bleeding and maintain sharp lines.
- Allow each layer of paint to dry completely before applying the next to avoid muddy colors and maintain the vibrancy of your hues. This is especially important for layering washes.
- Work with clean brushes and clean water frequently to prevent muddy colors and maintain the clarity of your washes. Rinse your brushes thoroughly between color changes.
Step-by-Step Instructions
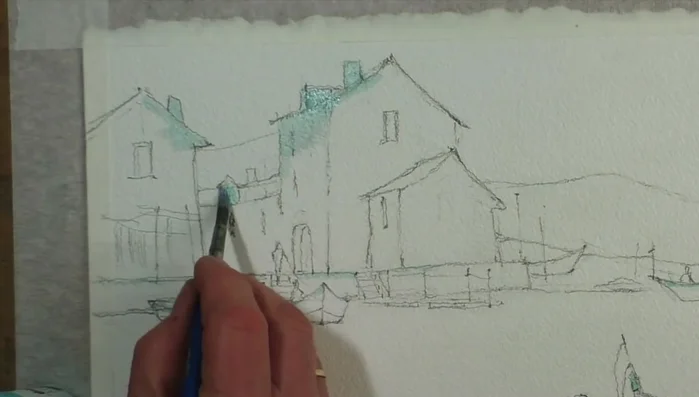
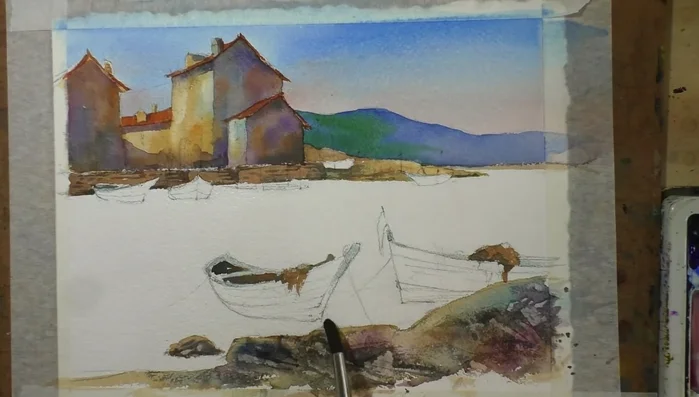
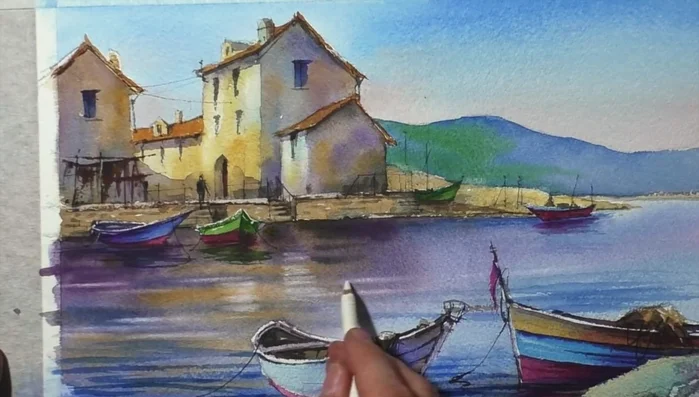
Prepare the Canvas
- Masking the top edges of the houses and highlights on the boats.

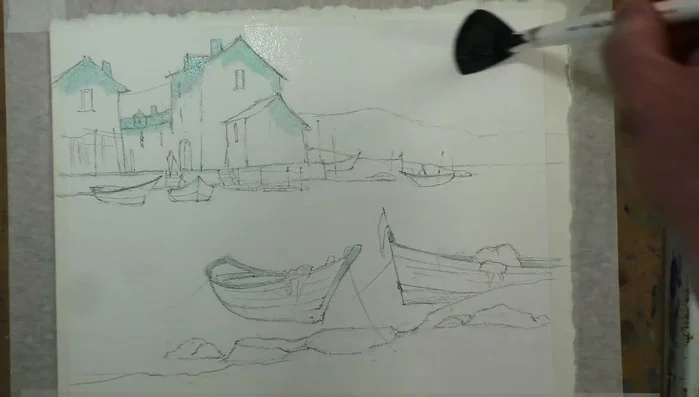
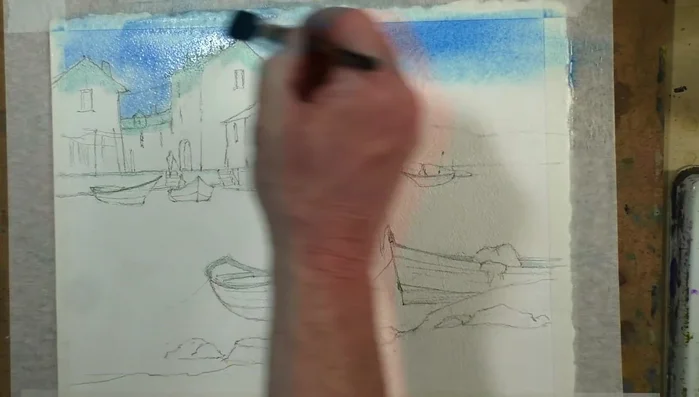
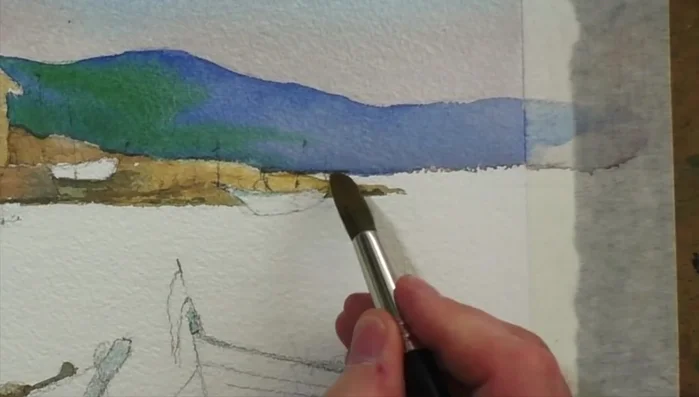
Prepare the Canvas Paint the Background
- Wetting the sky and sea with clean water using a mop brush.
- Painting the sky with a 50/50 mix of cerulean blue and cobalt blue, adding a touch of alizarin crimson.
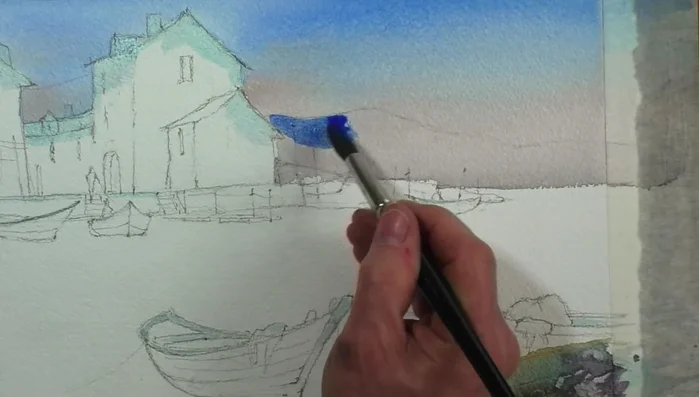
- Painting distant mountains with cobalt blue, lightening the value towards the distance and adding sap green on the left.
- Adding yellow ochre to a distant coastal village.
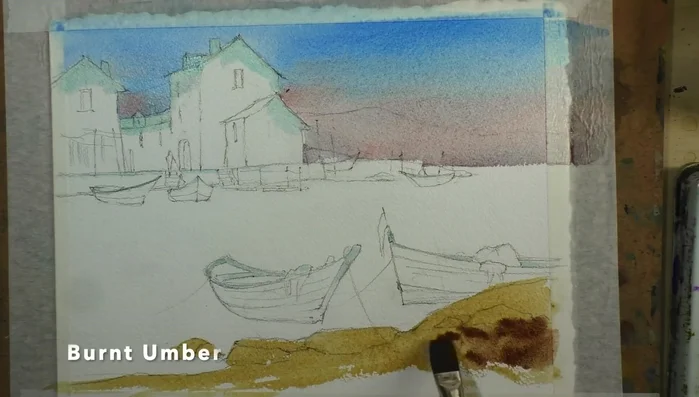
Paint the Background Paint the Foreground Rocks
- Painting the foreground rocks with yellow ochre and burnt umber using wet-on-wet technique, adding cerulean blue and purple for interest.
- Adding Payne's grey and scraping/dragging with a plastic card to create rock textures.
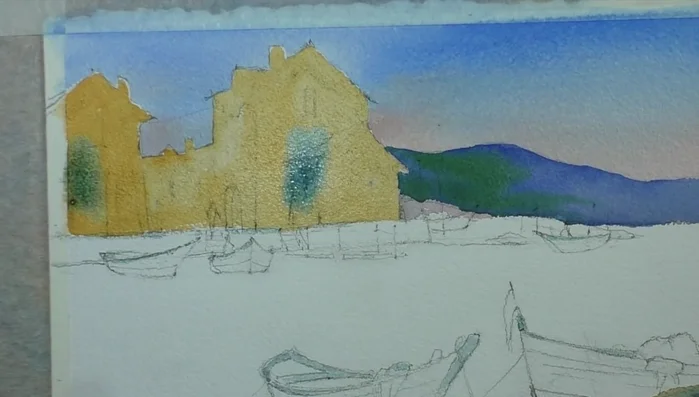
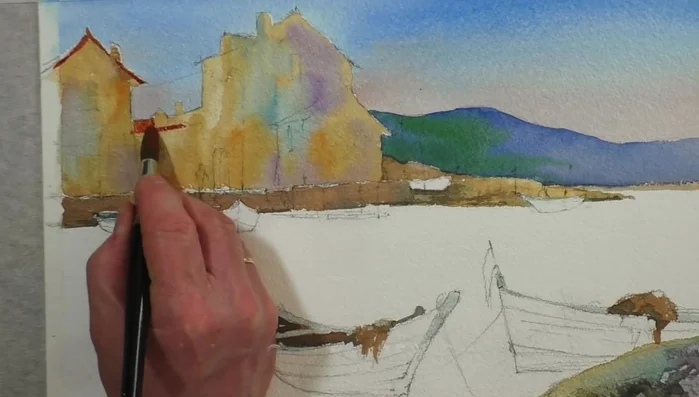
Paint the Foreground Rocks Paint the Houses and Harbor Wall
- Removing masking fluid.
- Painting roofs with a mix of cadmium orange and burnt umber, adding shadows with a mix of purple, cobalt blue, and cadmium orange.
- Lifting out highlights with a damp brush and dropping in wet-on-wet washes of cerulean blue, purple, and cadmium orange.
- Adding alizarin crimson to the orange mix for the harbor wall and burnt umber shadows.
Paint the Houses and Harbor Wall - Painting roofs with a mix of cadmium orange and burnt umber.
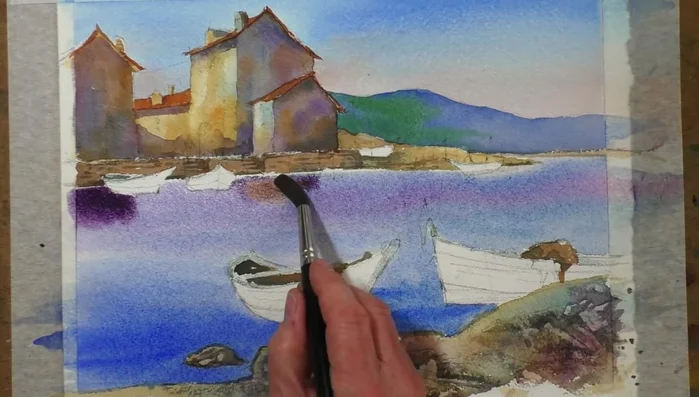
Paint the Houses and Harbor Wall Paint the Sea
- Painting the sea with clean water, then dropping in cobalt blue and alizarin crimson.
- Adding wet-on-wet colors to match the buildings above, creating darker values below.
- Tilting the board to create wet-on-wet fuzziness in the sea.
- Adding transparent blue ripples to the dry sea.
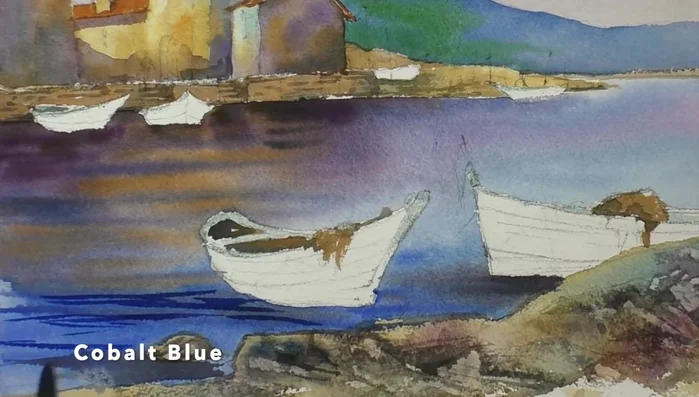
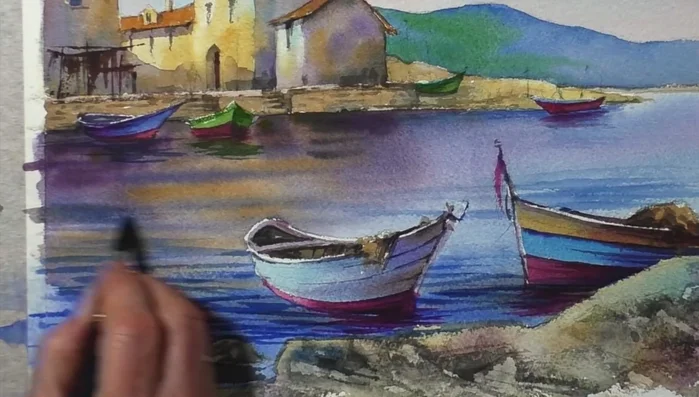
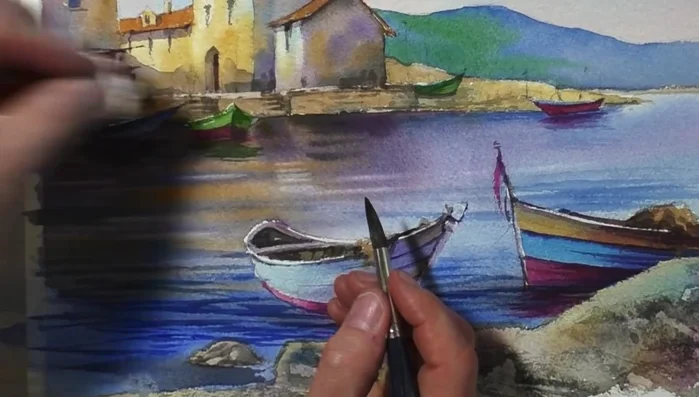
Paint the Sea Paint the Boats
- Painting boat details with blues and reds, adding strong shadows.
- Adding final boat details with blues and reds.
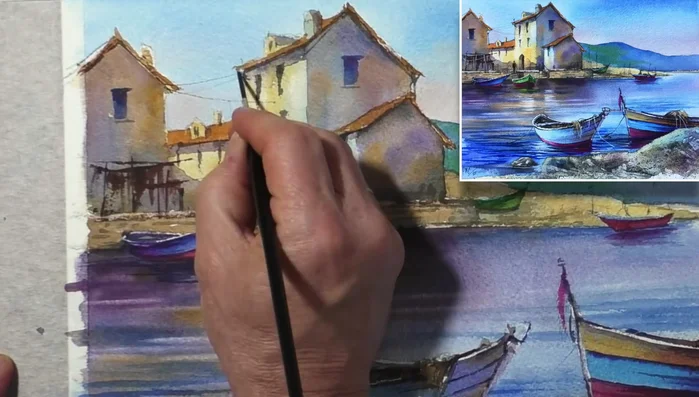
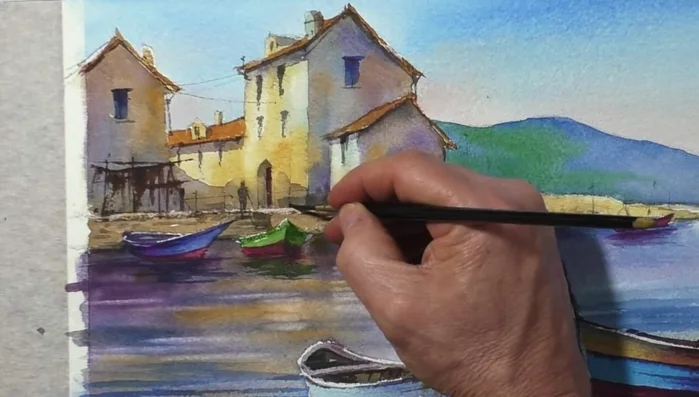
Paint the Boats Add Details to Buildings
- Adding cobalt blue for shuttered windows and Payne's grey for details, keeping it loose.
- Adding cadmium orange to Payne's grey for details in the nets.
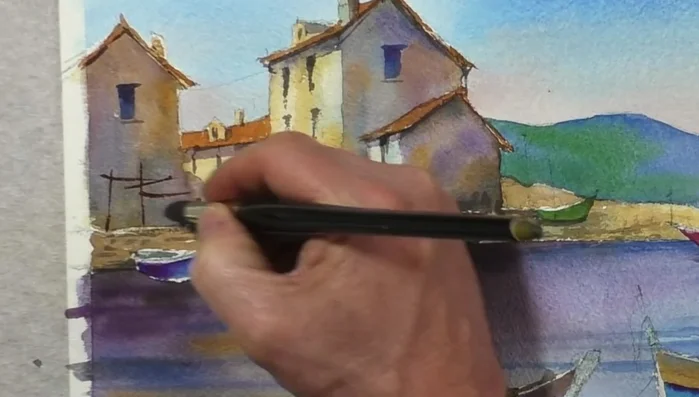
Add Details to Buildings Refine and Add Final Touches
- Removing remaining masking fluid, knocking back the white with yellow ochre.
- Creating soft ripples with clean water and a dry tissue.
- Adding reflections from the buildings using a dry brush technique.
- Adding details with Payne's grey using a #3 rigger brush.
Refine and Add Final Touches - Painting fishermen quickly and loosely.
- Adding highlights with a white pastel pencil.
- Adding final splattering with burnt umber.
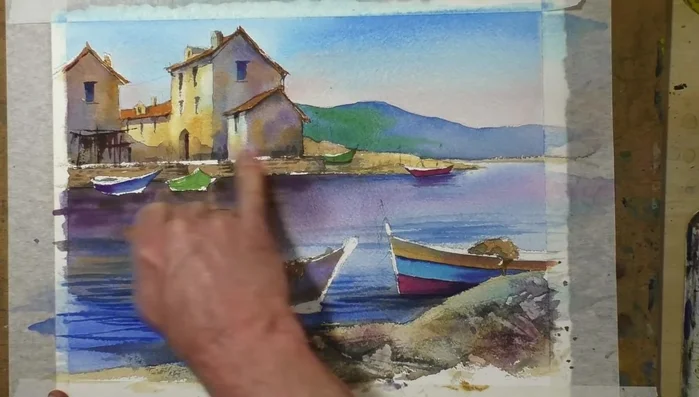
Refine and Add Final Touches


Read more: 7 Top Paint Color Trends for 2024: A Complete Guide with Free Downloadable Resource
Tips
- Use a larger brush (#12) to keep the painting loose and relaxed.
- If you have a particular color on your brush, look for other areas needing that color to save time.
- Paint details quickly and loosely for a more natural look.
- Try to paint as much as possible with one brush stroke for a more effective look.