Watercolor painting offers a delightful way to express creativity, and floral wreaths are a timeless, beautiful subject. Whether you're a seasoned artist or just beginning your watercolor journey, creating a charming floral wreath is surprisingly accessible. The delicate washes and soft blending techniques of watercolor lend themselves perfectly to the gentle curves and vibrant colors of flowers, resulting in a piece you'll be proud to display or gift. This calming activity is a wonderful way to de-stress and unleash your inner artist. Imagine the satisfaction of crafting your own unique masterpiece, imbued with your personal touch and artistic flair.
This tutorial provides a simple, step-by-step guide to painting your own beautiful watercolor floral wreath, even if you've never picked up a brush before. Let's dive into the process and learn how to create this lovely piece of art, transforming a blank page into a vibrant and blossoming creation. Get ready to unlock your artistic potential and follow along with the easy-to-follow instructions below!
Preparation and Safety Guidelines
- Watercolor paper
- Watercolor paints
- Paint brush
- Water
- Paper towel
- Painter's tape
- Always work in a well-ventilated area. Watercolor paints and mediums can contain chemicals that may cause respiratory irritation.
- Protect your work surface with a waterproof covering. Watercolor can stain.
- Clean your brushes thoroughly after each use to maintain their quality and prevent paint build-up.
Step-by-Step Instructions
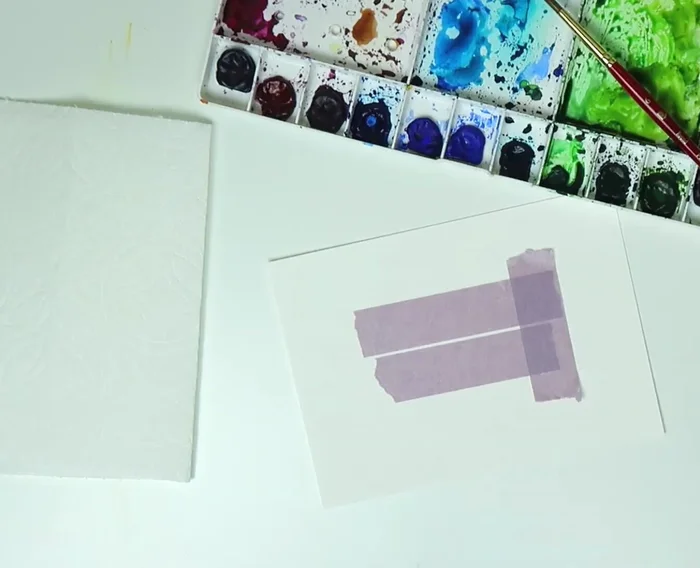
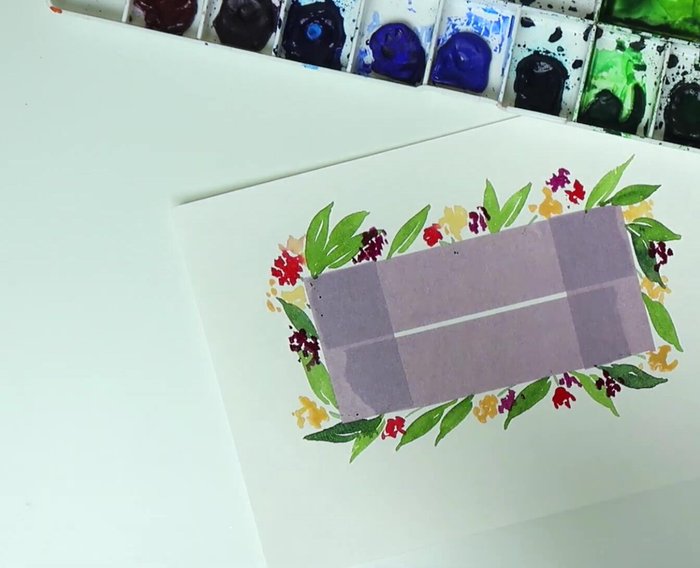
Prepare the Canvas
- Create a border using painter's tape.

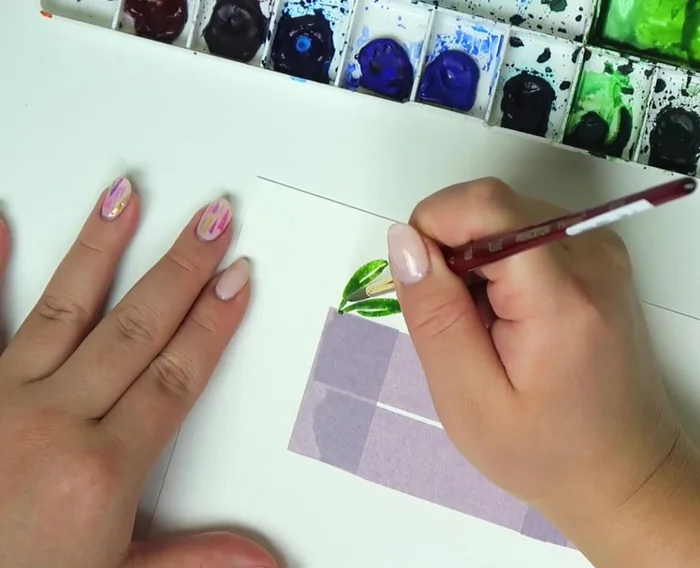
Prepare the Canvas Paint the Leaves
- Paint leaves around the edges using a darker shade of green. Vary the leaf clusters (single, double, triple).
- Fill any remaining negative space with more leaves, using a darker shade of green to add depth.
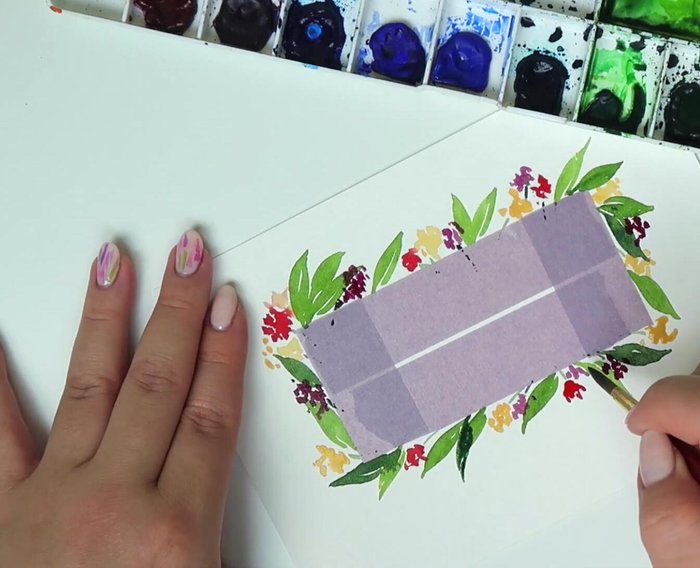
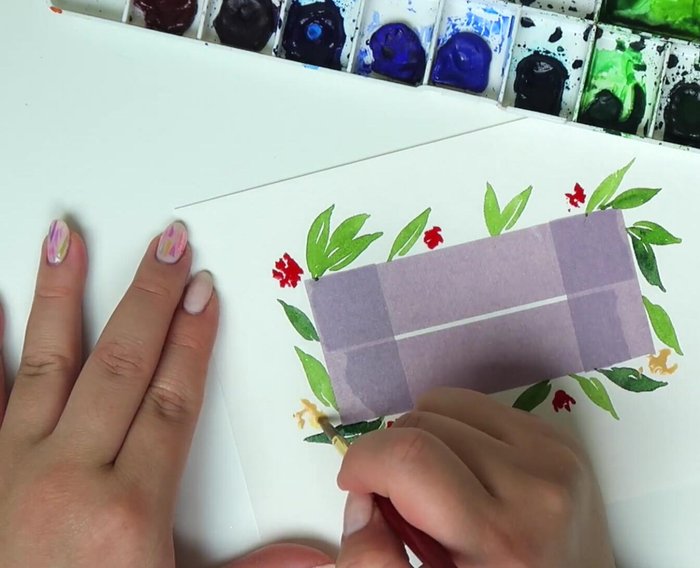
Paint the Leaves Add the Flowers
- Add clusters of colored dots (red, yellow, purple) to represent flowers, filling in spaces between leaves.
Add the Flowers Connect with Stems
- Connect the flower clusters with stems using the same green paint as the leaves.
Connect with Stems Add Berries
- Add brighter yellow dots around the wreath to resemble berries.
Add Berries Let it Dry
- Let the painting dry completely (approx. 30 minutes).
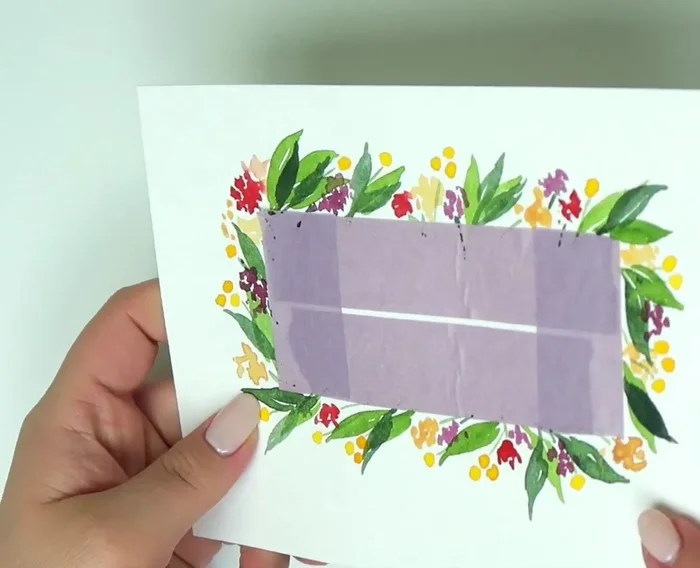
Let it Dry Remove the Tape
- Carefully peel off the painter's tape.
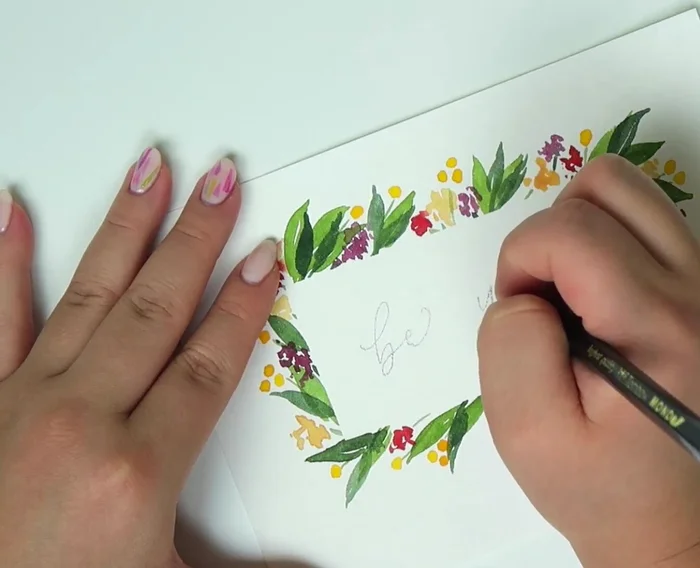
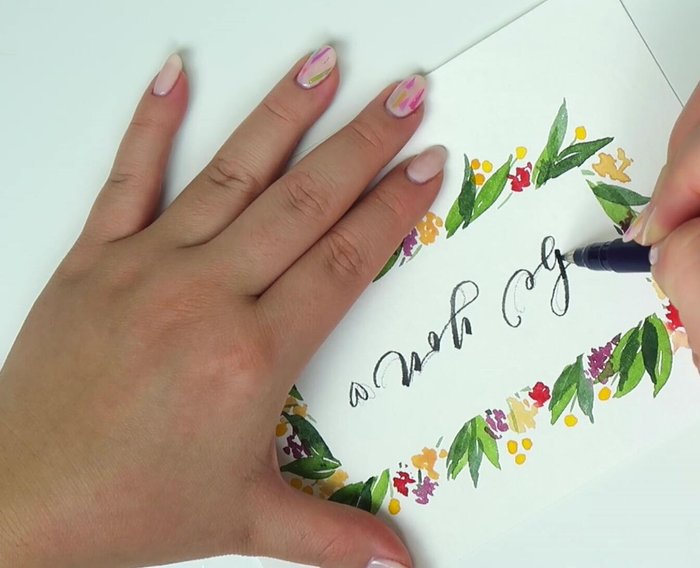
Remove the Tape Add a Message (Optional)
- Sketch a message (optional) with pencil, then trace with a brush pen.
- Allow the ink to dry completely before erasing pencil marks.
Add a Message (Optional)


Read more: 7 Top Paint Color Trends for 2024: A Complete Guide with Free Downloadable Resource
Tips
- Don't worry about making the tape border perfectly even; a slightly imperfect wreath adds charm.
- Use various shades of green to add dimension to the leaves.
- Add flowers and leaves randomly; you can always go back and add more later.
- Use an embossing tool to speed up the drying process.