Watercolor painting offers a unique blend of spontaneity and control, allowing artists to capture the charm of everyday subjects with delicate washes and vibrant hues. Few subjects are as idyllic and inviting as a cozy cottage nestled amidst a picturesque landscape, making it a perfect choice for exploring the expressive possibilities of watercolor. The charming details—from the weathered shingles to the carefully tended garden—present exciting opportunities for mastering watercolor techniques like layering, blending, and wet-on-wet effects.
This tutorial will guide you through the process of creating your own stunning watercolor cottage painting, perfect for beginners and experienced artists alike. Let's dive into a step-by-step approach that will equip you with the skills and confidence to paint your own charming cottage scene, revealing the secrets to achieving realistic textures and capturing the essence of a peaceful countryside retreat.
Preparation and Safety Guidelines
- Watercolor paper (100% cotton, rough texture)
- Large flat brush
- 3/4 inch flat brush
- Number 12 round brush
- Number 6 round brush
- Plastic store card
- Paints (Cadmium Yellow, Cadmium Orange, Cobalt Blue, Alizarin Crimson, Burnt Sienna, Sap Green, Pains Gray)
- Water
- Soft chalk pastels
- Yellow-green pastel pencil
- Always work in a well-ventilated area. Watercolor paints and mediums can release fumes.
- Protect your work surface with a waterproof cover or mat. Watercolor can stain.
- Wash brushes thoroughly after each use to prevent paint from drying and hardening the bristles.
Step-by-Step Instructions
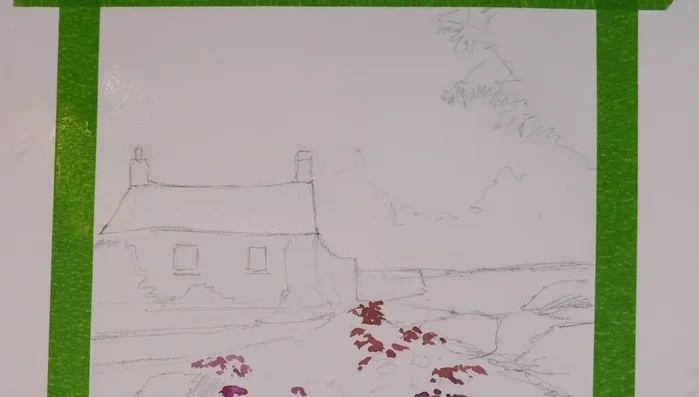
Sketching the Cottage
- Pencil Sketch

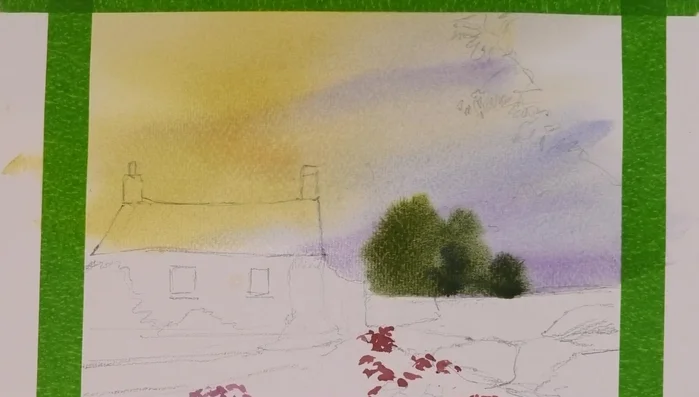
Sketching the Cottage Painting the Background
- Wetting Sky Area and Painting Sky (Cadmium Yellow, Cadmium Orange, Cobalt Blue)
- Painting Distant Trees (wet-on-wet with yellowy green mix, adding warmth with Burnt Sienna)
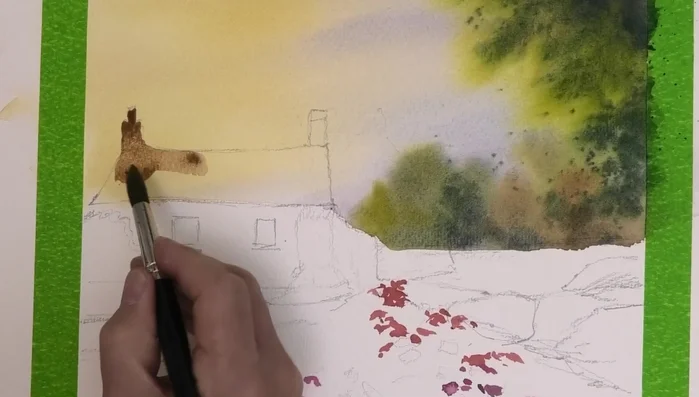
Painting the Background Painting the Cottage Structure
- Painting Roof (Burnt Sienna and Cobalt Blue mix, cooler towards the right)
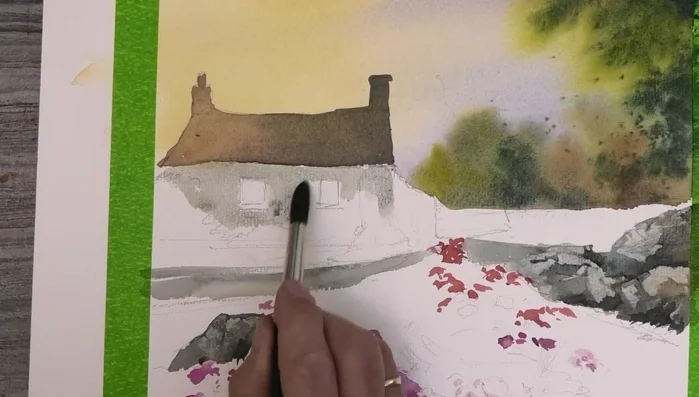
- Painting Cottage (watery wash of Pains Gray and Burnt Sienna)
Painting the Cottage Structure Painting the Landscape
- Painting Path (Pains Gray, scraping and dragging technique for rock effect)
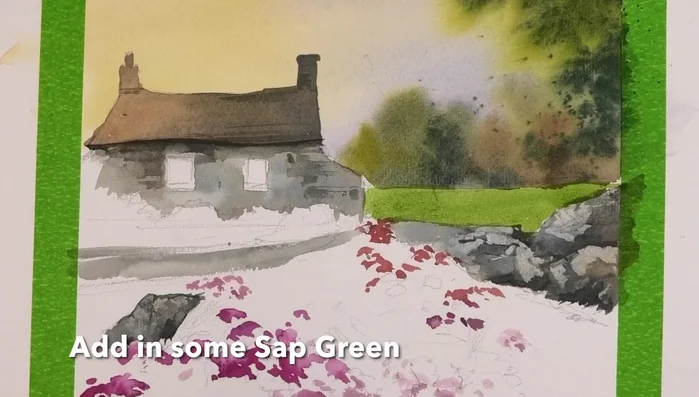
- Painting Lawn (Cadmium Yellow, Cobalt Blue, Sap Green mix)
- Painting Flower Beds (wet-on-wet with yellowy green and darker blue-green mixes)
Painting the Landscape Adding Floral Details
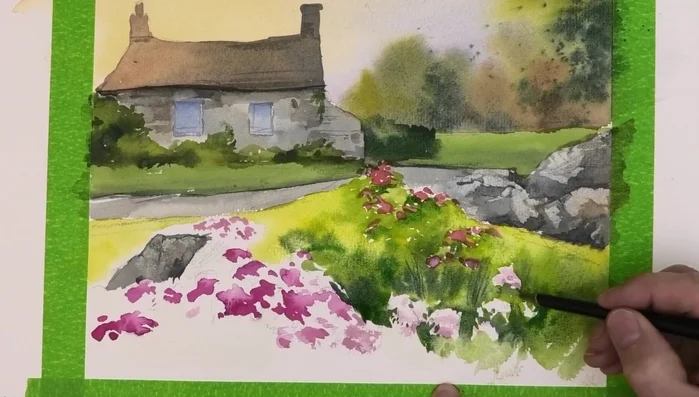
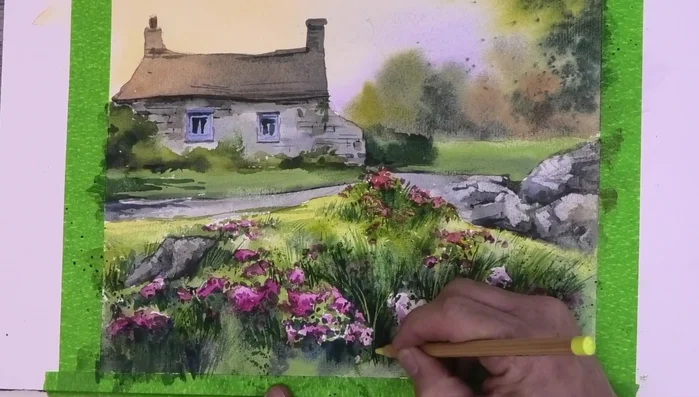
- Painting Flowers (wet-on-wet technique for soft edges)
- Adding Stem Details (using sharpened wooden end of brush)
Adding Floral Details Adding Fine Details and Shadows
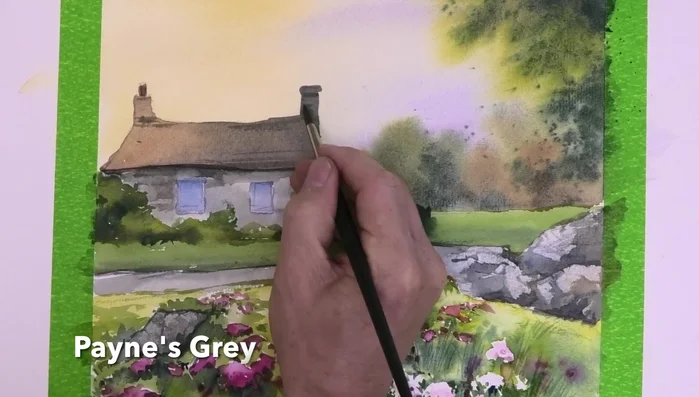
- Adding House Details (Number 6 brush and Pains Gray)
- Adding Shadows (darker greens)
Adding Fine Details and Shadows Blending and Finishing Touches
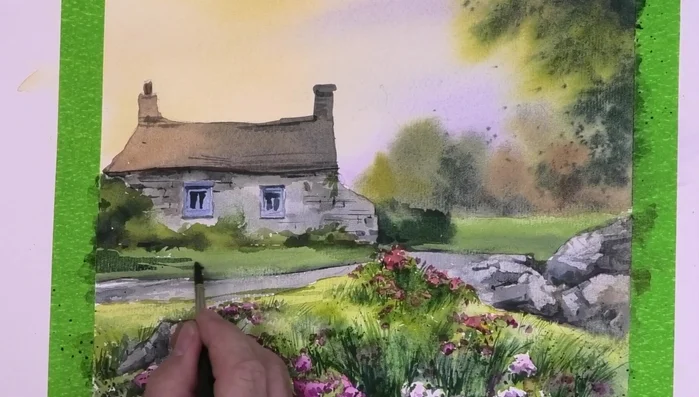
- Blending Edges (damp tissue)
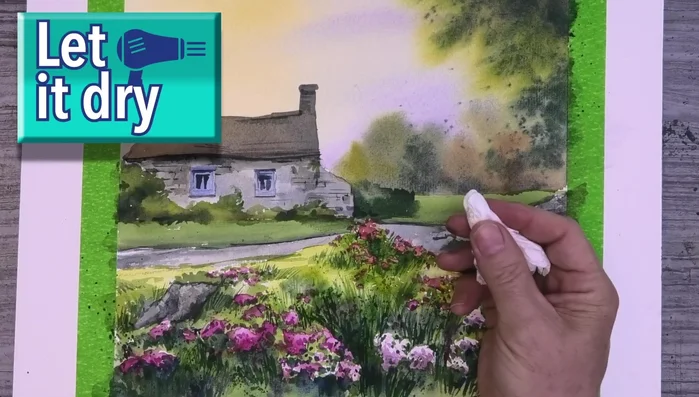
- Adding Pastel Details (yellow-green pastel pencil, soft chalk pastels)
Blending and Finishing Touches


Read more: 7 Top Paint Color Trends for 2024: A Complete Guide with Free Downloadable Resource
Tips
- Paint flowers first on clean paper for brightness.
- Premix colors for faster work.
- Less is more when adding details.
- Smudge soft pastels with your finger for a blurry effect.