Christmas is a time for twinkling lights and festive cheer, and what better way to capture that magic than by painting your own glowing Christmas tree? This tutorial will guide you through a simple yet effective method for adding radiant, sparkling lights to your watercolor Christmas tree painting, transforming a charming illustration into a truly captivating winter scene. Forget fiddly details and complex techniques; this approach is surprisingly quick and easy, perfect for artists of all skill levels, from seasoned watercolorists to enthusiastic beginners.
Imagine your beautifully painted Christmas tree, its branches laden with the promise of the holiday season, now enhanced with the warm, inviting glow of festive lights. Ready to transform your artwork from charming to dazzling? Let's dive into the step-by-step process and learn how to create these magical glowing Christmas lights!
Preparation and Safety Guidelines
- Watercolor paints (Cadmium Yellow, Sap Green, French Ultramarine Blue)
- Round brushes (size 0, size 2)
- Pencil
- Water
- Use only LED lights designed for low-voltage applications and intended for indoor use. Avoid using high-wattage incandescent bulbs which can be a fire hazard near paper.
- Never leave lit lights unattended. Turn them off before leaving the room or going to sleep.
- Keep lights away from flammable materials, including the watercolor painting itself and any nearby decorations. Ensure adequate space between the lights and the paper.
Step-by-Step Instructions
Sketch and Plan
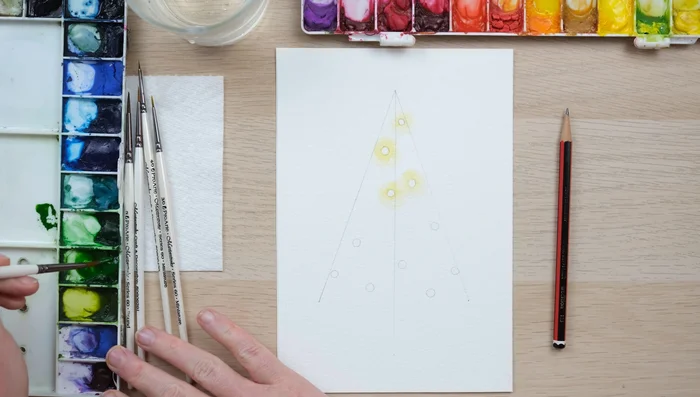
- Sketch a simple triangle for the Christmas tree and mark small circles where the lights will go.

Sketch and Plan Create Glowing Lights
- Paint around the edge of each circle with wet cadmium yellow, leaving the center unpainted to represent the glow.
- Clean your brush and blend the yellow outwards, creating a soft glow. Work quickly to maintain wetness for blending.
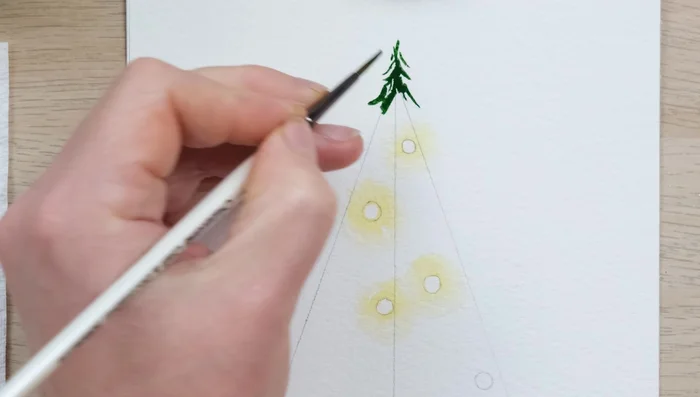
- Paint the top half of the tree using this technique, ensuring the lights remain wet for a seamless blend with the tree.
Create Glowing Lights Paint the Christmas Tree
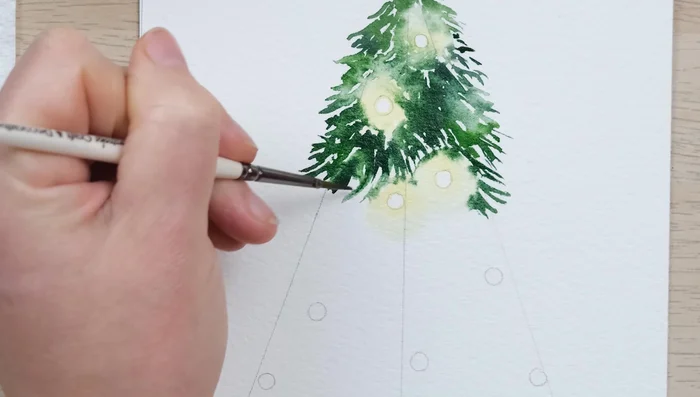
- Use sap green and a touch of French ultramarine blue to paint the Christmas tree. Reduce paint on your brush near the lights to maintain the glow and create a lit-up effect on the tree itself.
- Start painting from the top of the tree with a size 2 brush, leaving unpainted space where possible.
- If lights dry before painting the tree, add a tiny bit of water to rewet the edges for a smooth blend.
- Continue painting the tree, remembering to use less paint near the lights.
Paint the Christmas Tree Final Touches
- Once dry, erase pencil marks. Add more cadmium yellow to the underside of the lights to enhance the glow.
- Add a few more branches overlapping the lights to enhance depth and realism, avoiding a perfect circular glow.
Final Touches


Read more: 7 Top Paint Color Trends for 2024: A Complete Guide with Free Downloadable Resource
Tips
- Work quickly to keep the yellow paint wet for blending.
- A size 0 brush is ideal for painting the lights.
- Use less paint on your brush when painting the tree near the lights to maintain the glow effect.
- If lights dry, rewet the edges with water before painting the tree around them.
- Adding a few extra branches overlapping the lights adds depth and realism, preventing a perfect circular blend.