Vincent van Gogh's "The Starry Night" is arguably one of the most iconic and beloved paintings in the world. Its swirling, expressive brushstrokes and vibrant colour palette capture the beauty and mystery of a night sky like no other artwork. The emotional intensity and technical brilliance of the piece have captivated artists and art enthusiasts for generations, sparking countless imitations and interpretations. Its unique texture and bold use of impasto technique are often cited as key elements contributing to its enduring appeal.
This tutorial will demystify the creation of your own "Starry Night" masterpiece, guiding you through a step-by-step process that will enable you to recreate this legendary work of art. Whether you're a seasoned painter or a complete beginner, get ready to unleash your inner Van Gogh and learn to replicate the magic of this unforgettable painting. Let's begin!
Preparation and Safety Guidelines
- Acrylic paints (yellow ochre, white, black, various blues, yellow, yellow-green, brown)
- Watercolor paints
- Thin brush
- Paper or canvas
- Always use water-based paints or acrylics for easier cleanup and less toxicity. Oil paints require solvents, which are harmful if not handled properly.
- Protect your work surface with newspaper or a drop cloth. Acrylics and watercolors can stain.
- Proper ventilation is important, especially when using oil paints or solvents. Work in a well-ventilated area or wear a respirator.
Step-by-Step Instructions
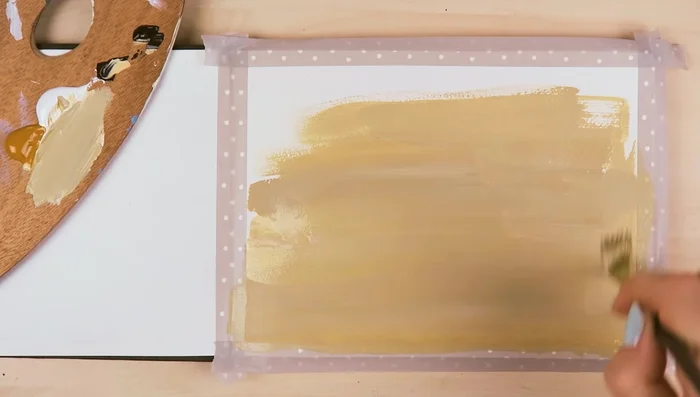
Prepare the Background
- Mix yellow ochre, white, and a little black acrylic paint to get a grayish-brown.
- Apply a thin layer of the grayish-brown base color all over the paper or canvas.

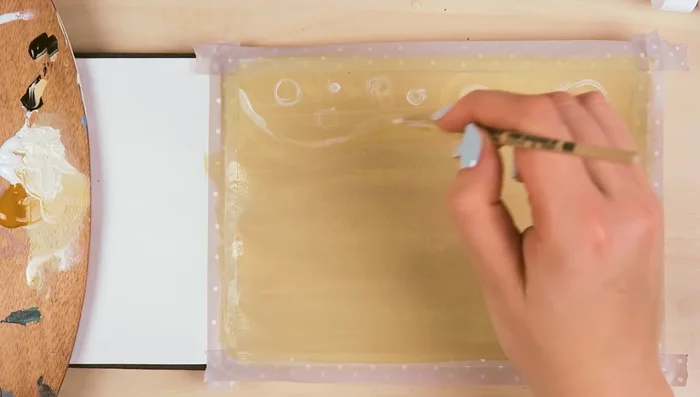
Prepare the Background Sketch the Composition
- While the paint dries, sketch the painting using watercolor paint and a thin brush. This helps map out the painting and prevents feeling lost while painting.
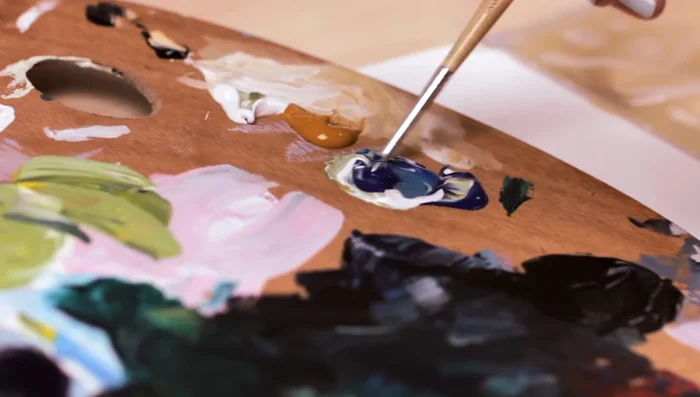
Sketch the Composition Mix Paints
- Mix different shades of blue. You can hold the mixed paint against a printed image to check the accuracy of the shade.
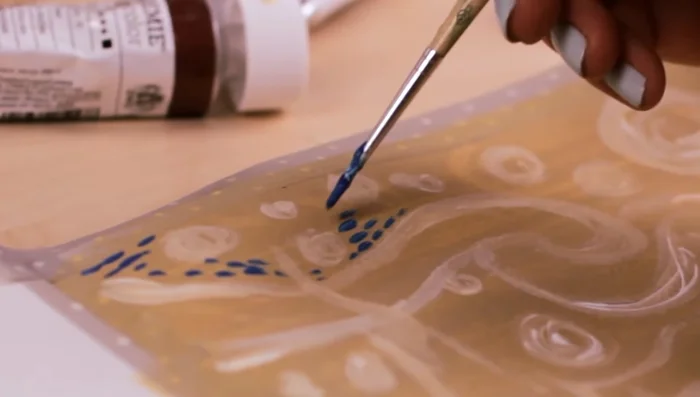
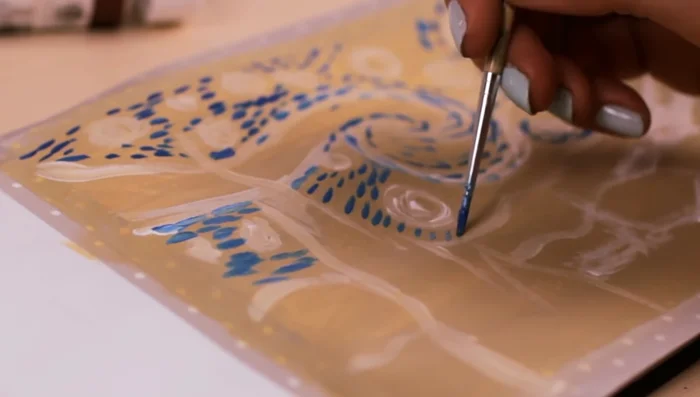
Mix Paints Paint the Night Sky (Darker Blues)
- Start painting with a darker shade of blue using short, thick brush strokes. Leave spaces between each stroke; don't aim for seamless lines. Follow the white outlines from your sketch.
Paint the Night Sky (Darker Blues) Paint the Night Sky (Lighter Blues)
- Use a lighter shade of blue for the lower third of the painting, maintaining the short, loose brush strokes.
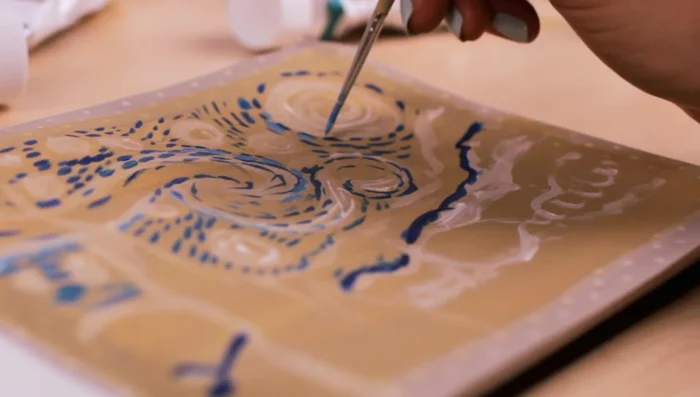
Paint the Night Sky (Lighter Blues) Layer and Refine the Sky
- Add another layer of paint to fill in gaps, following the shapes and movement of the objects.
- Go back and apply more blue paint, continuing to build layers with short brush strokes. Don’t strive for exact replication; focus on the technique.
Layer and Refine the Sky Add Yellow to the Sky
- Add yellow paint using the same short brush stroke technique, following the shape of the objects and mixing in white for brighter areas.
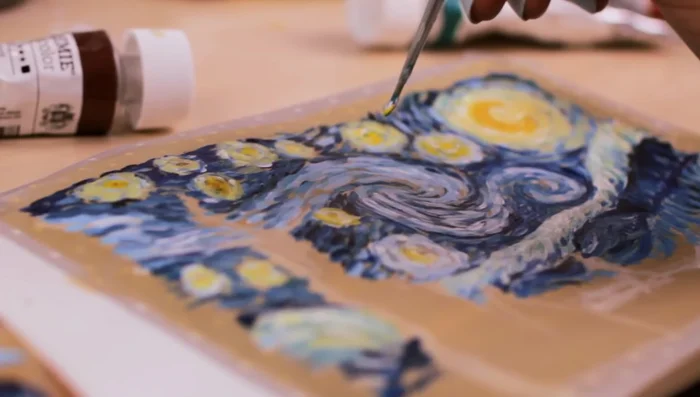
Add Yellow to the Sky Paint the Tree
- Paint the tree using yellow-green, black, and brown, focusing on the overall shape first before adding texture.
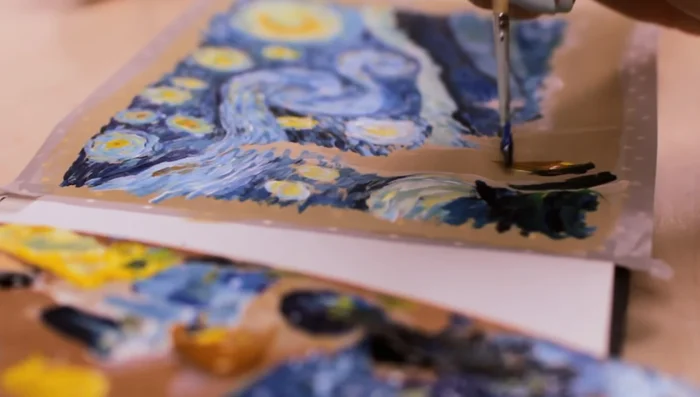
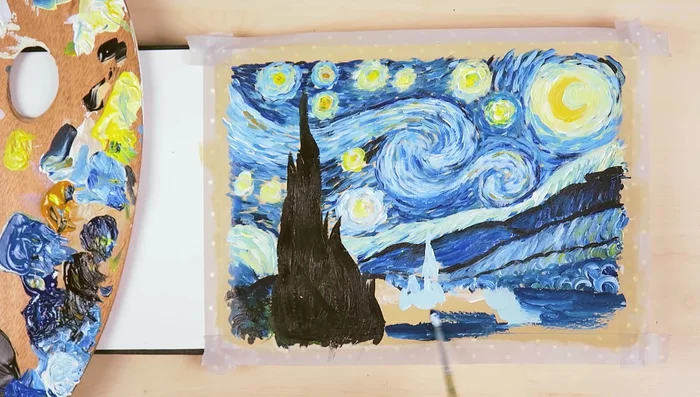
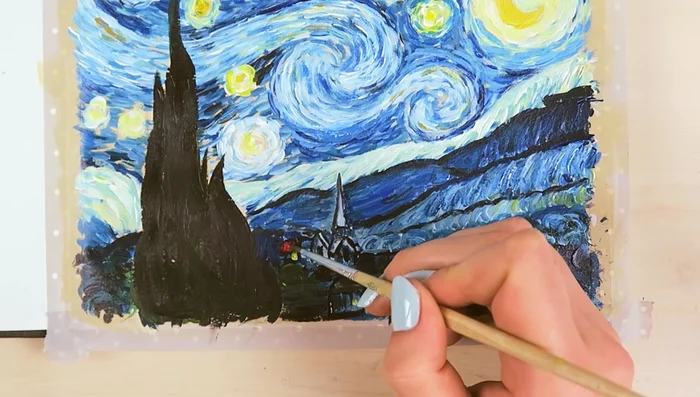
Paint the Tree Paint the City
- Paint the city with a blue underpainting, leaving lighter areas. Focus on main objects and paint the rest loosely; don't meticulously copy each house.
- Add color and highlights to the city to create a night-time effect. Continue refining and adjusting the painting.
Paint the City


Read more: 7 Top Paint Color Trends for 2024: A Complete Guide with Free Downloadable Resource
Tips
- The underpainting creates a base for later layers, making the painting look more transparent in areas.
- Using white acrylic paint allows for blending without visible outlines.
- Don't worry about perfectly matching colors; focus on capturing the overall mood and style of the painting. Experiment with different techniques and have fun!
- The painting's distinctive look comes from short, thick brushstrokes and thickly applied paint. Imitate this technique.
- Reference photos are helpful to guide your color choices and placement.