Capture the serene beauty of a snowy mountain landscape and the charm of a rustic barn in this comprehensive painting tutorial. We'll guide you through creating a captivating winter scene, perfect for adding a touch of tranquility to your home or showcasing your artistic skills. Imagine the crisp, clean lines of fresh snow contrasting with the weathered wood of a lonely barn, nestled against the imposing backdrop of a majestic mountain range – a scene brimming with peaceful solitude. This tutorial caters to all skill levels, from beginner to experienced painter.
Learn to blend cool blues and whites to create realistic snow, master the techniques of perspective to render the mountain's grandeur, and develop the texture of aged wood to bring the barn to life. Let's begin this artistic journey by following the step-by-step instructions below.
Preparation and Safety Guidelines
- Number 2 Nyon flat brush
- Medium size flat brush (number 8-10)
- Small flat brush (number 2-3)
- Liner brush/Rigger brush
- Bristle flat brush (medium size)
- Limited palette of colors (5 colors)
- Water
- Use appropriate paints for cold weather painting. Acrylics and oils can behave differently in low temperatures, affecting drying time and application. Check your paint manufacturer's recommendations.
- Dress warmly and in layers when painting outdoors in snowy conditions. Hypothermia is a real risk, and you need to be comfortable to focus on your painting.
- Be mindful of slippery surfaces. Snow and ice can make outdoor painting locations hazardous. Wear appropriate footwear and consider using trekking poles for stability.
Step-by-Step Instructions
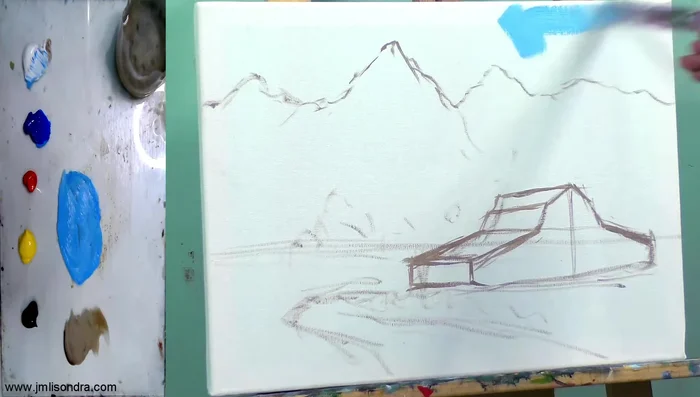
Sketching
- Sketching the landscape using a number 2 Nyon flat brush with a mix of Raw Umber and white.

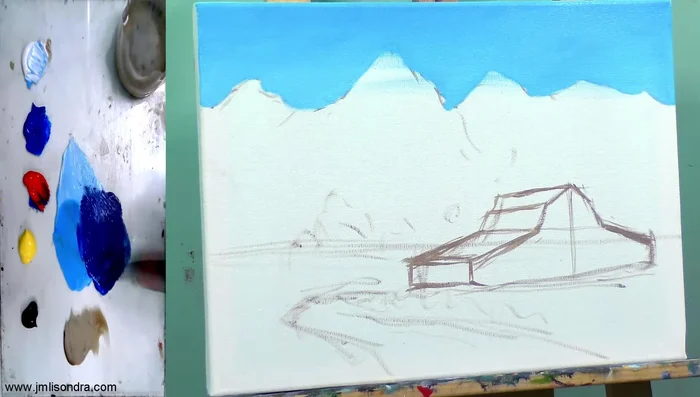
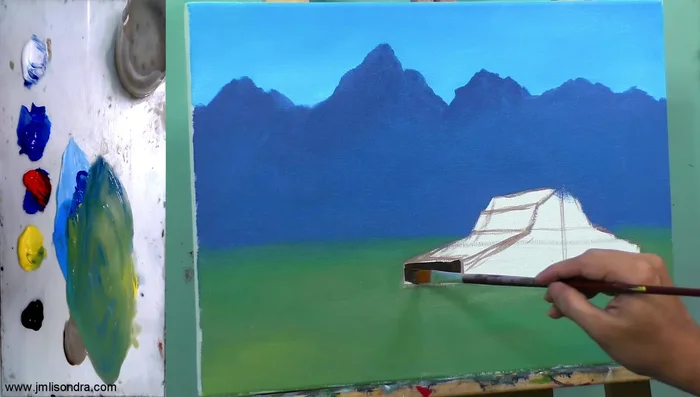
Sketching Sky and Background
- Painting the sky with a light blue mix (blue and white).
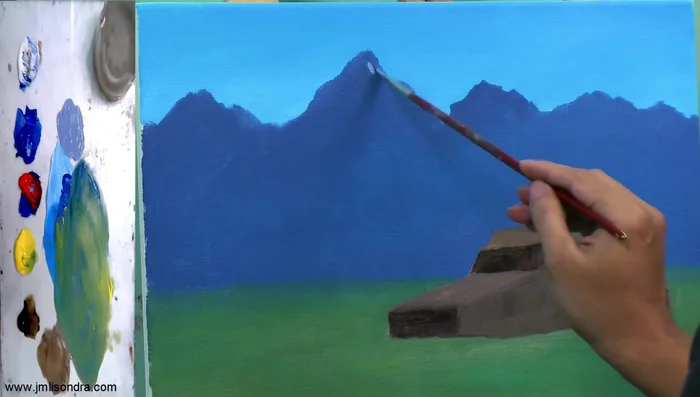
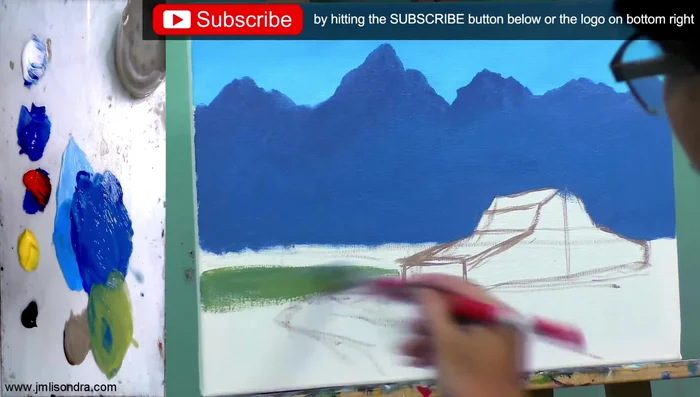
- Painting the mountains with a dark bluish-purple mix (blue, red, and white).
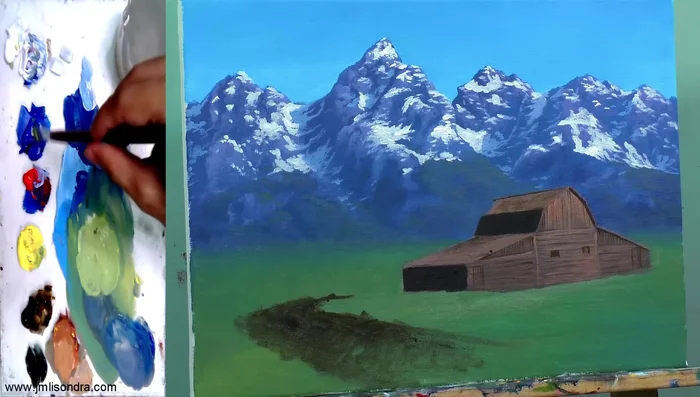
- Adding highlights to the mountain with lighter bluish-purple.
Sky and Background Foreground Elements
- Painting the field/grassy field with yellow and a little bit of blue and water.
Foreground Elements Barn Base
- Creating the barn's darker sketch using Raw Umber.
Barn Base Snow Application
- Adding snow using pure white paint with small, controlled strokes.
Snow Application Barn Detailing
- Adding details and shadows to the barn using Raw Umber and blue.
Barn Detailing Field Detailing
- Adding details to the field with a mix of yellow, blue, and white for texture.
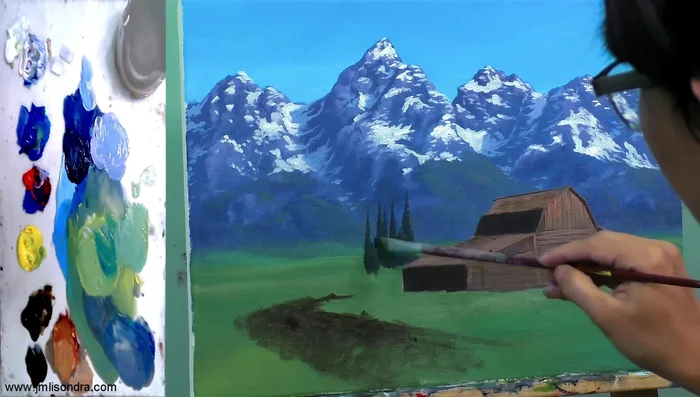
Field Detailing Adding Trees
- Adding pine trees using a mix of green tones (blue, red, yellow, raw umber).
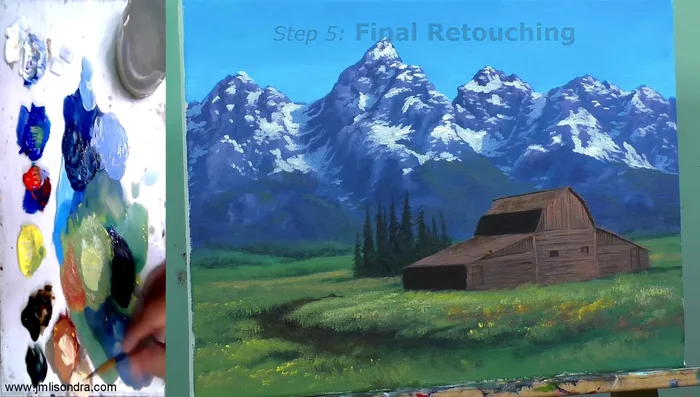
Adding Trees Final Touches and Highlights
- Adding final details and highlights to the entire painting.
Final Touches and Highlights


Read more: 7 Top Paint Color Trends for 2024: A Complete Guide with Free Downloadable Resource
Tips
- Don't overdo the paint application; work in groups of strokes.
- Use water to thin the paints and make blending easier.
- Use the light source to determine where to place highlights and shadows.
- Don't use black; mix Raw Umber with other colors for dark tones.
- Use the tapping technique with a bristle brush to create textures.