Origami, the ancient Japanese art of paper folding, offers a delightful blend of creativity and precision. From intricate cranes to whimsical animals, the possibilities are seemingly endless, and even beginners can achieve impressive results with a little patience. Today, we'll be tackling a particularly fun and engaging project: the jumping frog! This charming little amphibian isn't just a pretty paper creation; with a clever flick of the wrist, it can actually leap! Its simple design makes it a perfect project for children and adults alike, allowing everyone to experience the satisfying accomplishment of creating something delightful from a single sheet of paper.
This easy-to-follow guide provides clear, step-by-step instructions and accompanying diagrams, ensuring you'll soon be hopping with joy over your own origami masterpiece. Get ready to unleash your inner paper-folding ninja – let's begin creating your very own jumping frog!
Preparation and Safety Guidelines
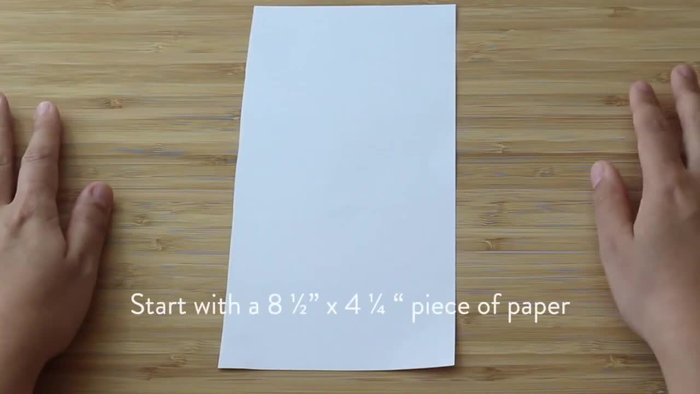
- Square piece of paper
- Use sharp, clean scissors to avoid injury. Adult supervision is recommended, especially for younger children.
- Be mindful of where you're jumping the frog. Avoid fragile surfaces or areas where it could cause damage or harm.
- Avoid using paper with sharp edges or corners that could be hazardous after folding.
Step-by-Step Instructions
Creating the Base
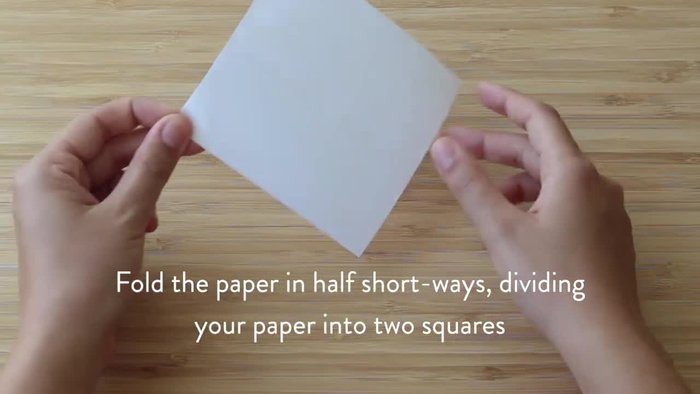
- Fold the paper in half, aligning the corners, creating a crease.
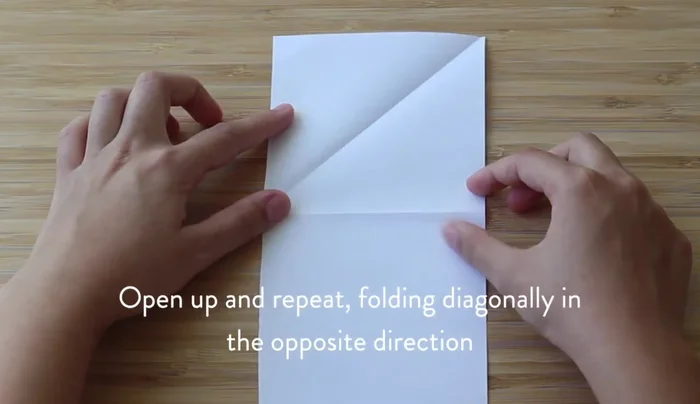
- Open the paper and fold it diagonally in the top section.
- Open and fold it diagonally in the other direction to create an X.
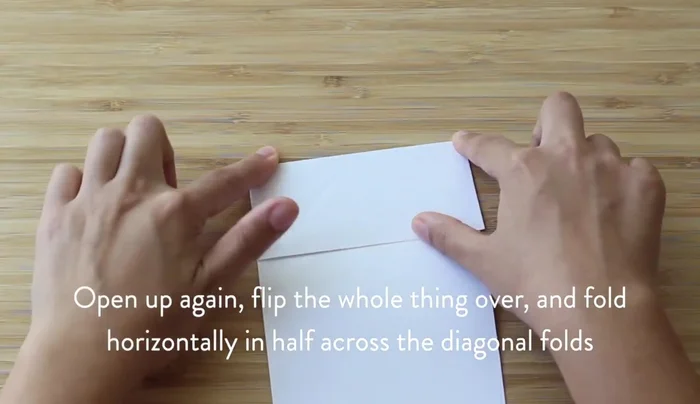
- Fold the paper in half horizontally, then open it to reveal a horizontal line through the X.

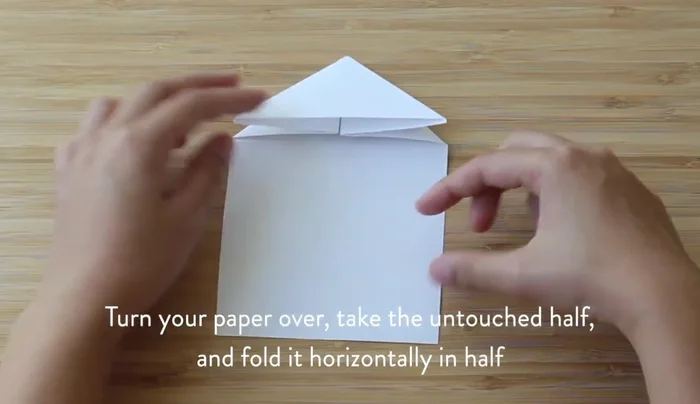
Creating the Base - Fold the bottom half of the paper in half horizontally.
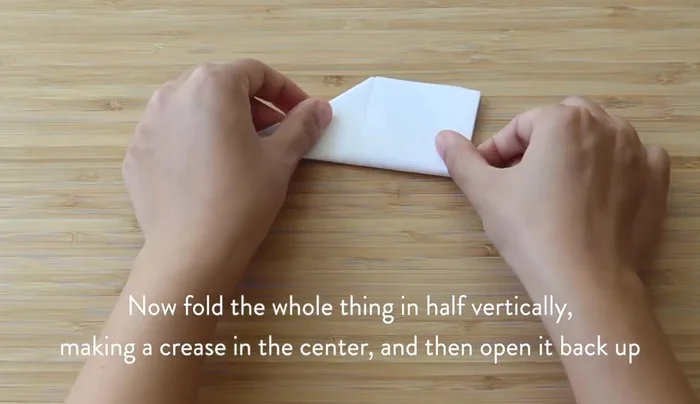
- Find the vertical center by folding the paper in half vertically, then open it.
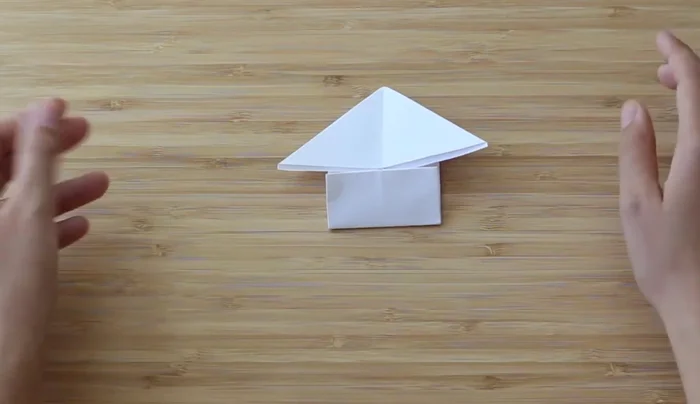
Creating the Base Forming the Body
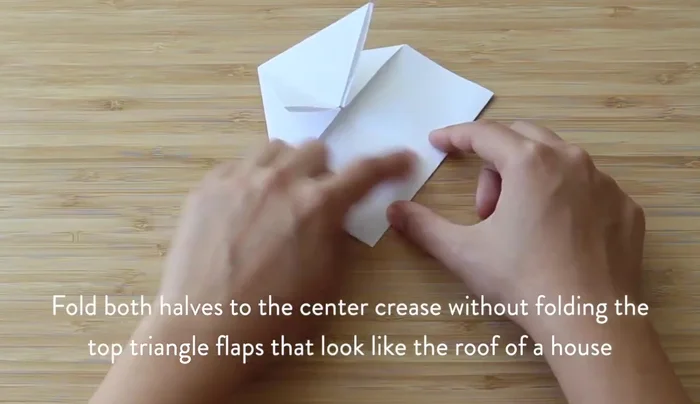
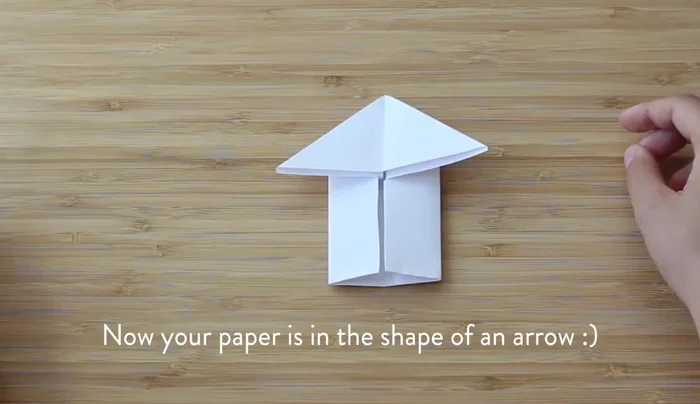
- Bring the bottom edge of the house shape to the center vertical line on both sides.
- Fold the stem of the arrow shape in half to shorten it.
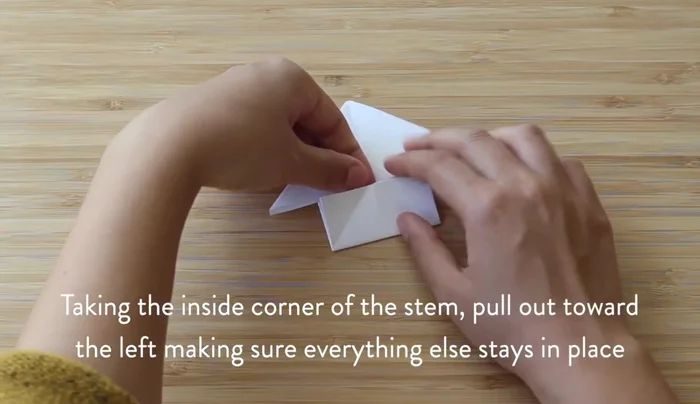
Forming the Body Shaping the Legs
- Fold the two sides of the stem down into small right triangles, then unfold.
- Pull the inside corner outward to the side and crease it down on both sides to form a sailboat shape.
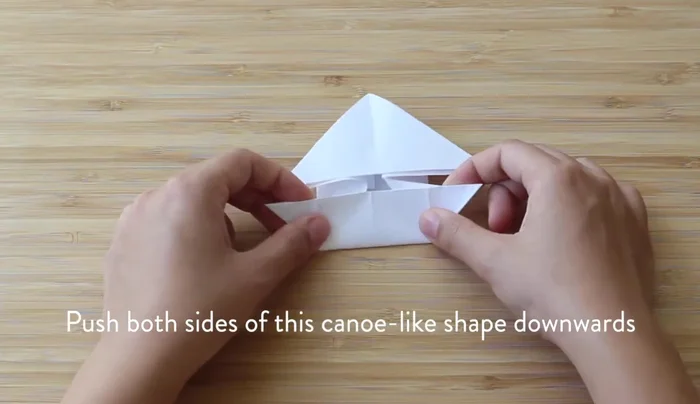
- Push down the two sides of the sailboat to form the frog's legs.
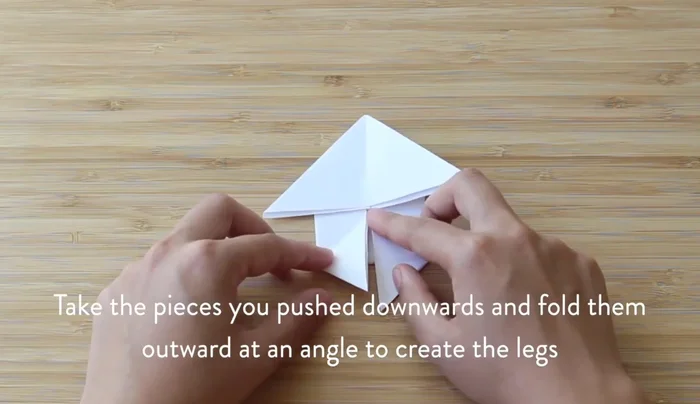
- Make the legs skinnier by folding them at an angle outward.
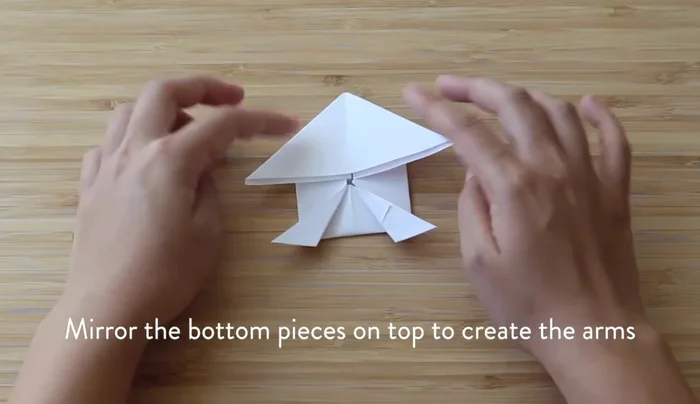
Shaping the Legs Adding the Arms
- Create the arms similarly to the legs, folding them up and outward.
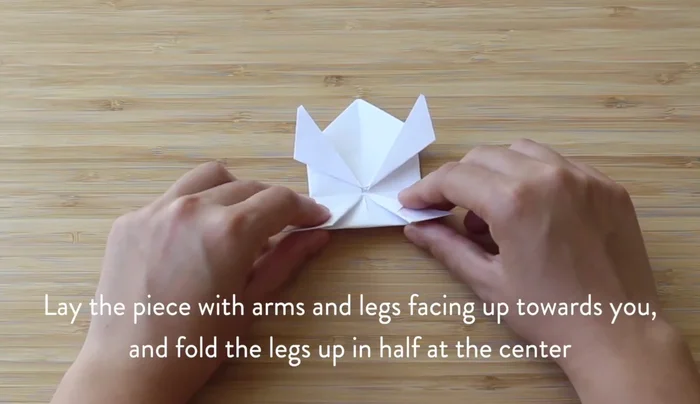
Adding the Arms Final Touches
- Fold the bottom half of the frog in half at the belly button.
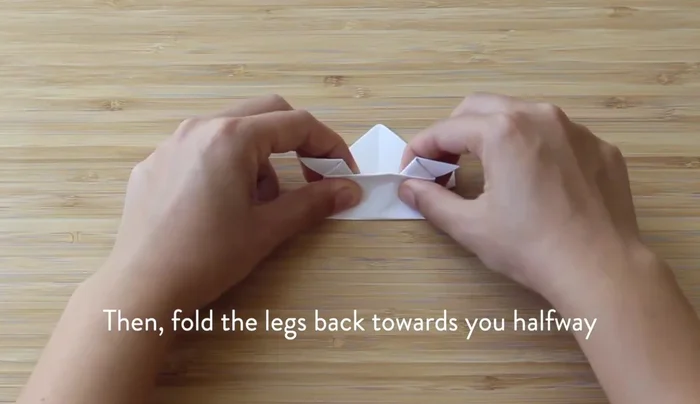
- Fold the legs backwards like an accordion, creating a crease.
Final Touches
Read more: Easy Origami Paper Box Tutorial: Step-by-Step Guide
Tips
- Make nice creases by pushing firmly.
- The last crease is the most important one.