Lighthouses, with their steadfast strength and evocative beauty, have captivated artists and onlookers for centuries. Their iconic silhouette, often perched dramatically against a turbulent sea, offers a compelling subject ripe for creative interpretation. This tutorial explores a vibrant and exciting way to capture that essence – through a mixed media lighthouse painting. We'll delve into the fascinating world of layering textures and colors, combining acrylics, inks, and possibly even collage elements to build depth and dimension in your artwork. Forget the limitations of a single medium; embrace the expressive possibilities of combining several!
Prepare to embark on a creative journey as we guide you through the process of creating your own stunning mixed media lighthouse masterpiece. This step-by-step guide will walk you through each stage, from initial sketching and background creation to the final details that bring your lighthouse to life. Let's get started and illuminate your artistic potential!
Preparation and Safety Guidelines
- Fabriano Artistico Rough 100% cotton paper
- White Knight pocket watercolor set
- Number 6, 12 round brushes
- 3/4 inch flat brush
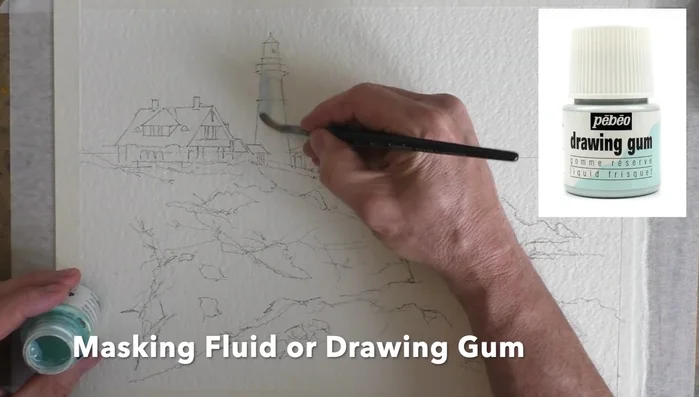
- Masking fluid
- Table salt
- Cling film/Saran wrap
- Sepia, Burnt Sienna, Cerulean Blue, Ultramarine Blue, Sap Green, Payne's Grey
- Tissue
- Beige pastel pencil
- Cheap pastel set
- Daler Rowney acrylic ink
- White gouache
- Always work in a well-ventilated area when using paints and mediums, as some fumes can be harmful.
- Protect your work surface with a drop cloth or newspaper to prevent damage from spills and paint.
- Dispose of used paints and materials responsibly according to local regulations. Never pour paints down the drain.
Step-by-Step Instructions
Prepare the Canvas
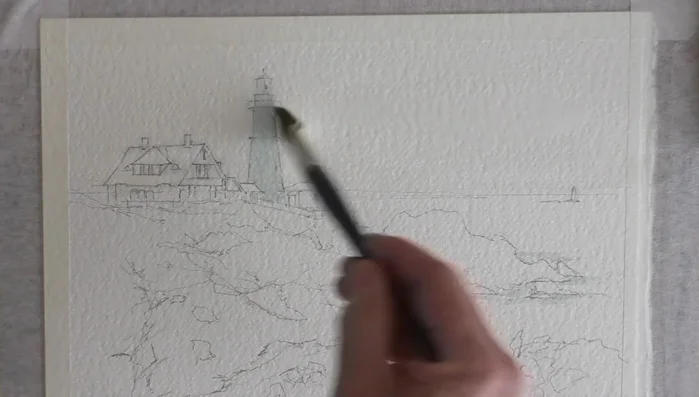
- Mask out the lighthouse and breaking waves.

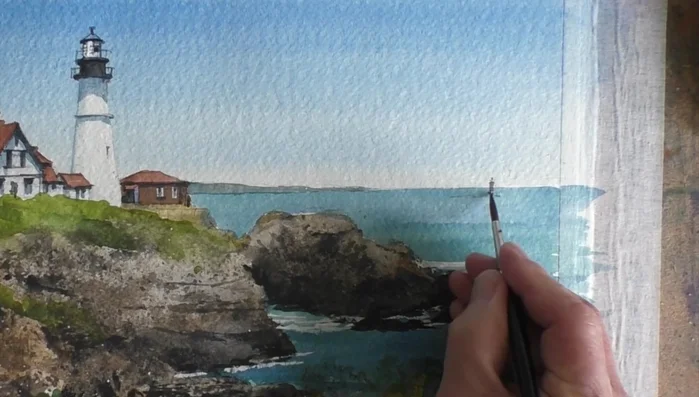
Prepare the Canvas Paint the Sky and Sea
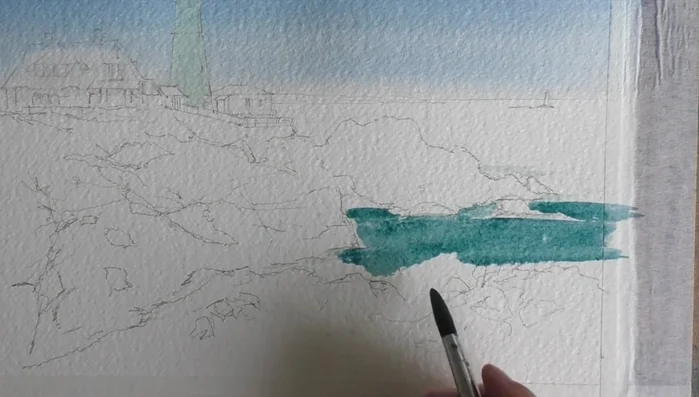
- Wet the sky with clean water and paint a graduated wash using Cerulean and Ultramarine blue.
- Paint the sea using the same sky mix with added Sap Green, dropping in wet-on-wet Ultramarine blue.
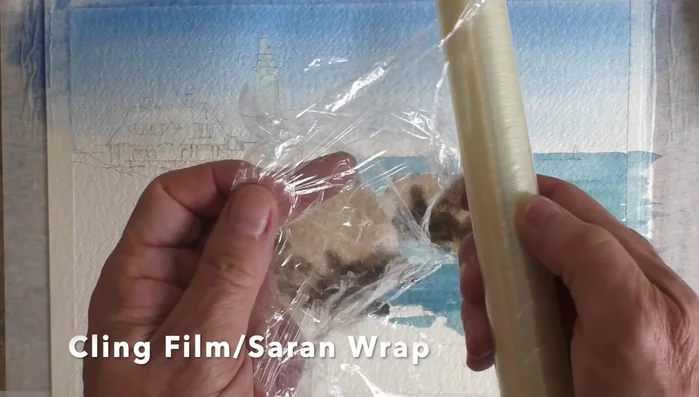
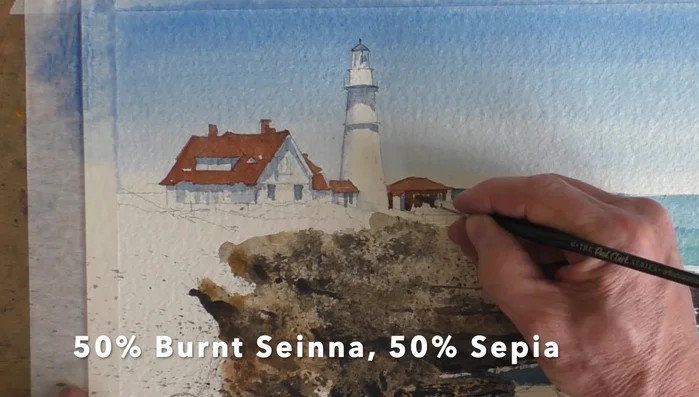
Paint the Sky and Sea Create Rock Texture
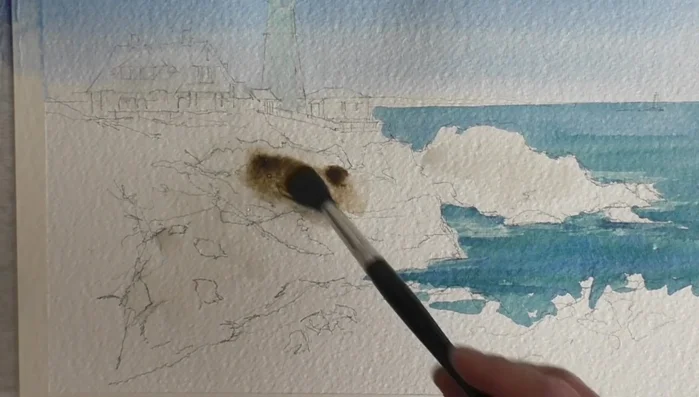
- Add texture to the rocks with wet washes of Sepia and Burnt Sienna, sprinkling in table salt and using cling film for additional texture.
- Use dry brushing with Sepia to create darker values in the rocks.
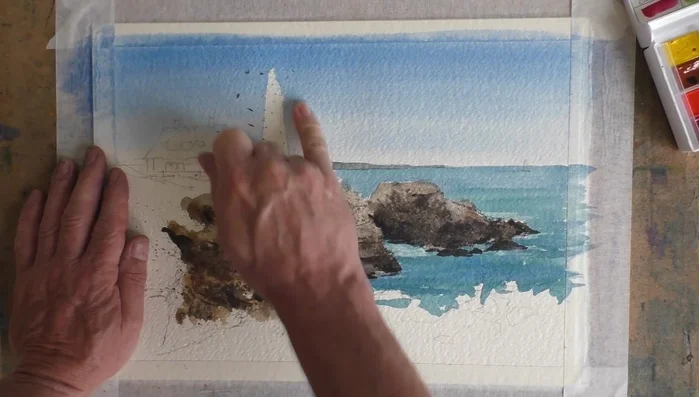
Create Rock Texture Paint Background Elements
- Paint the distant land with a mix of sea color and Payne's Grey.
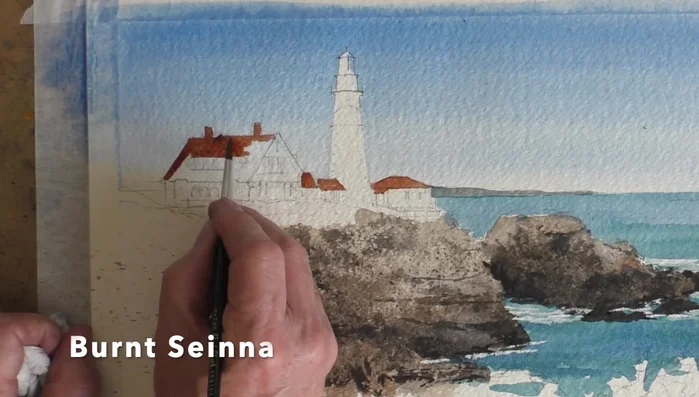
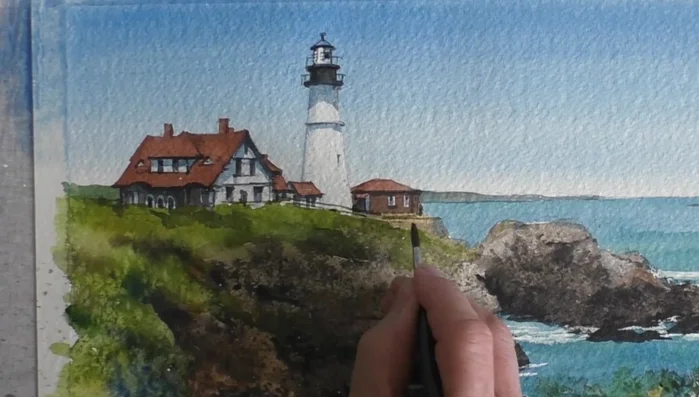
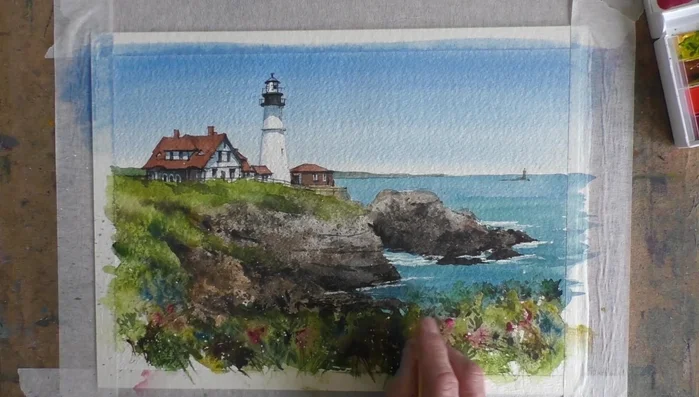
Paint Background Elements Paint the Lighthouse
- Remove masking fluid and add watery color to the lighthouse.
- Paint the lighthouse roof and buildings using Burnt Sienna, then add strong shadows with a 50/50 mix of Ultramarine and Payne's Grey.
- Add a soft shadow to the lighthouse and subtle details with Payne's Grey.
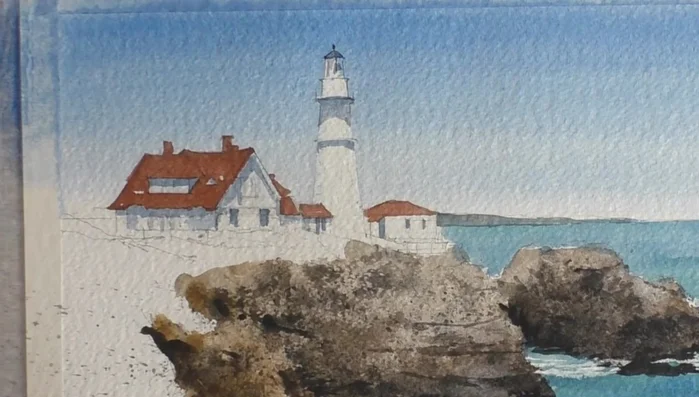
Paint the Lighthouse Paint the Outbuildings
- Paint the wooden building with Burnt Sienna and Sepia.
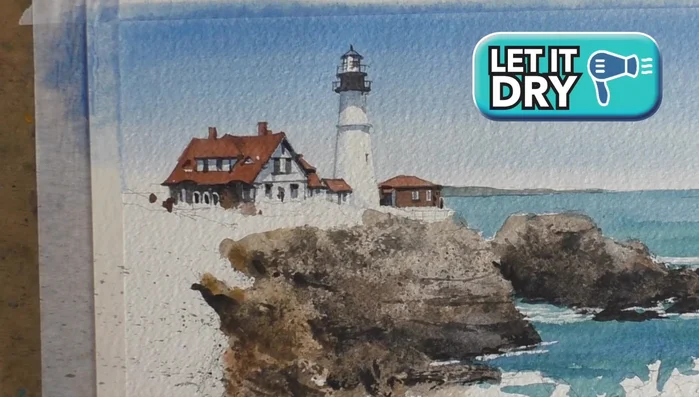
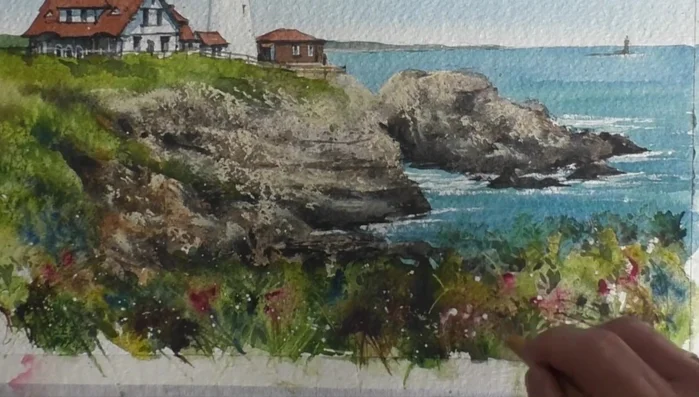
Paint the Outbuildings Dry and Add Foliage
- Let the painting dry completely.
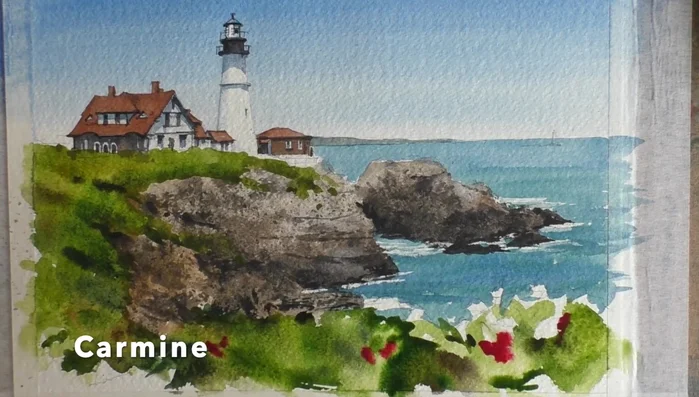
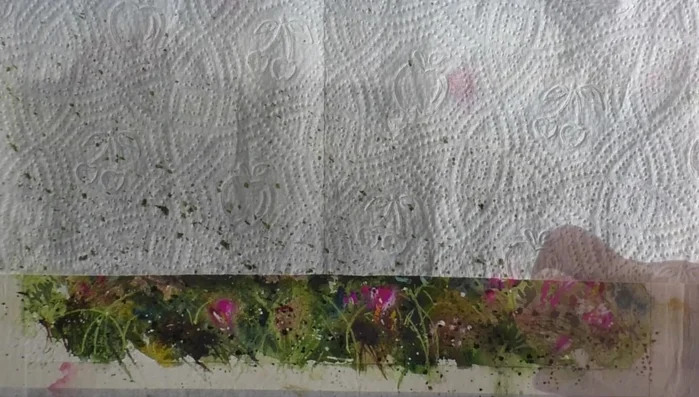
- Add loose washes of Sap Green, Sepia, Burnt Sienna, and clean water, using backruns and creating a messy effect.
- Add Carmine Red while still wet, sprinkle with salt, and soften edges with clean water.
- Use the brush end to score and scratch into the paper for dark lines.
Dry and Add Foliage - Add a bluish mix and suggest leafy details.
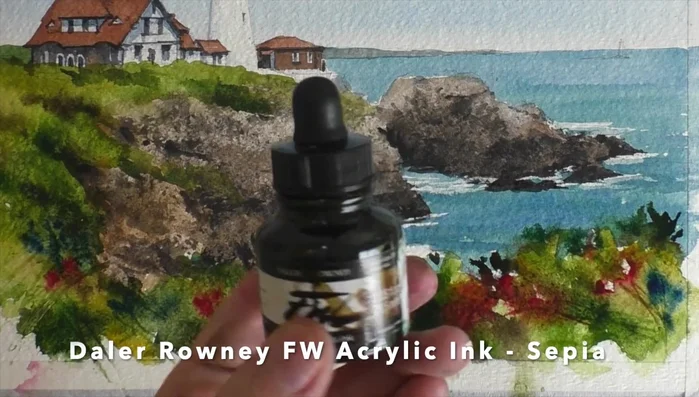
- Use Daler Rowney acrylic ink in the wet wash.
- Scratch in more detail with the brush end and add Raw Sienna.
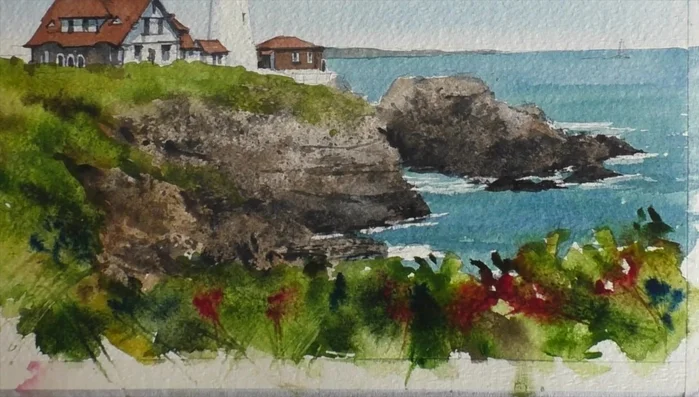
Dry and Add Foliage Add Details and Finishing Touches
- Add detail to the Ram Island Ledge Light Station, leafy details, and white dots with white gouache.
- Add the fence with Sepia.
- Scratch in sparkles in the water with a magic scalpel.
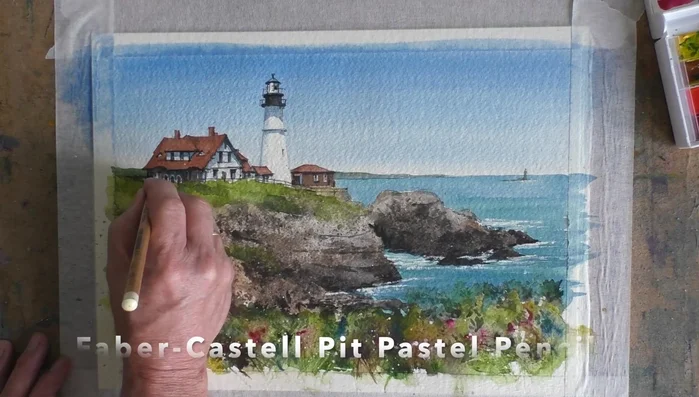
- Use a beige pastel pencil for light sections of the fence and beach.
Add Details and Finishing Touches - Use pastels for the light colored rocks, blending with fingers for soft edges.
- Add stems and grasses with a yellow-green pastel pencil.
- Add flowers with pink, white, and yellow pastels.
- Add final touches and splattering with dark green.
Add Details and Finishing Touches


Read more: 7 Top Paint Color Trends for 2024: A Complete Guide with Free Downloadable Resource
Tips
- How to label mixed media paintings for exhibitions.
- Using salt and cling film for texture.
- White Knight paints review – highly pigmented, excellent blending.