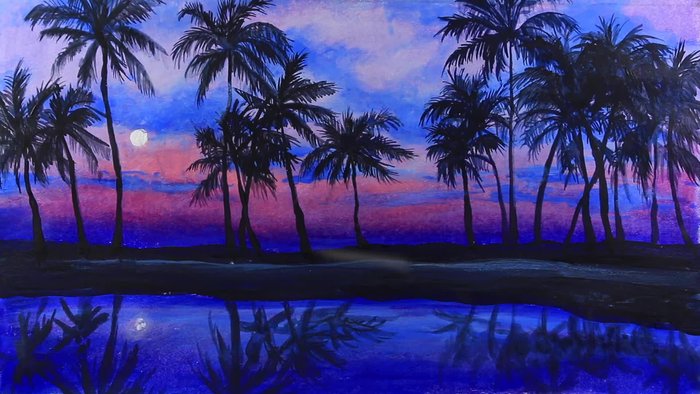
The allure of palm trees, swaying gently in the tropical breeze, has captivated artists for centuries. Their distinctive silhouettes, vibrant greens, and the play of light and shadow offer endless opportunities for expressive landscape painting. Whether you're a seasoned artist seeking to refine your technique or a beginner eager to explore the beauty of nature, mastering the art of depicting these iconic plants is a rewarding journey. From capturing the subtle textures of their fronds to accurately rendering the dramatic interplay of light and shadow on their trunks, this guide will unlock the secrets to creating truly vibrant and lifelike palm tree scenes.
This step-by-step guide will lead you through the essential techniques and considerations, from initial sketching and color mixing to the final details that bring your painting to life. Prepare to transform your canvas into a breathtaking slice of paradise, filled with the swaying grace and vibrant hues of majestic palm trees. Let's begin!
Preparation and Safety Guidelines
- Prismacolor color pencils
- Acrylic paints
- Fine detail brush
- Paper
- Always use appropriate ventilation when working with oil paints and solvents. Oil paint fumes can be harmful if inhaled.
- Protect your skin and eyes. Wear gloves and eye protection when handling paints and solvents. Clean up spills immediately.
- Dispose of painting materials responsibly. Oil paints, solvents, and brushes should be disposed of according to local regulations to prevent environmental damage.
Step-by-Step Instructions
Sketching the Scene
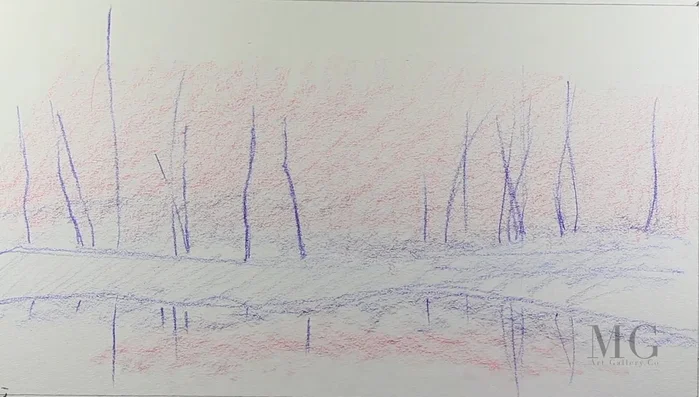
- Sketching the landscape elements (palm trees, land, reflection). Keep details minimal; they'll be covered by color later.

Sketching the Scene Establishing the Sky Base
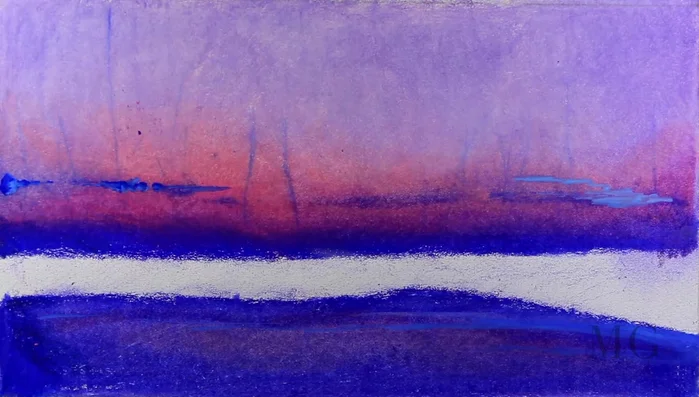
- Laying down the undertone for the sky using alternating colors (Pink, Parma Violet, Process Red) to create a background. Apply thin layers with minimal pressure.
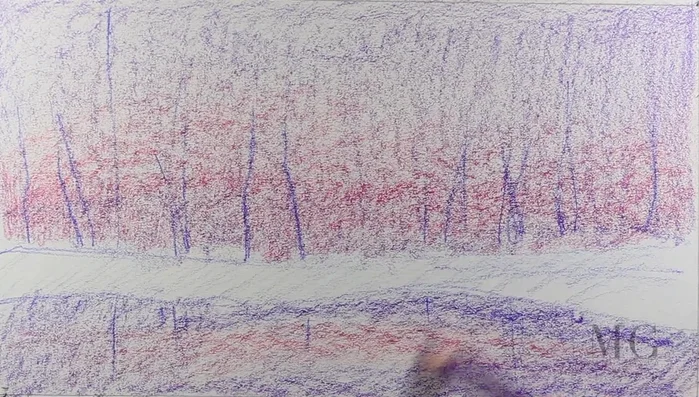
- Defining the horizon line with ultramarine, working on both sky and reflection. Increase pressure for a more defined look. Alternate blues with pink and layer with Mulberry for a soft transition.
- Sketching clouds. Minimal detail is needed here; it’s a preliminary step. This layer prepares the base for a beautiful sky.
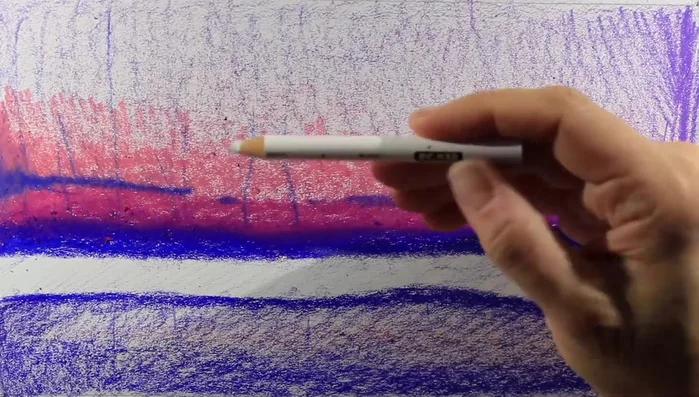
- Adding base colors for sky with pink, violet, and white to create soft transitions between colors. This serves as a protective layer for the paper and adds depth.
Establishing the Sky Base Painting and Refining the Sky
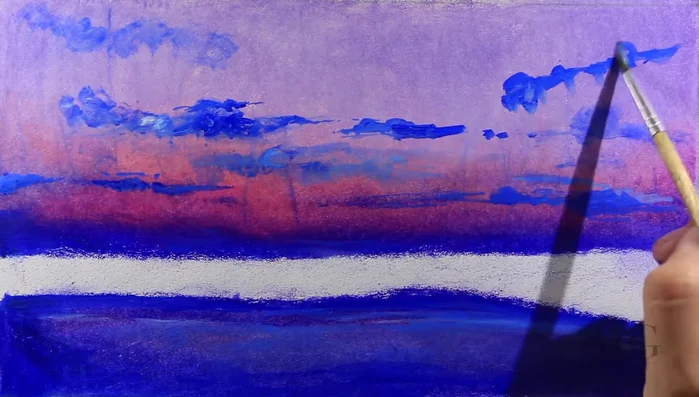
- Painting the clouds using transparent layering technique. Multiple layers of cobalt blue and titanium white are applied to achieve puffiness and texture. Avoid specific shapes; let the clouds be unique.
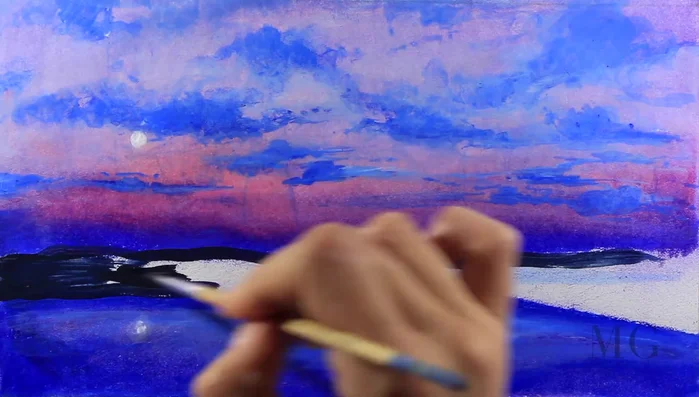
- Adjusting and touch-up of clouds. Cover unwanted areas with paint, and blend to achieve a natural look. Apply highlights where light hits the clouds.
Painting and Refining the Sky Painting the Land
- Painting the land by mixing cobalt blue and black. Avoid using black alone; it can be too strong. The mixture creates depth and shadows.
Painting the Land Painting the Palm Trees and Reflections
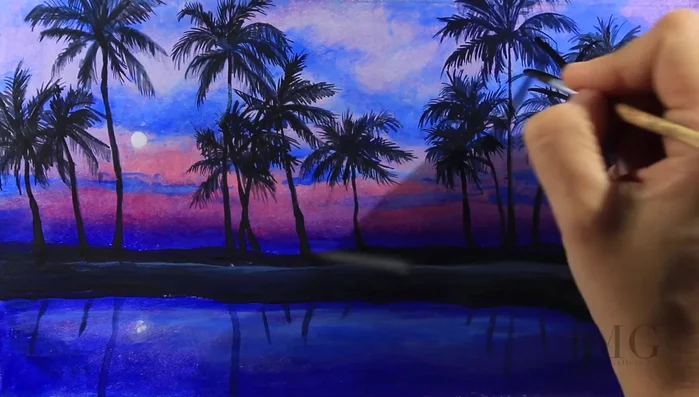
- Painting the palm trees. Using the initial sketch as a guide, avoid straight lines for the trunks to create dynamics. Group trees for storytelling. The crown should have short and long branches, as well as leaves of varying lengths for a natural look.
- Painting the reflection of the palm trees. Keep it somewhat unfinished and distorted to create a natural look. Use similar colors to the trees but with more transparency and fluidity.
Painting the Palm Trees and Reflections


Read more: 7 Top Paint Color Trends for 2024: A Complete Guide with Free Downloadable Resource
Tips
- Use transparent layering for painting clouds to achieve puffiness and texture.
- For palm trees, avoid straight lines for the trunks and use varying lengths for branches and leaves to achieve a natural look.
- Mix colors instead of using pure black for deeper, more natural shades.
- Keep the reflection of the palm trees slightly distorted and unfinished for a natural feel.