Still life paintings, especially those featuring vibrant fruit, offer a fantastic opportunity to explore color, light, and shadow in a manageable setting. A bowl overflowing with juicy oranges, glistening grapes, and perhaps a blushing apple presents a feast for the eyes – and a perfect subject for your next artistic endeavor. Learning to paint such a scene can be surprisingly accessible, even for absolute beginners, allowing you to develop fundamental painting techniques in a fun and rewarding way.
This guide will demystify the process of creating a stunning still life painting, leading you through each step with clear instructions and helpful tips. Forget intimidating canvases and complex techniques; we'll break down the creation of a vibrant fruit bowl painting into easily manageable steps, so you can confidently bring this colorful scene to life on your own canvas. Let's get started with our step-by-step journey into the world of fruit bowl painting!
Preparation and Safety Guidelines
- Primary colors (blue, red, yellow), black, white paint
- Paper or canvas
- Paper towel
- Cup of water
- Flat brush
- Round brush
- Pencil
- Plate
- Always work in a well-ventilated area. Acrylic paints and mediums can release fumes.
- Cover your work surface to protect it from paint spills. Use newspaper or a drop cloth.
- Wash brushes thoroughly with soap and water after use to prevent paint from hardening and ruining them.
Step-by-Step Instructions
Sketching the Fruit Bowl
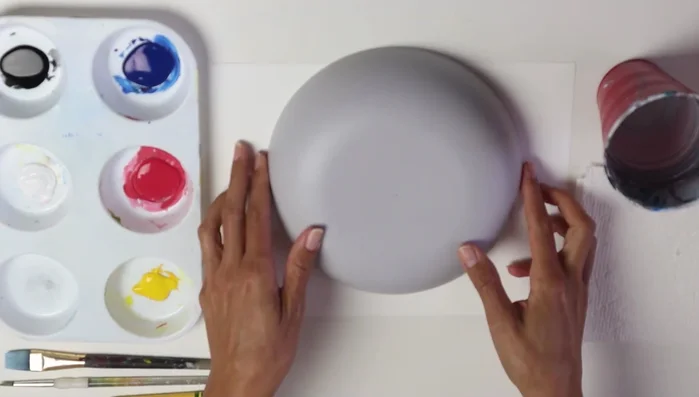
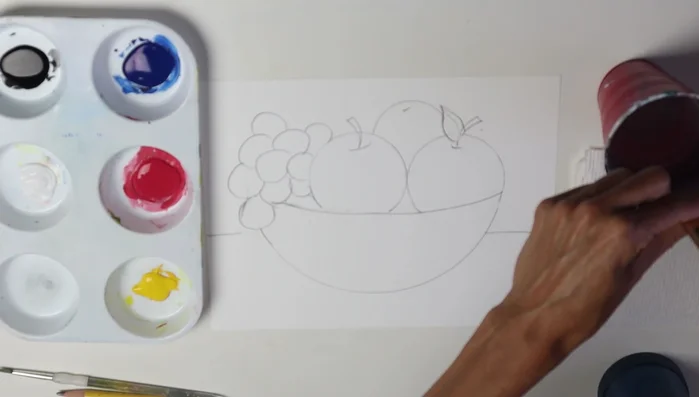
- Draw a plate in the middle of your paper, slightly above the center, showing only half of it.
- Draw a horizontal line slightly below the center of the plate.
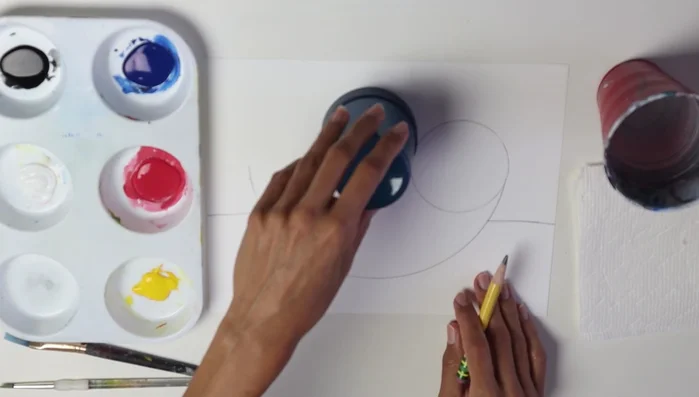
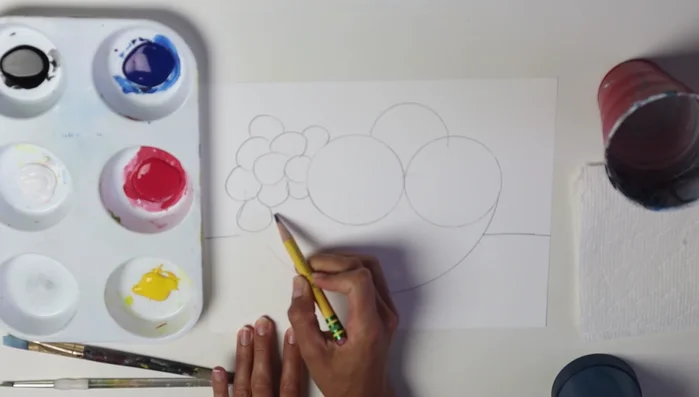
- Draw outlines of cups of various sizes to represent different fruits (apples, oranges, grapes). Overlap the shapes for a natural look.
- Draw a line across to represent the top of the bowl, overlapping with fruits. Erase any lines under the bowl line.

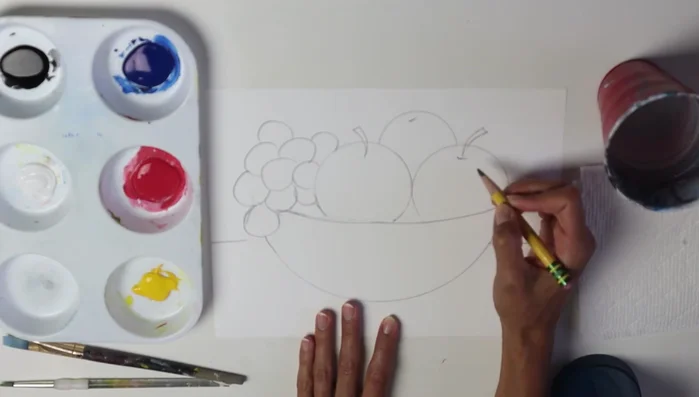
Sketching the Fruit Bowl - Add details like leaves and stems to your fruits.
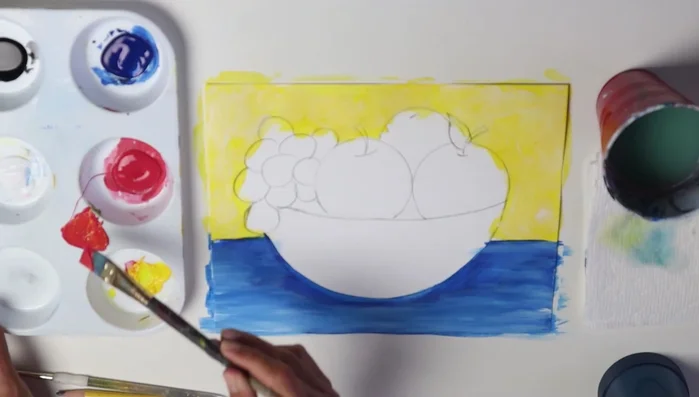
Sketching the Fruit Bowl Painting the Background and Table
- Paint the background with your chosen color (yellow in this example). Add a touch of white in certain areas for texture.
- Paint the table with your chosen color (blue in this example). Use side-to-side strokes. Add highlights of white to the edges of the table to create a shadow effect.
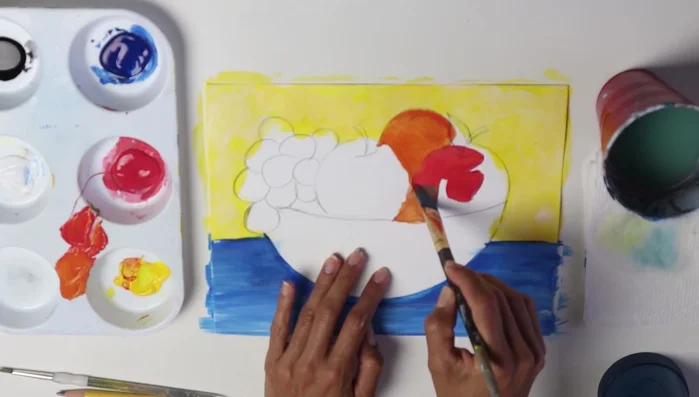
Painting the Background and Table Painting the Fruits
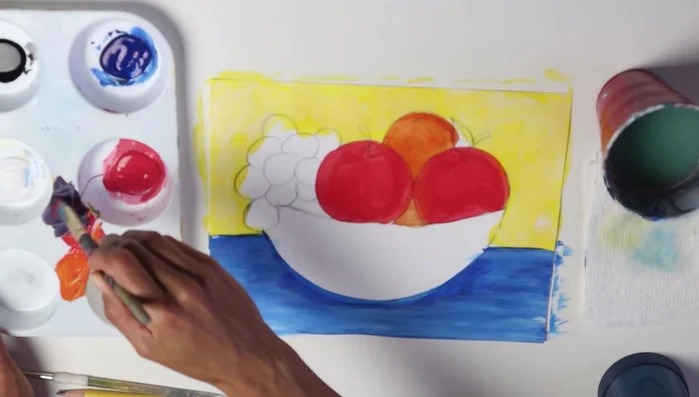
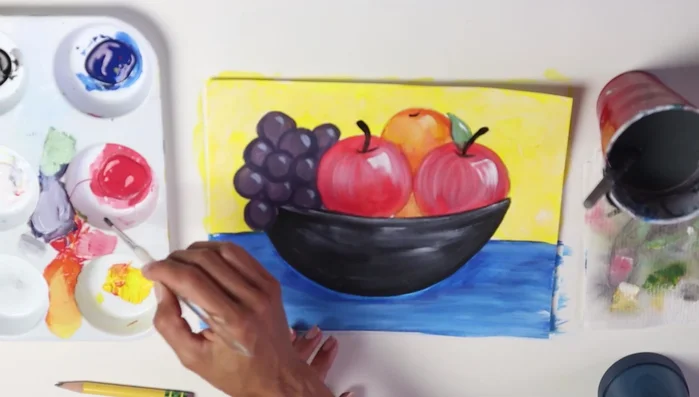
- Mix red and yellow to create orange and paint the oranges.
- Paint the apples with red.
- Mix red and blue to create purple and paint the grapes. Slightly overlap the grapes.
- Mix yellow and blue to create green and paint the leaves.
Painting the Fruits Painting the Bowl
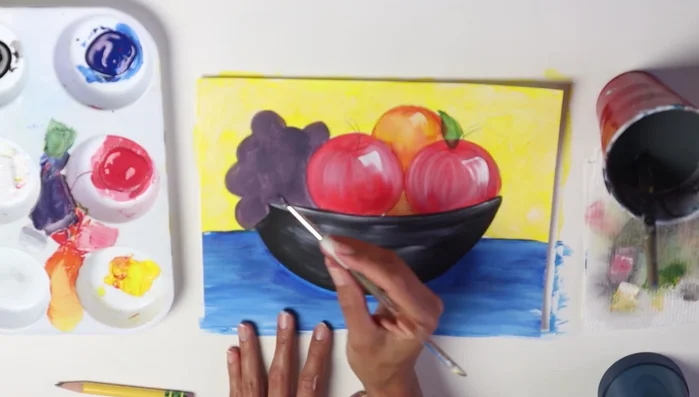
- Paint the bowl black. Outline it first to avoid going outside the lines.
Painting the Bowl Adding Highlights and Shadows
- Highlight the fruits with lighter shades of their respective colors. Add white highlights to create a glossy effect.
- Add darker shades of purple to define the individual grapes.
- Add stems to the fruits with black paint.
- Darken areas between the fruits to enhance depth. Add a shadow under the bowl with a darker shade of blue to ground it.
Adding Highlights and Shadows


Read more: 7 Top Paint Color Trends for 2024: A Complete Guide with Free Downloadable Resource
Tips
- Don't be afraid to overlap your fruit drawings for a more realistic look.
- Add more yellow than red when mixing orange.
- Work quickly when blending colors while they are still wet.
- Outline shapes before filling them in to maintain clean edges.
- Use lighter shades of colors to highlight the fruits, creating a glossy appearance.