Fluid acrylic pouring is a captivating art technique that allows for the creation of stunning, unpredictable abstract landscapes. Imagine vibrant colors swirling and blending organically, creating a mesmerizing tapestry of textures and forms – a miniature world born from the interplay of paint and gravity. This expressive method, far from rigid instruction, embraces chance and spontaneity, leading to uniquely beautiful and wholly original pieces. The fluidity of the acrylics lends itself perfectly to mimicking natural landscapes, from rolling hills and tranquil lakes to stormy seas and fiery sunsets, all contained within the confines of your canvas.
This article will guide you through a step-by-step process of creating your own vibrant abstract landscape using the fluid acrylic pouring technique. We'll delve into the essential materials, explore different pouring methods, and offer tips and tricks to achieve the desired effect, transforming your canvas into a breathtaking, one-of-a-kind work of art.
Preparation and Safety Guidelines
- 60x80cm canvas
- Acrylic paints (Jenkins green, Pho green, turquoise, Payne's gray, iridescent gold, white)
- Water
- Brushes
- Always work in a well-ventilated area. Acrylic pouring involves using mediums and paints that release fumes.
- Wear gloves and eye protection to prevent skin and eye irritation from the paints and mediums.
- Protect your work surface with a drop cloth or plastic sheeting; acrylic pour paint is very difficult to clean up once it's dried.
Step-by-Step Instructions
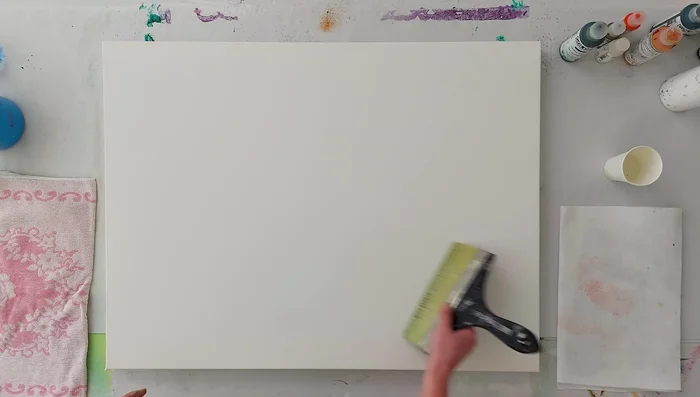
Preparing the Canvas
- Wet the canvas to dilute colors and create lighter shades.

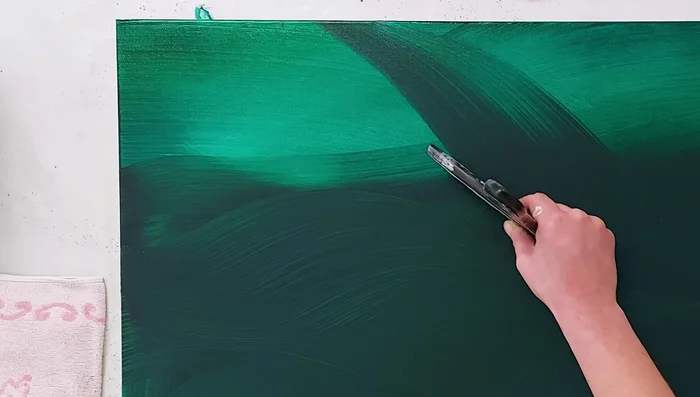
Preparing the Canvas Creating the Dark Base
- Pour and blend dark base colors (Jenkins green, Pho green, turquoise, Payne's gray) onto the wet canvas. Build layers to achieve desired darkness.
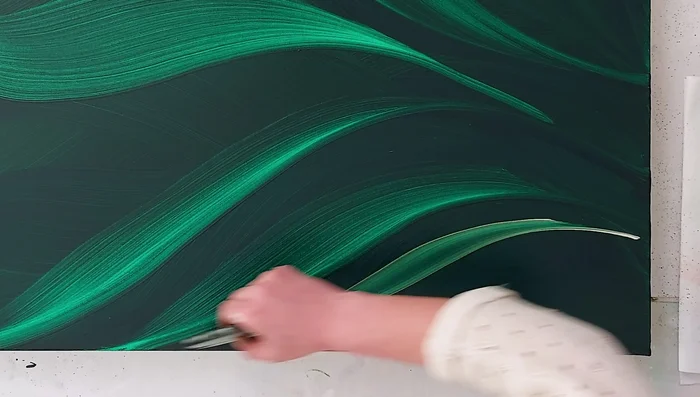
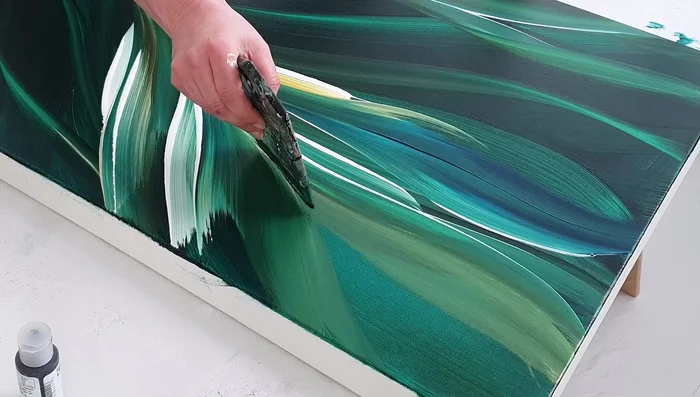
Creating the Dark Base Shaping with Brushstrokes
- Create brush strokes to shape the composition and add highlights by pressing harder for more intense color.
Shaping with Brushstrokes Introducing Iridescent Colors
- Introduce iridescent colors (iridescent gold) while the canvas is still wet to allow for blending and flow.
Introducing Iridescent Colors Adding Highlights and Blending
- Add white paint to create highlights and further blend colors.
Intuitive Refinement and Final Touches
- Continue blending and adding colors intuitively, adjusting and refining the composition as you go. This is a fluid and improvisational process.
Intuitive Refinement and Final Touches
Read more: 7 Top Paint Color Trends for 2024: A Complete Guide with Free Downloadable Resource
Tips
- Wetting the canvas beforehand allows for better color blending and lighter shades.
- Building layers with dark colors is necessary to achieve a deep, rich background.
- Pressing harder with the brush creates highlights and intensifies color.
- Work with iridescent colors while the canvas is still wet for optimal blending.
- Embrace a fluid, intuitive approach to allow the painting to evolve organically.