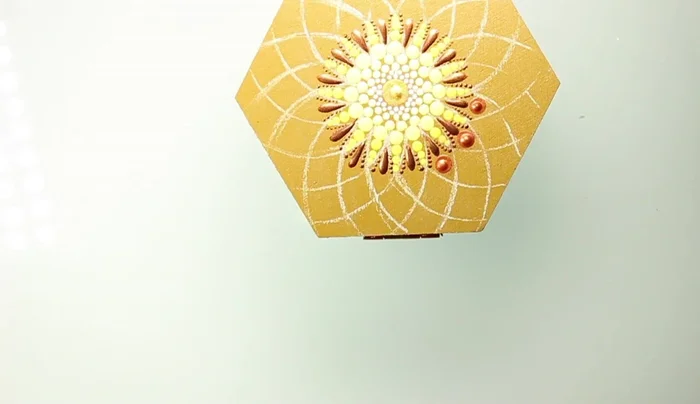
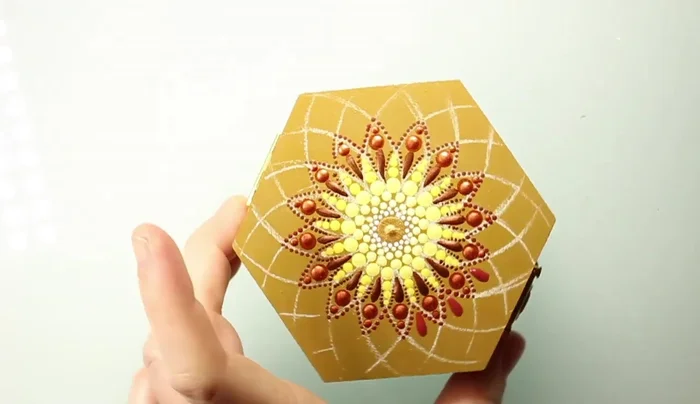
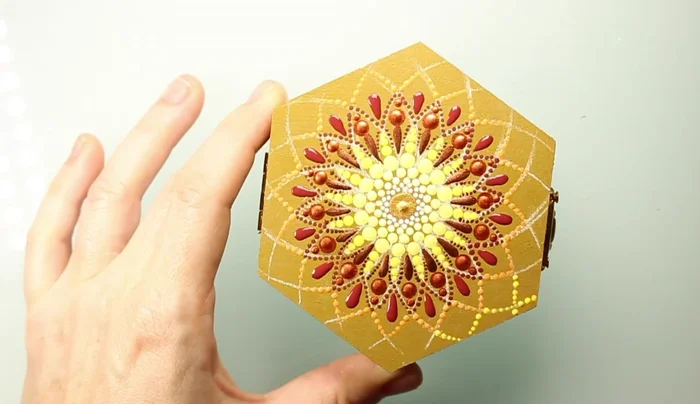
Unleash your inner artist and prepare to be captivated by the vibrant beauty of the Happy Sunshine Hexagon Box! This stunning mandala design, created using the simple yet effective dotting technique, is perfect for beginners and experienced crafters alike. Imagine a cheerful hexagon bursting with sunshine-yellow hues and intricate patterns, radiating positive energy and transforming a simple box into a piece of personalized art. The satisfying process of carefully placing each dot will leave you feeling relaxed and creatively fulfilled. This project is not only visually impressive but also surprisingly therapeutic.
This tutorial will guide you through each step, transforming a plain hexagon box into a joyful masterpiece. Prepare your tools, gather your chosen colours, and let's embark on this creative journey together, learning how to create this cheerful and captivating Happy Sunshine Hexagon Box with a detailed, step-by-step guide.
Preparation and Safety Guidelines
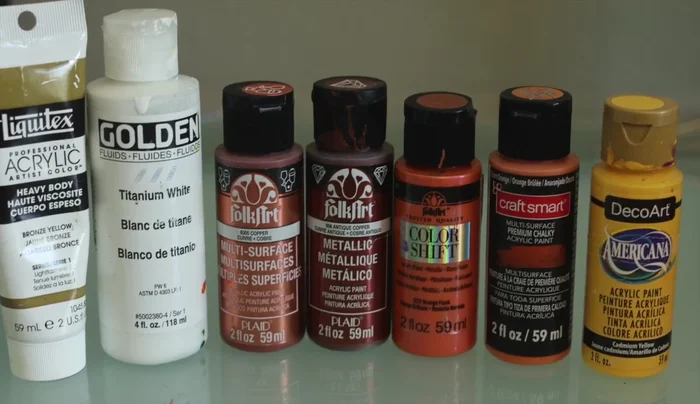
- Acrylic paints
- Hexagon wood box
- Reversible tourist stencil
- Putty
- DecoArt Chalk Finish Medium
- Divider stencil
- Silicon tools (flat and pointed)
- Dotting rod
- Stylus tool
- Brush (optional)
- Varnish
- Always use a well-ventilated area when working with dotting tools and paints to avoid inhaling fumes.
- Protect your work surface with a protective covering like newspaper or a plastic sheet. Acrylic paints can stain.
- Clean your dotting tools thoroughly after each use with water and a mild soap to prevent paint from drying and clogging them.
Step-by-Step Instructions
Prepare the Surface
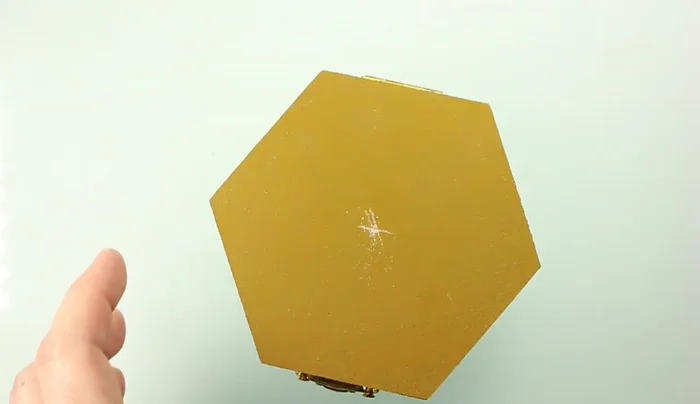
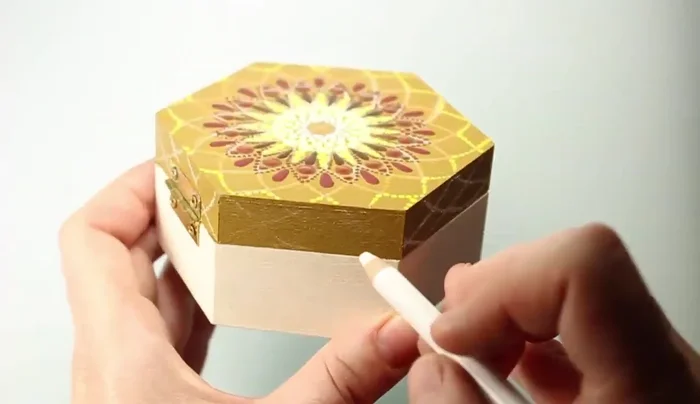
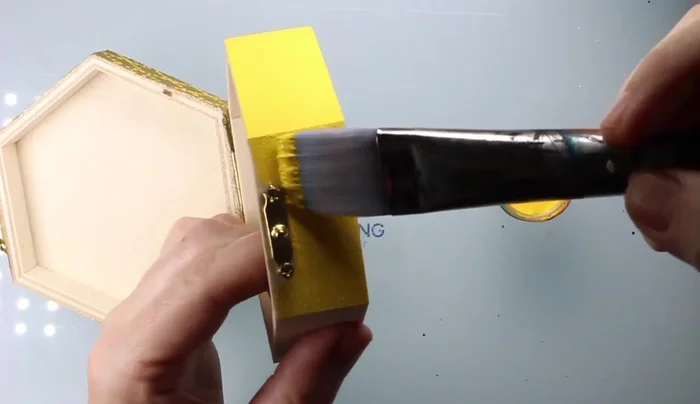
- Prepare the hexagon box top by painting it with ochre acrylic paint.
- Find the center of the hexagon using a ruler and mark a cross.
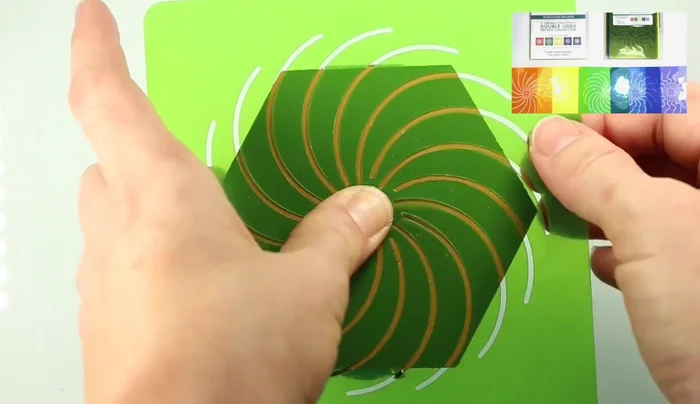
- Use a stencil (e.g., reversible tourist stencil) to create a guide for your mandala.
- If using satin or semi-gloss paint, mix in DecoArt Chalk Finish Medium to create a chalkboard surface for easier drawing.

Prepare the Surface Create the Center Mandala
- Create a small mandala using a seed of life pattern in the center with a divider stencil.
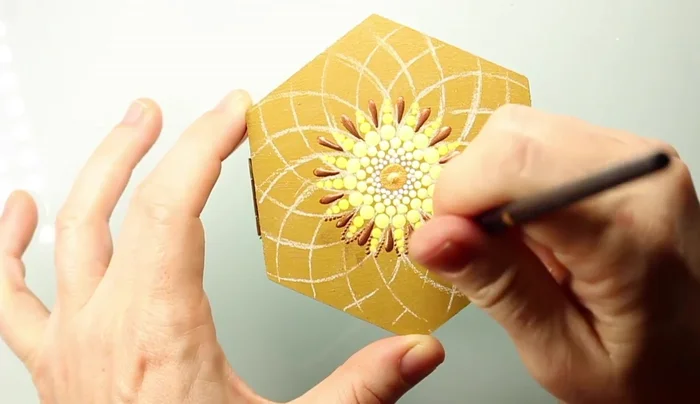
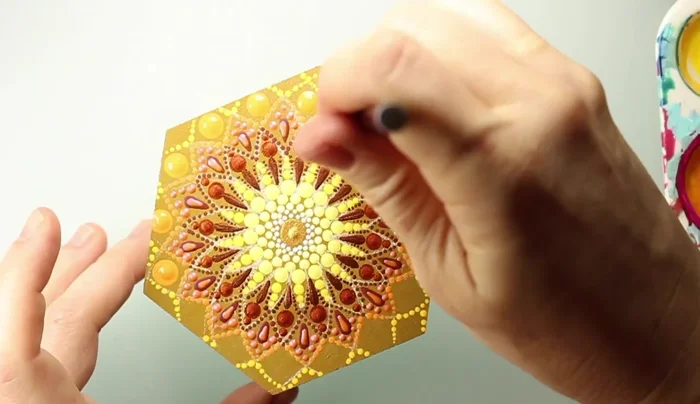
Create the Center Mandala Extend the Mandala with Yellow
- Extend the mandala outward with yellow dots, gradually darkening the color in successive rows.
Add Bronze and Copper Accents
- Use a flat silicone tool to add petal-shaped drops of bronze paint.
- Use a pointed silicone tool to add tiny micro dots along the edge of the yellow dots.
- Add copper dots using a dotting rod in between the petal shapes.
- Add bronze dots with the largest stylus tool at the end of the pointed petals.
Add Bronze and Copper Accents - Go over the ends of the petal shapes with the pointed silicone tool.
Add Bronze and Copper Accents Add Outer Petals and Yellow Transition
- Add more petal-shaped drops using the flat silicone tool, varying paint quantity for different effects.
- Transition to yellow dots towards the edge using a stylus tool.
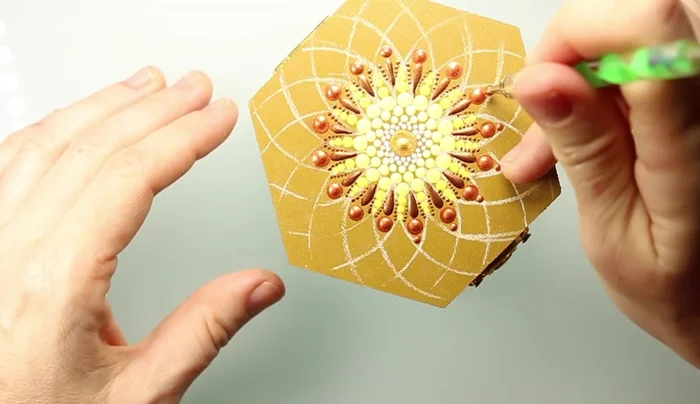
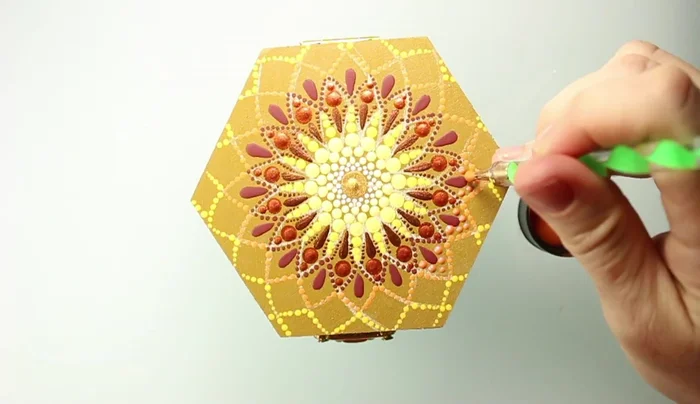
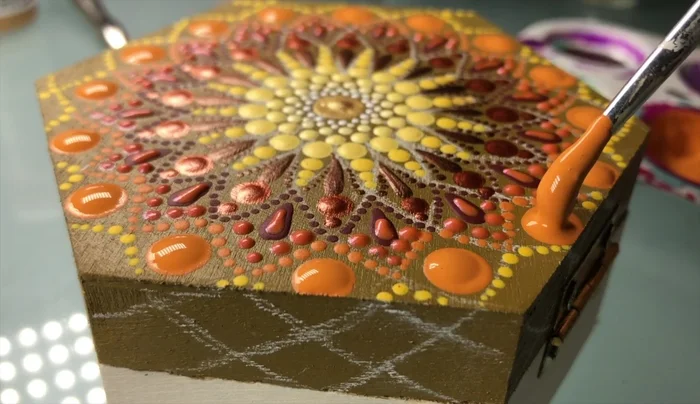
Add Outer Petals and Yellow Transition Add Orange Accents and Details
- Extend the lines along the sides of the box for added detail.
- Add orange color shift paint, walking the dots and filling in petal shapes.
- Use the flat silicone tool to add smaller drop shapes on top of existing ones.
- Add orange dots using a dotting rod that fits in the space between existing shapes.
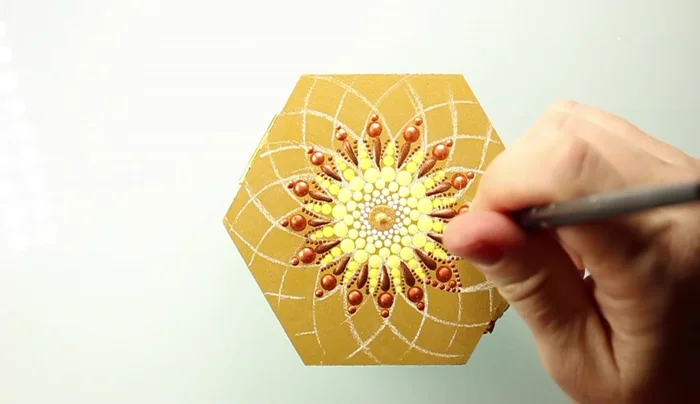
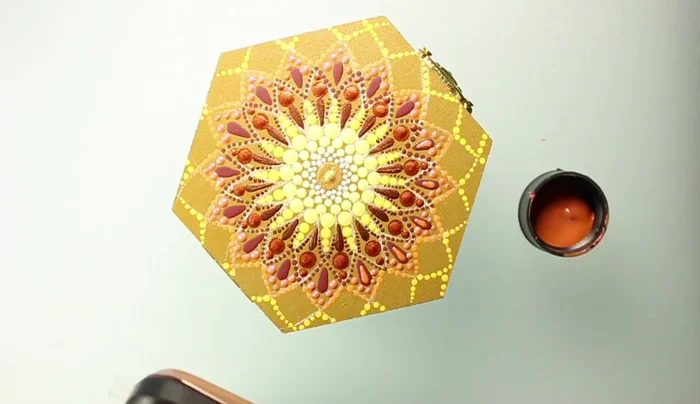
Add Orange Accents and Details Optional Brushwork
- Optionally, use a brush to add perfectly round dots, adding extra paint with a glob if needed.
Optional Brushwork Finishing Touches
- Finish the bottom of the box and seal the top with varnish.
Finishing Touches


Read more: 7 Top Paint Color Trends for 2024: A Complete Guide with Free Downloadable Resource
Tips
- Use opaque paints for your chalk lines to prevent transparency issues.
- Practice different drop shapes with various tools on paper before applying them to your project.
- Sealing the finished project with varnish is crucial for protection and longevity.
- Consider adding extra details such as fabric, velvet, or a smaller mandala inside the box for a unique touch.