Tired of the same old picture frames cluttering your home? Do you crave a unique, handcrafted touch that reflects your personal style without breaking the bank? Then get ready to transform those neglected frames into stunning, rustic masterpieces! This easy DIY project will show you how to upcycle your chipped and worn-out picture frames, breathing new life into them with a charming, country-chic aesthetic. We’ll be harnessing the beauty of imperfection, turning flaws into features and creating personalized artwork that adds character and warmth to any space.
Forget expensive store-bought frames! With just a few readily available materials and a dash of creativity, you can achieve a stunning chippy and rustic look. This project is perfect for beginners, requiring minimal skills and tools, making it an ideal weekend activity for all skill levels. Ready to get started on this simple yet rewarding transformation? Let's dive into the step-by-step guide and unleash your inner artist!
Preparation and Safety Guidelines
- Picture frames
- Homemade chalk paint (black & white)
- Pillar candle
- Packing tape
- Candle stick
- Paint scraper
- Scotch pad
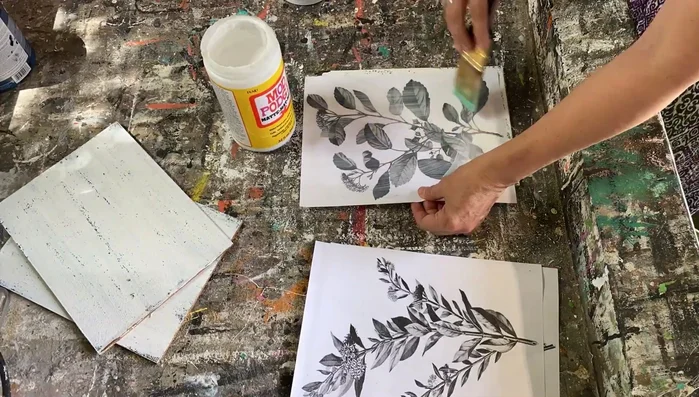
- Botanical prints
- Mod Podge Matte
- Water-based polyacrylic sealer
- Always wear safety goggles to protect your eyes from flying debris when sanding or using power tools.
- Ensure adequate ventilation when working with paints, stains, or other potentially harmful chemicals. Use in a well-ventilated area or wear a respirator.
- Use caution when handling sharp tools like knives or chisels. Keep them away from children and store them safely after use.
Step-by-Step Instructions
Frame Preparation
- Remove existing artwork or photos.

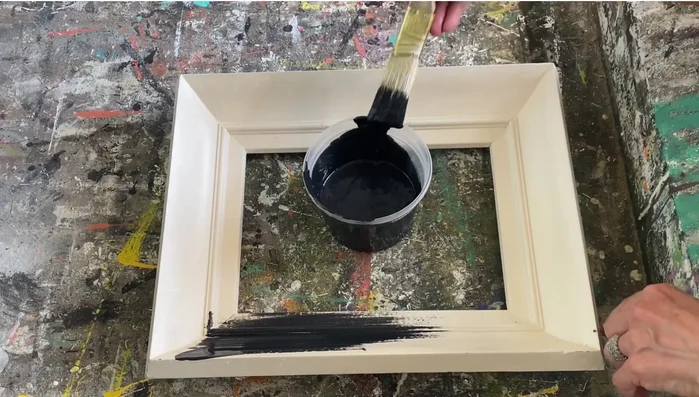
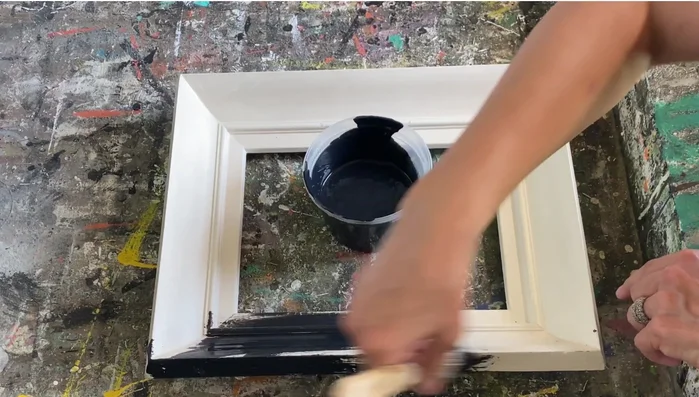
Frame Preparation Base Coat Application
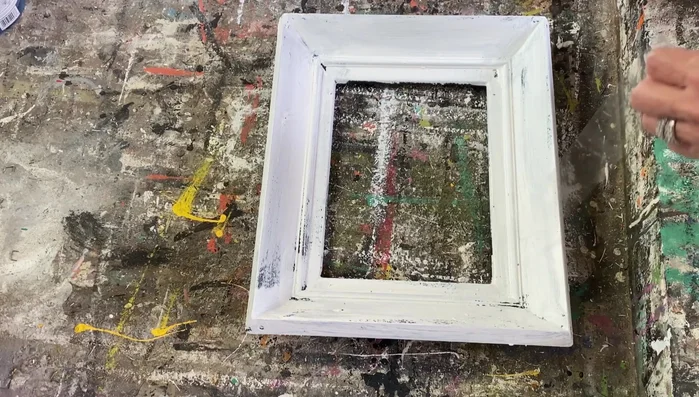
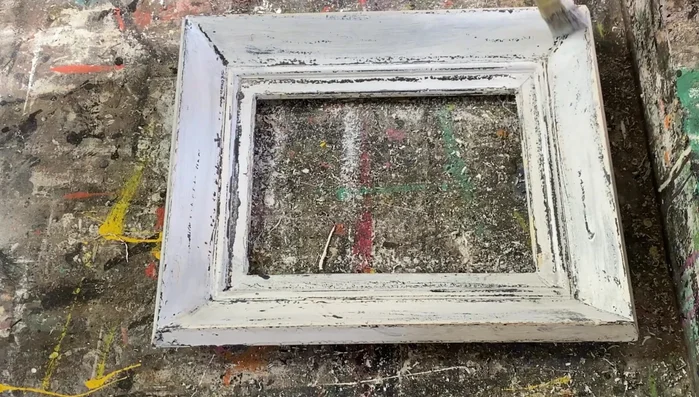
- Apply a base coat of black homemade chalk paint.
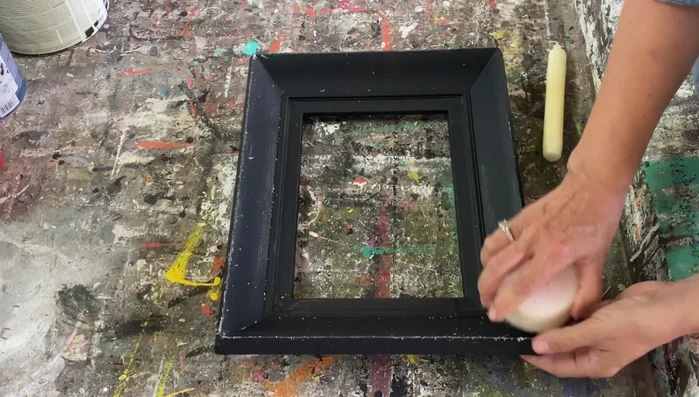
Base Coat Application Waxing for Chipping
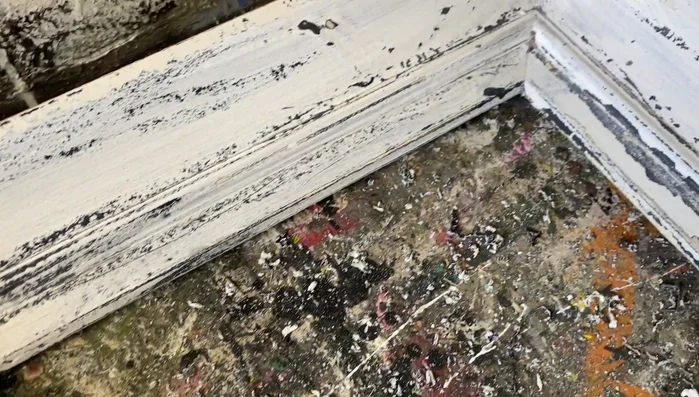
- Apply candle wax to areas where you want the paint to chip (edges, corners). Rub aggressively for a more chippy look.
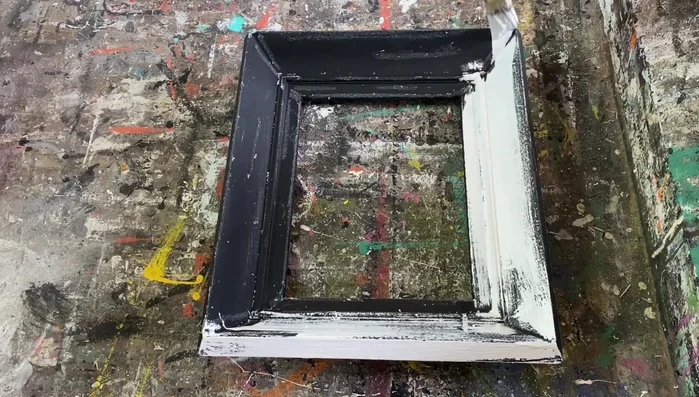
Waxing for Chipping Top Coat Application & Chipping Techniques
- Apply a coat of white homemade chalk paint over the black base coat and the waxed areas.
- Humidity may affect the adhesion of the tape).
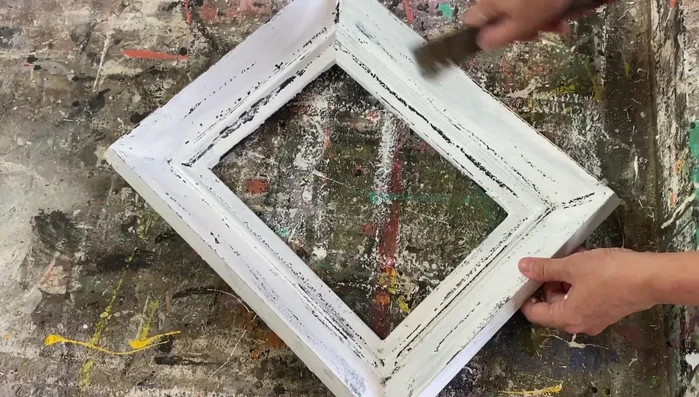
- Gently scrape away some of the white paint in areas where wax remains, for further distressing.
Top Coat Application & Chipping Techniques Smoothing & Refinement
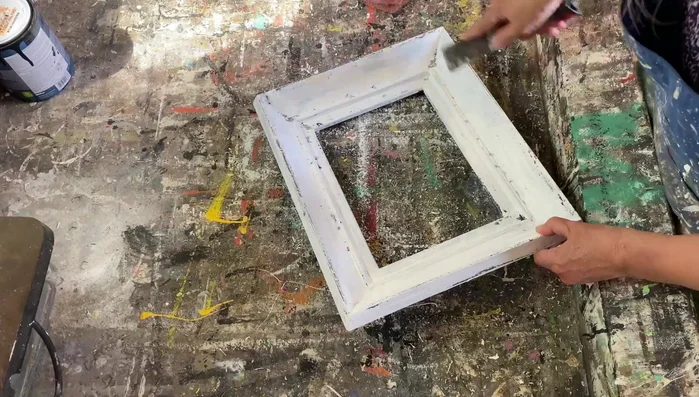
- Lightly sand the entire frame with a scotch pad to smooth any rough edges.
Smoothing & Refinement Interior Frame Distress & Decoration
- Prepare and distress the inside of the frame.
- Apply botanical prints using the reverse graphic transfer method with Mod Podge Matte.
Interior Frame Distress & Decoration Sealing & Finishing
- Seal the frames with a water-based polyacrylic sealer to enhance the chippy look and protect the finish.
Sealing & Finishing
Read more: 7 Top Paint Color Trends for 2024: A Complete Guide with Free Downloadable Resource
Tips
- Don't sand too much; it removes details. Use the wax and tape technique to achieve the chippy look.
- Apply the paint somewhat haphazardly for a more authentic aged look.
- Humidity affects packing tape adhesion. Work carefully if humidity is high.
- Homemade chalk paint is a cost-effective alternative to store-bought paint and adheres well to any surface.