Step aside, expensive store-bought jewelry! There's a vibrant, budget-friendly world of DIY accessories waiting to be discovered, and it all starts with paper beads. Forget complicated techniques and time-consuming processes; this guide unveils the easiest and fastest method for creating stunning paper bead jewelry. Using readily available materials and simple steps, you’ll be amazed at how quickly you can transform ordinary paper into extraordinary necklaces, earrings, and bracelets. This craft is perfect for beginners, offering a rewarding and creative outlet that’s both fun and accessible.
Whether you're crafting a unique gift, adding a personalized touch to your outfit, or simply enjoying a relaxing crafting session, making paper beads is surprisingly straightforward. From choosing your paper to stringing your finished beads, we'll walk you through every stage with clear instructions and helpful tips. Ready to get started and create beautiful, one-of-a-kind jewelry? Let's dive into the step-by-step process below!
Preparation and Safety Guidelines
- Double-pointed knitting needles (3.25 mm and smaller size)
- Spacer beads
- Stretch cording (0.8 mm diameter)
- Tombow Mono Liquid Glue (or any clear drying glue)
- Versamark pad
- Ultra-thick embossing powder
- Paper beading tool (available on Etsy)
- Paper strips (pre-cut to desired length)
- Die storage box (or similar for drying beads)
- Paper cutter
- Heat tool
- Super glue
- Always use non-toxic, acid-free paper. Regular printer paper or cardstock is fine, but avoid papers containing chemicals that could irritate your skin or be harmful if ingested.
- Be mindful of sharp objects. Scissors, awls, and needles should be handled with care to prevent cuts or punctures.
- Ensure proper ventilation when working with any adhesive or sealant. Some glues or varnishes release fumes that can be harmful if inhaled in poorly ventilated areas.
Step-by-Step Instructions
Prepare Paper Strips
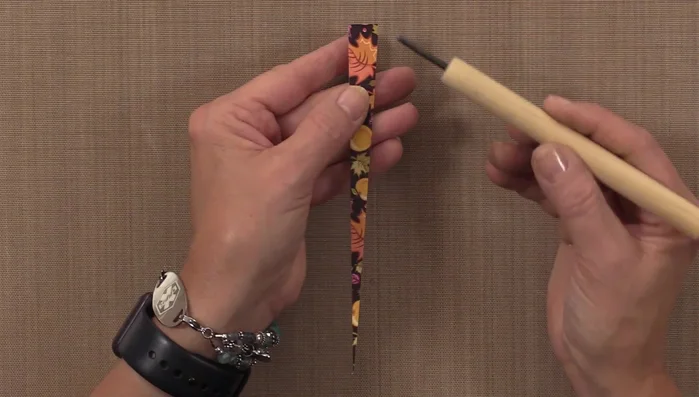
- Prepare your paper strips. Cut strips to your desired width using a paper cutter. The presenter uses 0.5 inch for smaller beads and longer strips for larger beads.

Prepare Paper Strips Create Paper Beads
- Insert the wide end of the paper strip into the paper beading tool.
- Twist the tool, keeping the paper lined up evenly, to create a spiral shape.
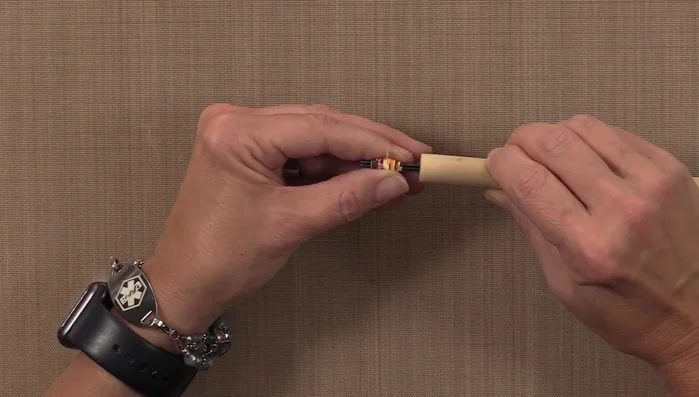
- Apply a small bead of glue to the end of the paper spiral and continue twisting, pressing the glue to secure the paper as you go.
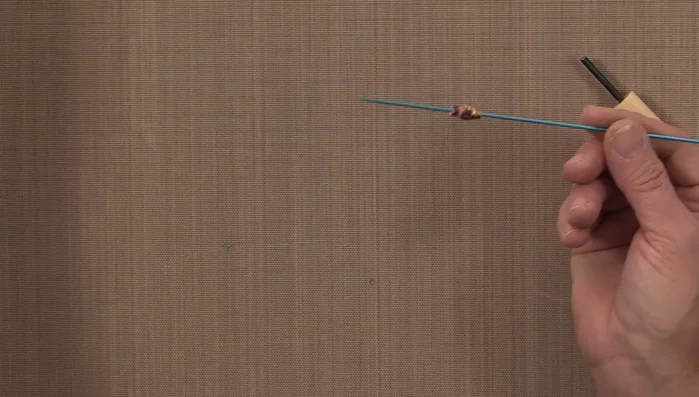
- Remove the finished paper bead from the tool and let it dry completely on a drying rack.
Create Paper Beads Add Shiny Finish
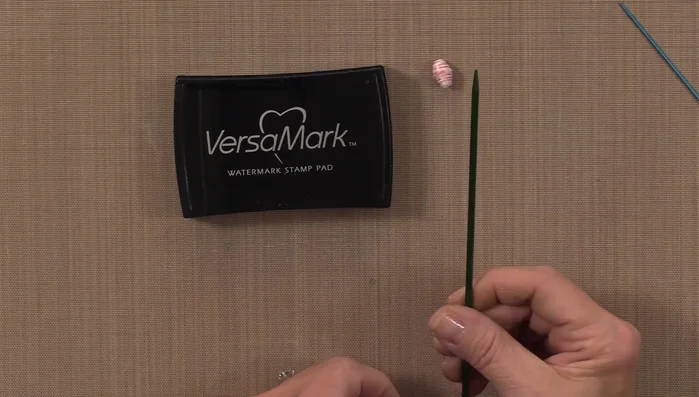
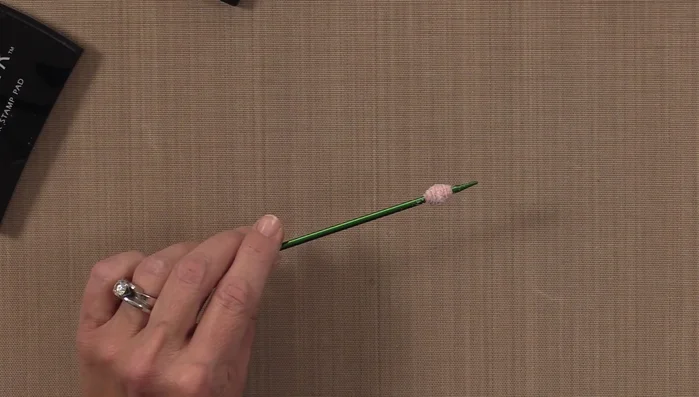
- Once dry, ink the bead with Versamark ink, then coat generously with ultra-thick embossing powder.
- Heat the embossing powder with a heat tool to melt and create a shiny, durable finish. You can repeat steps 6 & 7 for an extra shiny coat.
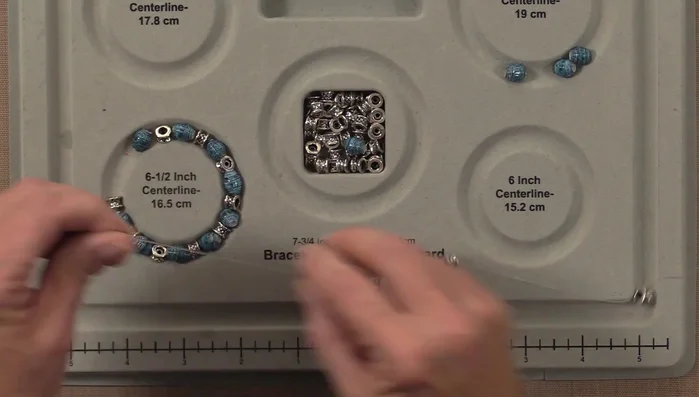
Add Shiny Finish Assemble Bracelet
- String your beads onto stretch cord, alternating with spacer beads, using your chosen bracelet size as a guide. Tie off the ends with multiple knots and secure with superglue.
Assemble Bracelet


Read more: Easy Origami Paper Box Tutorial: Step-by-Step Guide
Tips
- Use a variety of patterned papers to create unique beads. Even scrap paper can yield beautiful results.
- Adding a spacer bead to the bottom before knotting prevents beads from falling off the end.
- Apply super glue to the knots to ensure the bracelet remains secure.