Forget flimsy plastic bags! This summer, elevate your farmer's market experience with a stylish and sustainable DIY painted canvas tote bag. Imagine strolling through the vibrant aisles, your reusable bag showcasing a charming, hand-painted design inspired by the bounty of fresh produce. This project is perfect for crafters of all levels, offering a fun and rewarding way to express your creativity while reducing your environmental impact. A personalized tote bag is not only practical for carrying your groceries, but it also adds a touch of personal flair to your everyday style. You'll be surprised how easily you can transform a plain canvas bag into a unique piece that reflects your love for fresh, locally sourced goods.
This tutorial will guide you through each step of creating your own beautiful farmer's market themed tote bag, from selecting your paints and prepping your canvas to perfecting the design and sealing your masterpiece for lasting durability. Let's get started and learn how to bring your vision of a flourishing farmer's market to life on your very own canvas tote!
Preparation and Safety Guidelines
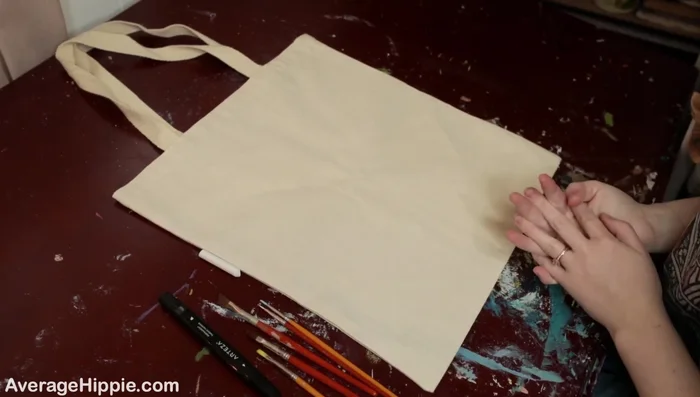
- Canvas tote bag
- Acrylic paints
- Paint brushes
- Paint palette
- Chalk (optional)
- Permanent fabric marker (optional)
- Fine tip marker (optional)
- White paint (optional)
- Always work in a well-ventilated area. Fabric paints and sealants can release fumes.
- Allow paint to dry completely before using or washing the bag. This prevents smudging and ensures the design's longevity.
- Pre-wash your canvas tote bag before painting to remove any sizing that might prevent the paint from adhering properly.
Step-by-Step Instructions
Design & Prep
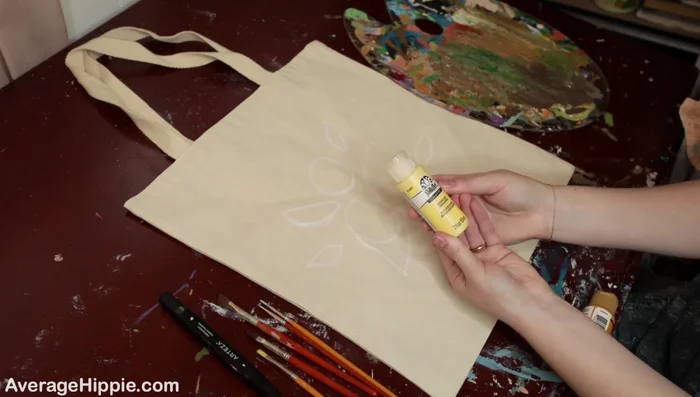
- Plan your design. Think of a design you want on your bag. The example uses a 'Farmer's Market' theme with lemons.
- Outline your design. Use chalk to lightly sketch your design onto the bag before painting. This helps prevent mistakes.

Design & Prep Base Painting
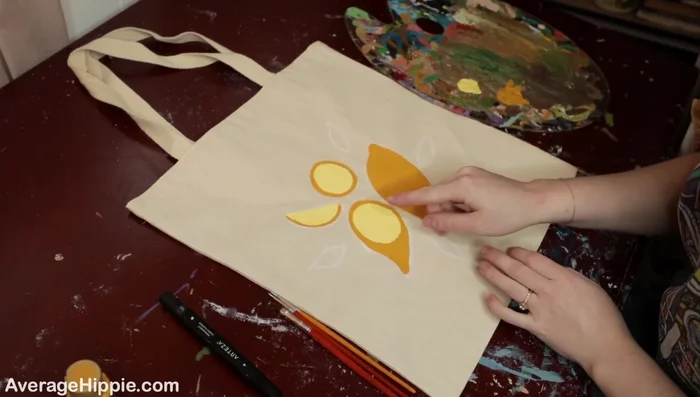
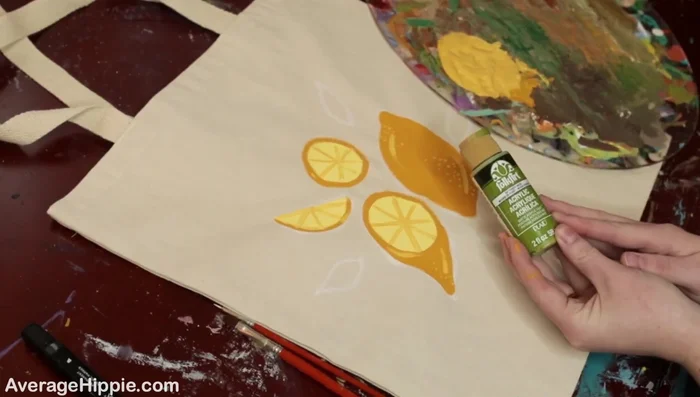
- Paint the base colors. Begin painting the larger areas of your design. Start with darker shades and gradually add lighter colors. The example uses darker and lighter yellows for the lemons.
Base Painting Shading & Detailing (Lemons)
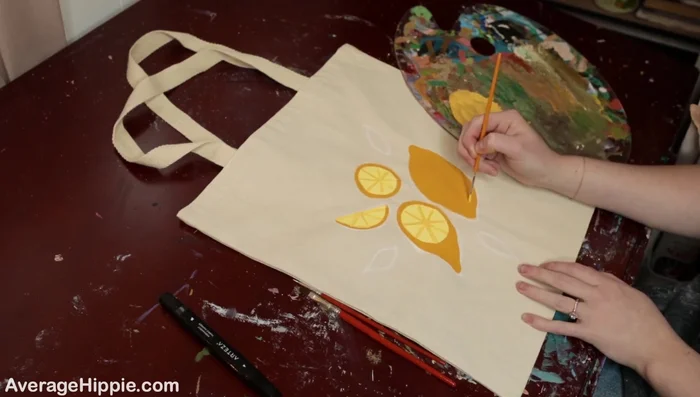
- Mix colors for shading and details. Create a softer shade by mixing your base colors. This is used to add details and depth to the lemons.
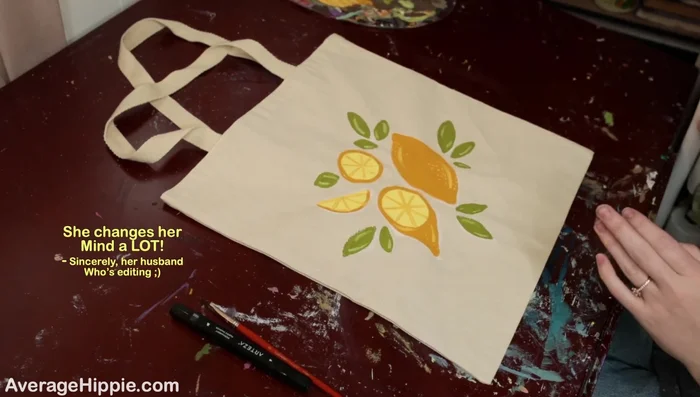
- Add highlights. Use a lighter color to add highlights to your design, creating a 3D effect. The example adds highlights to the lemons and leaves.
Shading & Detailing (Lemons) Leaves
- Paint the leaves. Using a base green and a lighter green, paint in the leaves, adding highlights for depth.
Leaves Lettering
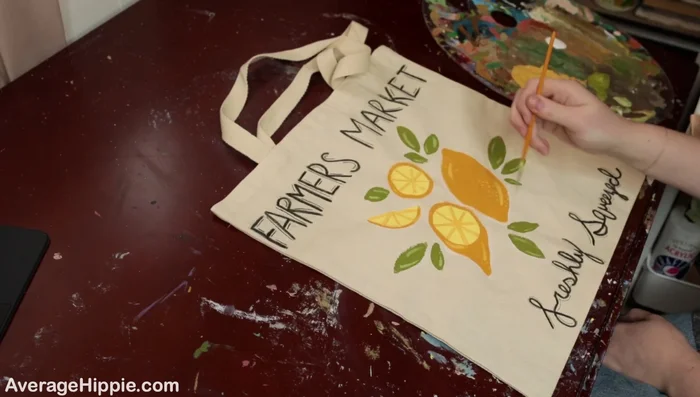
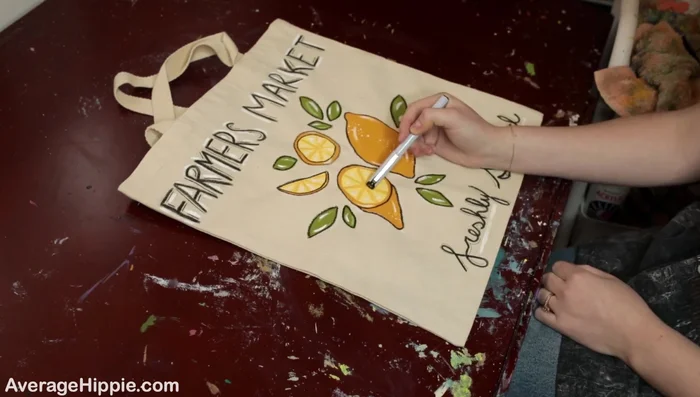
- Add lettering. Sketch your lettering with chalk, then use a fabric marker to outline the text. The example uses 'Farmer's Market' and 'Fresh Squeezed'.
- Enhance lettering with details. Use a fine-tip marker to add details and shading to the letters.
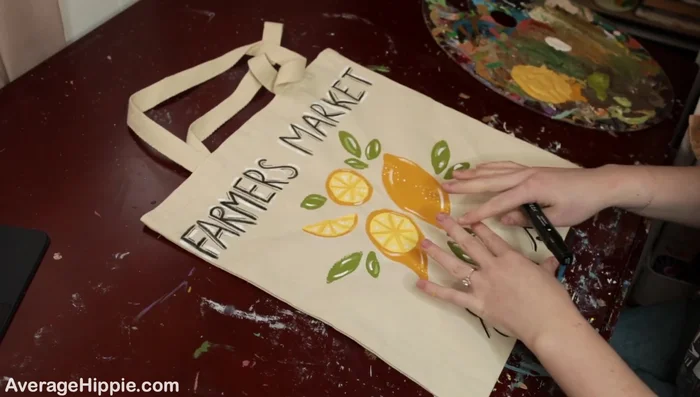
- Add white highlights to lettering and design elements. This adds dimension and makes the design pop.
Lettering Outline & Final Touches
- Outline your design. Once the paint is dry, use a black marker or paint to outline all of your designs for a cleaner look.
- Add final details. Use a fine-tip marker to add smaller details to enhance the design.
Outline & Final Touches


Read more: 7 Top Paint Color Trends for 2024: A Complete Guide with Free Downloadable Resource
Tips
- Use chalk to lightly sketch your design before painting to avoid mistakes.
- Mix colors to create softer shades for shading and details.
- Add highlights to give your design a 3D effect.
- Let the paint dry completely before adding outlines and details.