Tired of flimsy gift card holders that crumple and tear? Craving a unique and stylish way to present your next gift? Then prepare to be captivated by the DIY Kelly Box Handbag – a surprisingly simple yet stunning project that transforms ordinary cardboard into a luxurious-looking gift card holder. This adorable miniature handbag, inspired by the iconic Hermès Kelly bag, offers a delightful blend of elegance and practicality, making it a perfect present in itself or a sophisticated container for your thoughtful gift.
The Kelly Box Handbag is surprisingly easy to construct, even for beginners, requiring only basic crafting supplies and a little patience. Its sturdy design ensures your gift card stays protected and adds a touch of sophisticated flair. Ready to create your own miniature masterpiece? Let's dive into the step-by-step instructions below and transform a simple piece of cardboard into a treasured keepsake.
Preparation and Safety Guidelines
- 12x12 cardstock
- bone folder
- glue
- scissors
- ruler
- decorative papers
- straps
- Always use sharp, strong scissors or a rotary cutter for precise cuts. Blunt tools can lead to uneven edges and fabric damage.
- Ensure your interfacing is the correct weight for your chosen fabric. Too light, and the bag will lack structure; too heavy, and it will be difficult to sew and may distort.
- Pay close attention to the seam allowances throughout the project. Inaccurate seam allowances will result in a poorly fitting and unprofessional-looking Kelly Box.
Step-by-Step Instructions
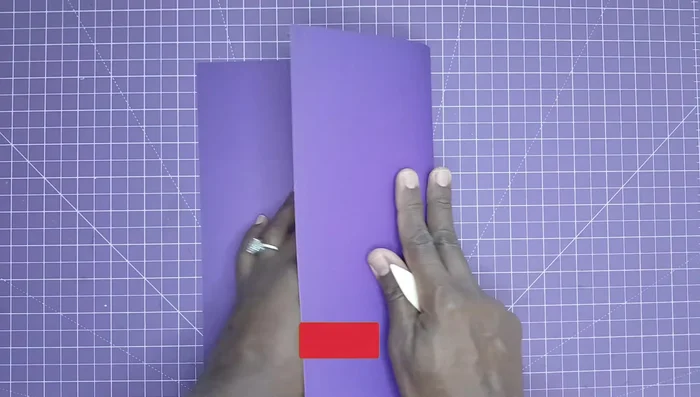
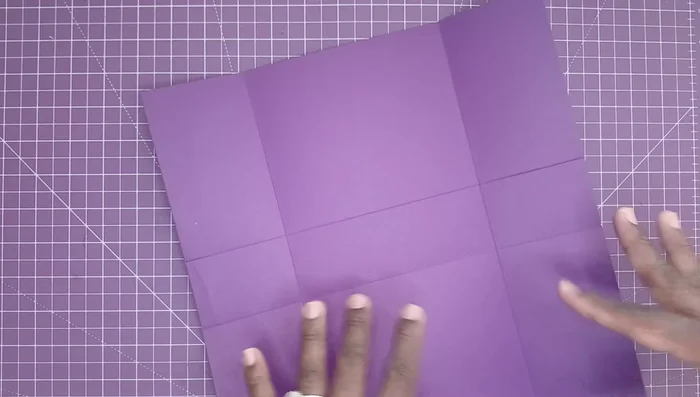
Prepare the Cardstock
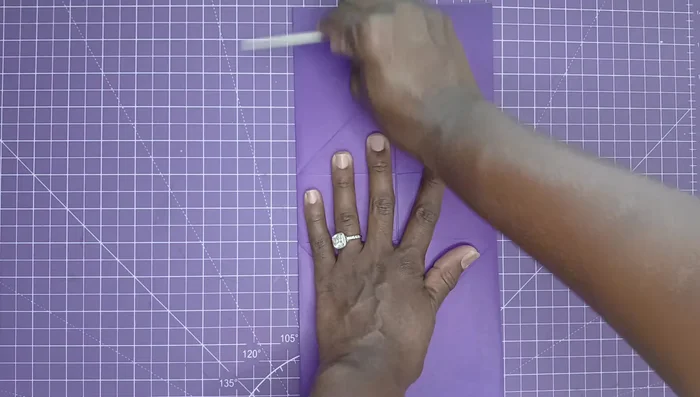
- Score your 12x12 cardstock at 3, 5, 7, and 9 inches.
- Fold and burnish all score lines.
- Perform the unique John B. Crops-inspired fold to create clean edges. Fold the paper in half, then bring the scored edges together to create a precise, clean crease.

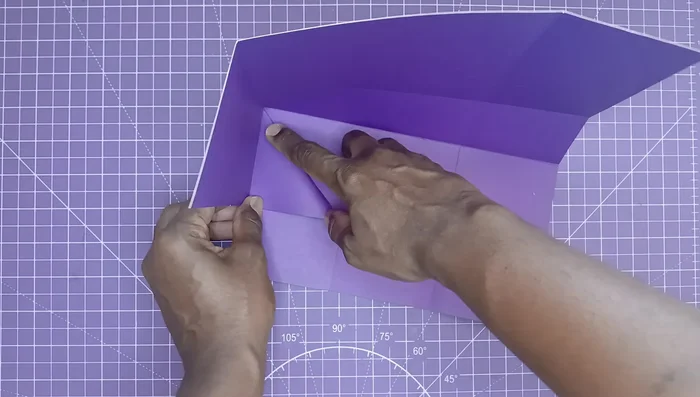
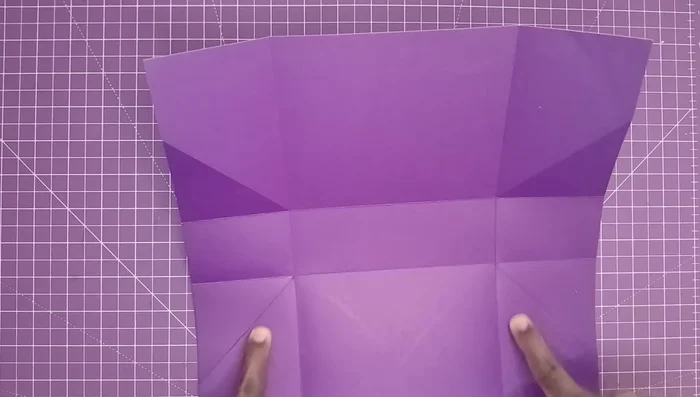
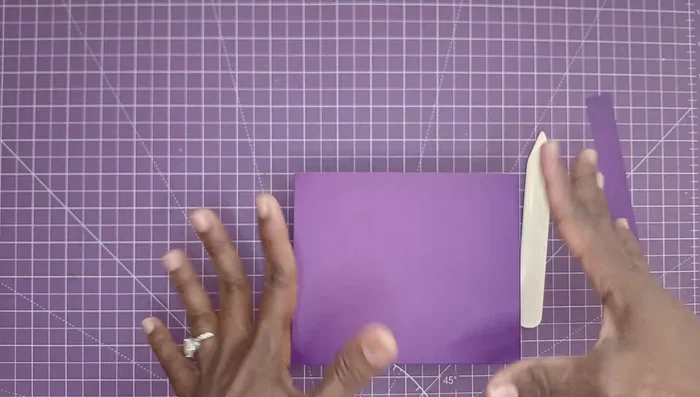
Prepare the Cardstock Assemble the Box
- Crease the inside of the bag to shape it.
- Glue the side flaps to close the box structure.
- Fold all sides and flatten. Bring the top edges up and adhere them with glue and a bone folder.
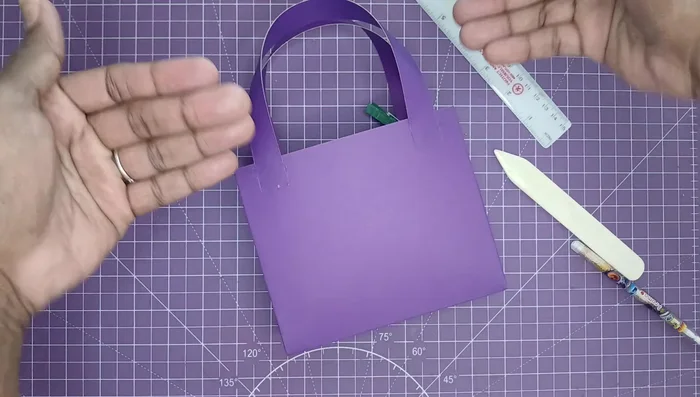
Assemble the Box Add the Straps
- Add the straps by placing them between the layers of the bag and securing them with glue.
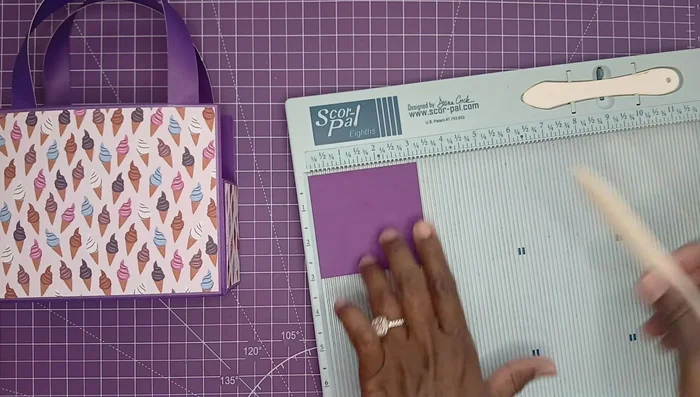
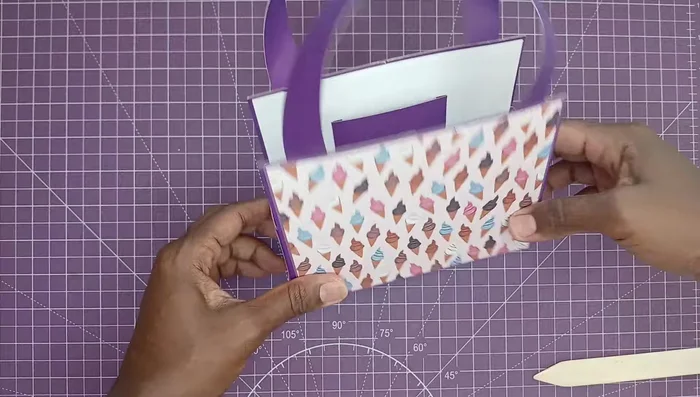
Add the Straps Decorate the Exterior
- Layer decorative papers to enhance the handbag's appearance. Glue these layers in place.
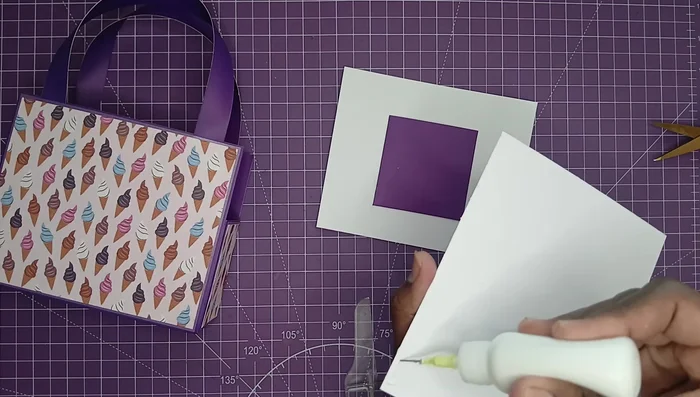
Decorate the Exterior Create the Gift Card Holder
- Create a gift card holder by scoring and folding a 3.25 x 3 inch piece of paper, then adding decorative layers inside.
Create the Gift Card Holder Attach the Gift Card Holder & Finish
- Attach the gift card holder to the inside of the bag.
- Finish lining the inside of the bag for a clean finish.
Attach the Gift Card Holder & Finish

Read more: Easy Origami Paper Box Tutorial: Step-by-Step Guide
Tips
- Use a bone folder to create sharp, crisp creases.
- The John B. Crops fold ensures clean edges, avoiding raw edges that would result from cutting and joining.
- Adding straps between layers makes them more secure and prevents them from being easily pulled out.
- Use multiple layers of decorative paper for a luxurious look and added durability.