Transform your space with the breathtaking beauty of giant paper flowers! These stunning decorations are surprisingly easy to create, adding a touch of whimsical elegance to any room, party, or event. Forget expensive floral arrangements – with just a few simple supplies and a little patience, you can craft show-stopping blooms that will leave your guests in awe. Imagine the vibrant colors and impressive scale these creations can bring, instantly elevating the atmosphere and creating a memorable visual impact. They're perfect for adding a unique and personalized touch to weddings, birthdays, or simply brightening your own home.
This DIY project is perfect for crafters of all skill levels, requiring no specialized tools or advanced techniques. From choosing your paper to the final flourish, we'll guide you through each step of the process with clear instructions and helpful images. Ready to create your own magnificent giant paper flowers? Let's dive into the easy, step-by-step tutorial below!
Preparation and Safety Guidelines
- Light cardstock paper
- Glue gun
- Use sharp scissors and craft knives with caution, keeping fingers away from the blades at all times. Adult supervision is required, especially for children.
- Be mindful of the weight of the finished flower, especially larger ones. Use sturdy sticks or supports to prevent drooping or damage.
- Work in a well-ventilated area, especially when using spray adhesive or paint. Avoid inhaling fumes and wear a mask if necessary.
Step-by-Step Instructions
Cut Petals
- Cut out eight bud petals, eight medium petals, and twelve large petals using your chosen method (Cricut or hand-cutting).

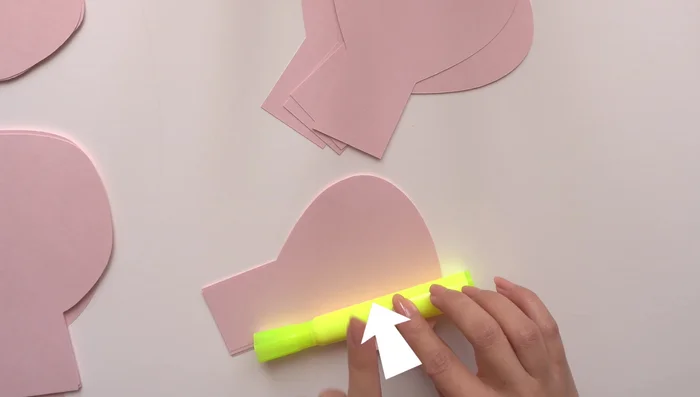
Cut Petals Curl Petals
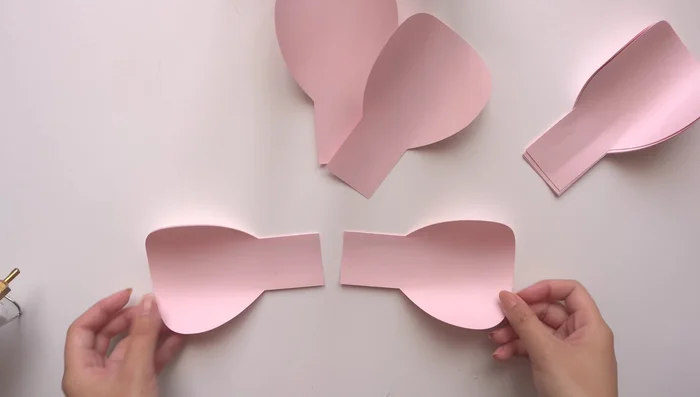
- Curl each petal individually using a rounded object (like a highlighter) to create inward curves. Pay attention to the direction of the curl for each petal size and how much you curl it.
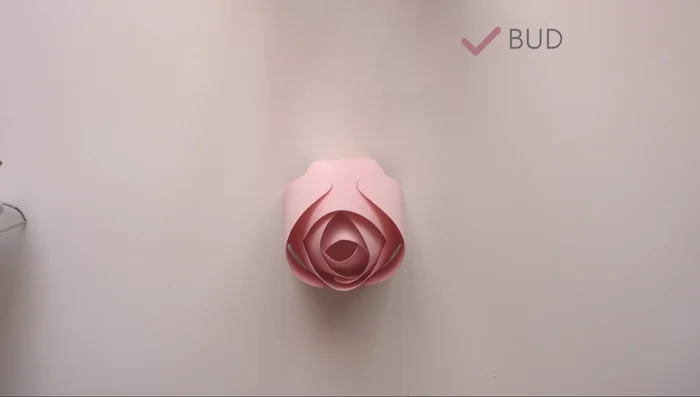
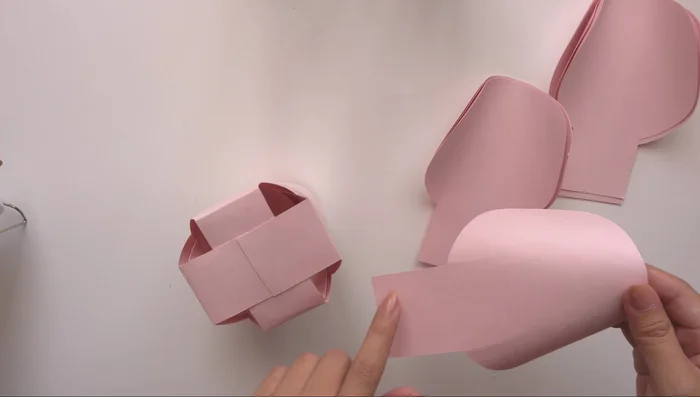
Curl Petals Assemble the Flower Bud
- Glue pairs of bud petals together, then cross the pairs and glue them together to create a layered bud center. Repeat with the remaining bud petals.
Assemble the Flower Bud Create Flower Layers
- Apply glue to the base of the petals in each layer, following the described formations ('plus' and 'X' formations) to attach them to the bud center and preceding layers.
- Build the flower layer by layer, using the 'plus' formation for the first two layers and the 'X' formation for the subsequent layers, always ensuring a slight gap between petals and layers to create dimension.
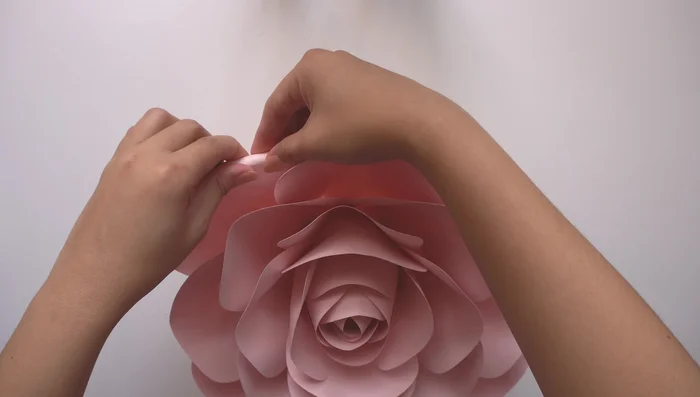
Create Flower Layers Optional: Add Detail
- Curl the edges of the petals using a thin pen or pencil to add detail and enhance the flower's appearance.
Optional: Add Detail
Read more: Easy Origami Paper Box Tutorial: Step-by-Step Guide
Tips
- Don't worry about perfect symmetry with the medium petals; the asymmetry adds to the flower's charm.
- Be gentle when curling to avoid creases in the paper.
- Hold each glue joint for a few seconds to ensure the glue sets properly.
- Take your time and check frequently to make sure the petals are lined up nicely, especially as the flower gets larger.
- Use the 'plus' and 'X' formations to create a visually appealing flower with even spacing and dimension between petals and layers.