Transform your living space with a touch of whimsical elegance using this guide to creating a magnificent giant paper butterfly. Forget mass-produced decorations; this DIY project allows you to craft a unique, personalized piece of art that reflects your individual style. Imagine the stunning effect of a large, intricately designed butterfly fluttering against a wall, adding a dash of playful sophistication to any room – from a vibrant child's bedroom to a subtly bohemian living area. The possibilities are as limitless as your imagination, and the process itself is surprisingly simple and rewarding.
This guide provides a comprehensive, step-by-step walkthrough, perfect for both seasoned crafters and enthusiastic beginners alike. Whether you opt for a classic monarch design or unleash your creativity with vibrant colors and bold patterns, creating this impressive piece of décor is guaranteed to be a fun and fulfilling experience. Let's get started and learn how to bring this breathtaking paper butterfly to life!
Preparation and Safety Guidelines
- Foil
- Floral wire
- Masking tape
- Matte Mod Podge
- Black tissue paper
- Black felt
- White glue
- Cricut or Silhouette cutting machine (optional)
- Paper (letter size)
- Use sharp scissors or a craft knife with caution, keeping fingers away from the blades at all times. Adult supervision is recommended, especially for children.
- Be mindful of the size of your finished butterfly. Ensure it's appropriately sized for your chosen display area to avoid accidents or damage.
- Work in a well-ventilated area, especially if using spray adhesive or paint, to avoid inhaling harmful fumes.
Step-by-Step Instructions
Prepare Butterfly Body
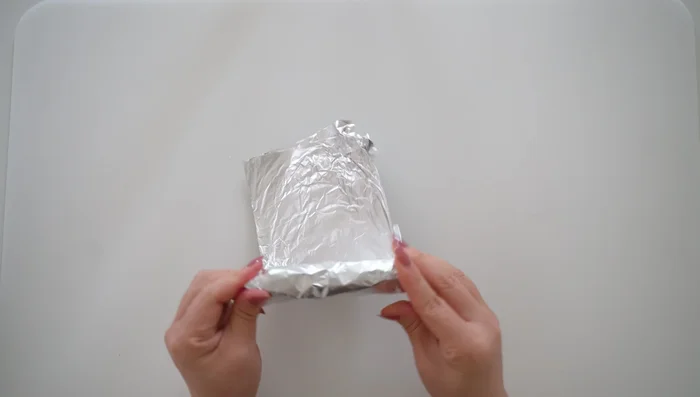
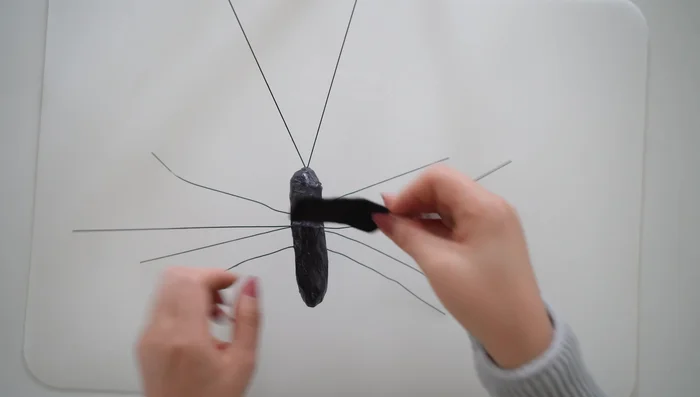
- Prepare the butterfly body using foil, approximately 1.5 inches wide and 4-5 inches long. You can also adjust the size using the template provided.
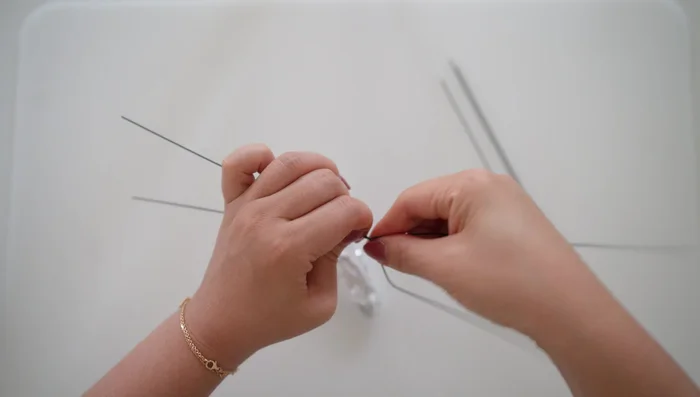
- Cross two floral wires in the middle. The top will be the antennae; the bottom will form the body.
- Wrap one floral wire around the foil body for a pair of legs. Repeat with another wire for another pair. You'll have a total of six legs.
- Wrap the last floral wire around the top of the foil body; this is where the wings will attach.

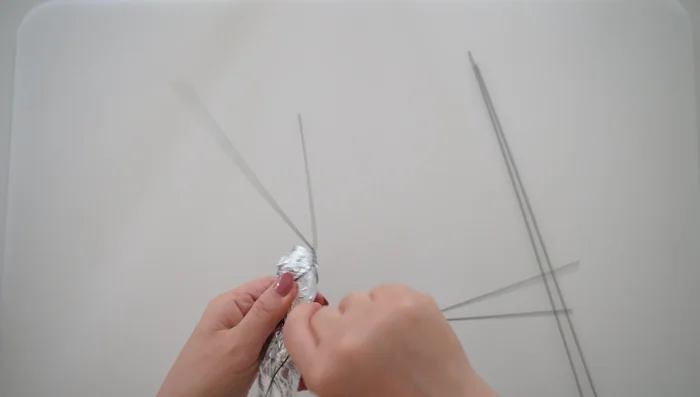
Prepare Butterfly Body - Secure the foil body with masking tape, leaving the bottom for legs, front for antennae, and top for wings.
Prepare Butterfly Body Decorate Butterfly Body
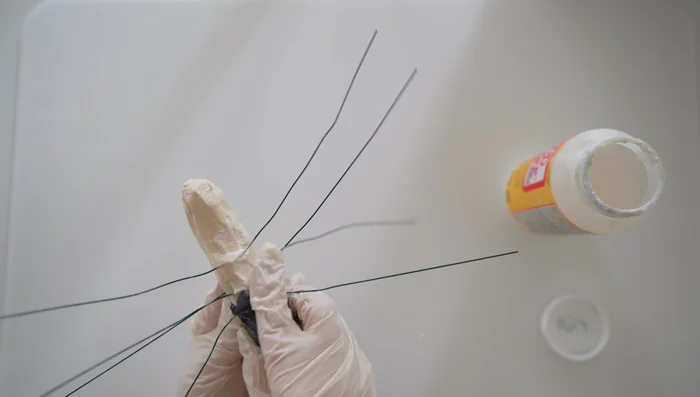
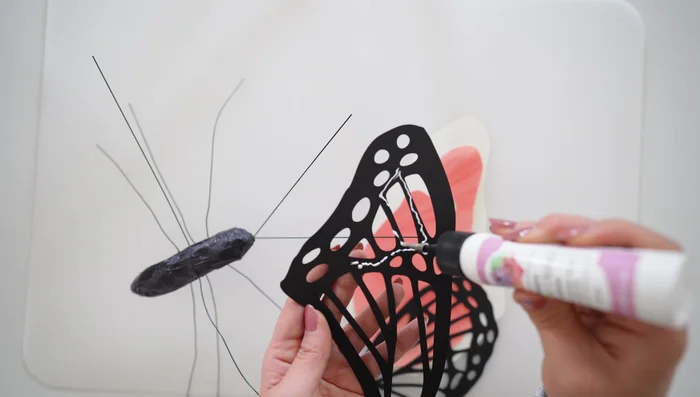
- Cover the taped foil body with matte Mod Podge, then add black tissue paper, layering Mod Podge on top.
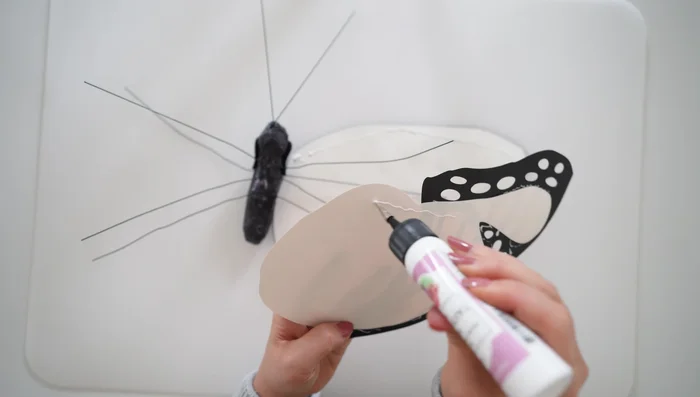
- Glue a small oval black felt piece on top of the body where the wings will attach.
Decorate Butterfly Body Create One Wing
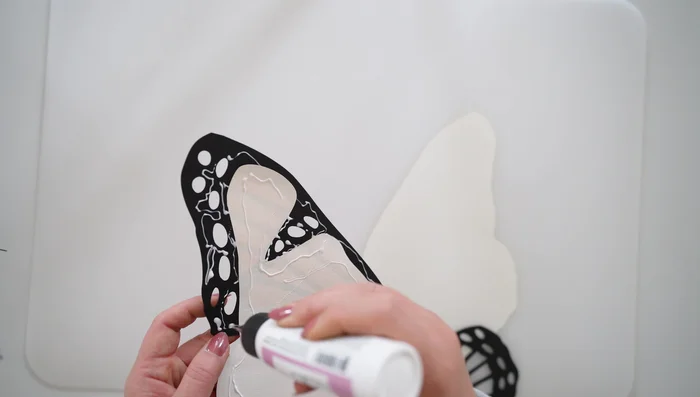
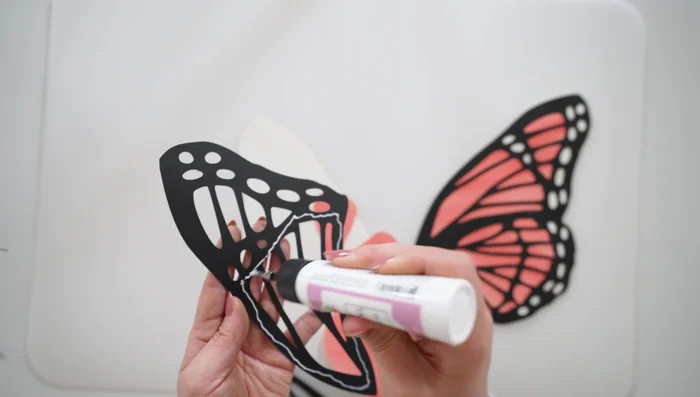
- Cut out the wing pieces using the template (adjust size as needed to fit a letter-size paper).
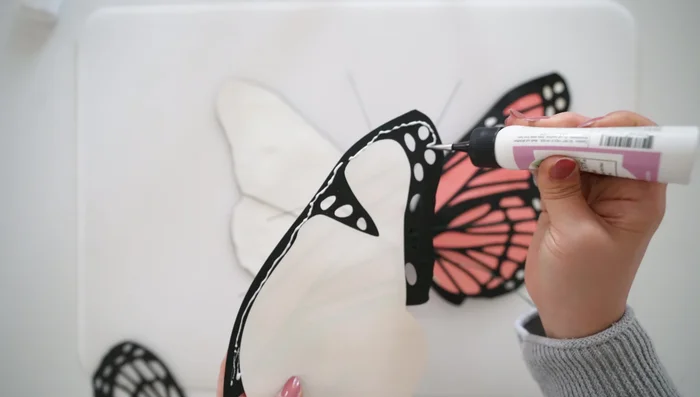
- Glue the wing pieces together, starting with the black pattern, then the orange, and finally the white, following the order shown in the video.
Create One Wing Create Second Wing
- Repeat steps 8 and 9 for the other wing.
Create Second Wing Assemble Butterfly
- Attach the finished wings to the floral wire on the top of the butterfly body using glue.
- Shape the wings by slightly curving them and adjusting with the floral wire. You can leave them flat or angle them upwards.
Assemble Butterfly


Read more: Easy Origami Paper Box Tutorial: Step-by-Step Guide
Tips
- If using dark green floral wire, it may be dark enough for the legs. If not, paint or cover it with black tissue paper and Mod Podge, or use black wire.
- Use a white glue with a fine tip for precise gluing of the wing patterns.