Ever dreamed of creating unique and expressive doll heads? Forget expensive kits and pre-made molds! This tutorial unlocks the secrets to sculpting charming, personalized doll heads using readily available materials: humble tin foil and versatile polymer clay. We'll guide you through a surprisingly simple process, transforming basic supplies into captivating miniature faces, perfect for doll making, artistic projects, or simply indulging your creative spirit. You'll be amazed at the level of detail you can achieve with a little patience and these simple techniques.
This DIY approach offers unparalleled customization; from delicate features to bold expressions, the possibilities are endless. Whether you're a seasoned crafter or a complete beginner, this guide provides clear instructions and helpful tips to ensure a successful sculpting experience. Ready to bring your unique doll head visions to life? Let's dive into the step-by-step process!
Preparation and Safety Guidelines
- Tin foil
- Polymer clay (Super Sculpey recommended)
- Liquid Sculpey
- Ball styling tool
- Rounded tapered silicone tool
- Clay softener
- Soft synthetic acrylic brush
- Polymer clay needs to be baked according to the manufacturer's instructions to harden properly. Improper baking can result in a weak or misshapen doll head.
- Always work in a well-ventilated area when baking polymer clay. The fumes can be harmful if inhaled.
- Use caution when working with sharp tools, such as sculpting tools or craft knives, to avoid injuries.
Step-by-Step Instructions
Creating the Foundation
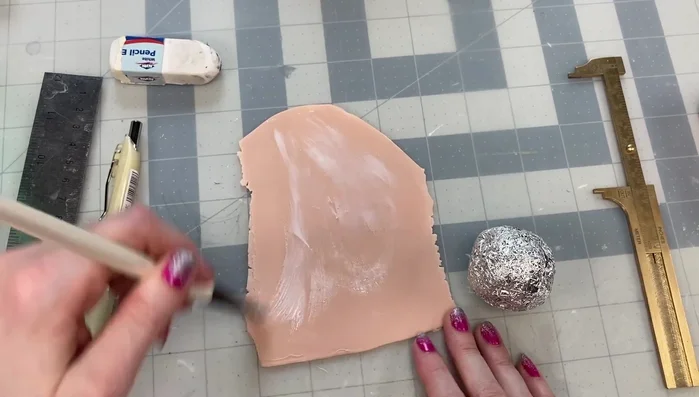
- Create a tin foil ball base for the doll head.
- Apply polymer clay over the tin foil ball using liquid Sculpey as adhesive.

Creating the Foundation Forming the Basic Head Shape
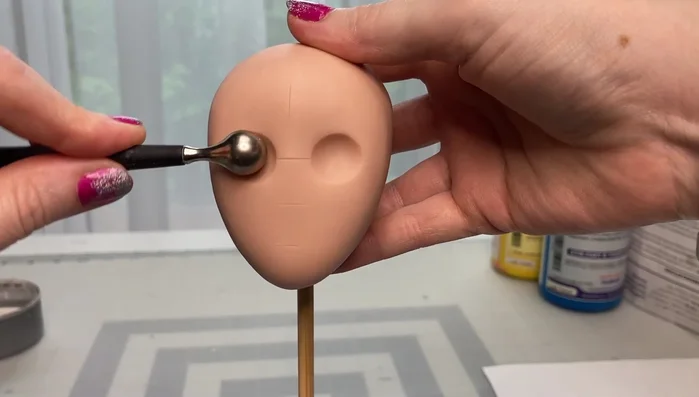
- Shape the clay into a basic oval head form.
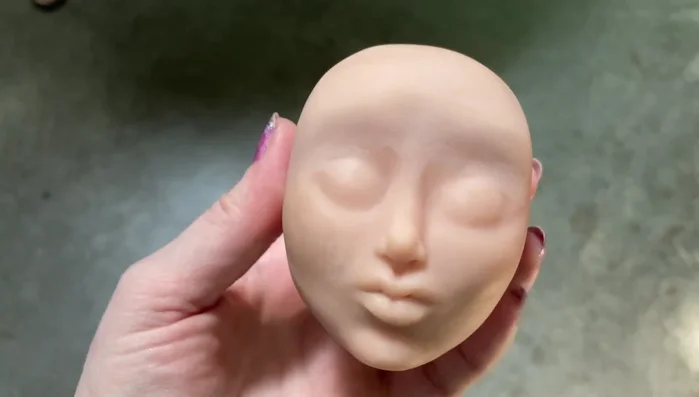
Forming the Basic Head Shape Sculpting the Facial Features
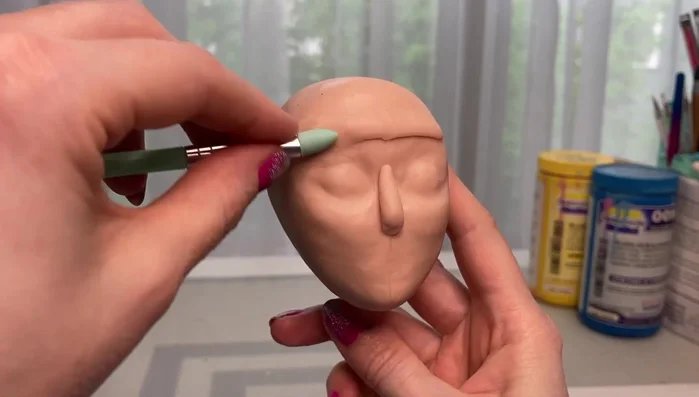
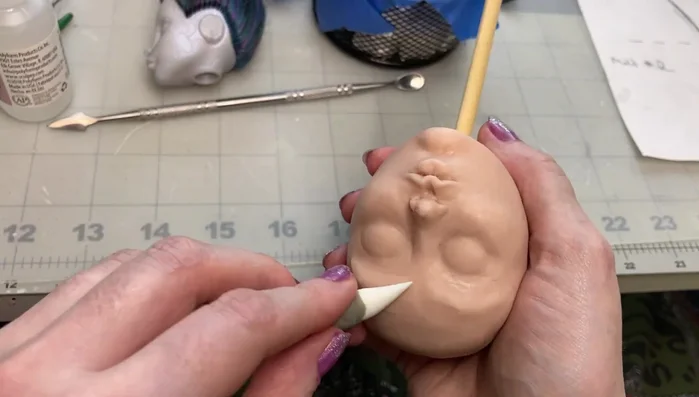
- Use a ball styling tool to create eye sockets.
- Smooth out the eye socket area using a rounded tapered silicone tool.
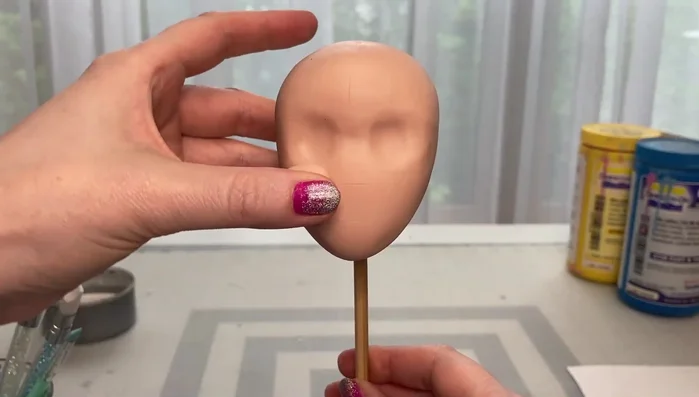
- Sculpt the cheeks and add clay for the eye area.
- Build up the brow bone area with clay.
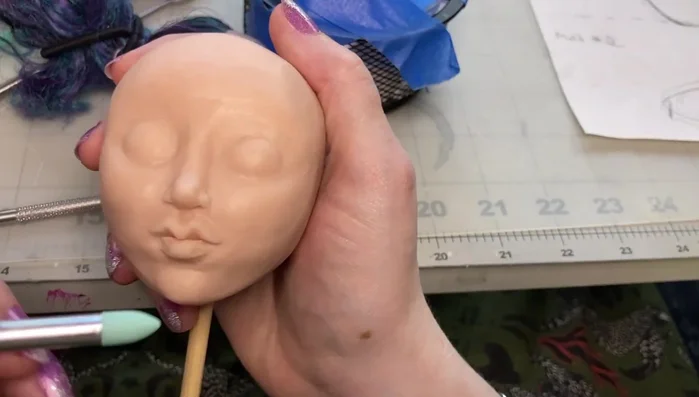
Sculpting the Facial Features - Sculpt the top lip, aiming for a balanced shape.
- Sculpt the bottom lip, flipping the head for better visibility and balance.
- Blend the lips into the face using additional clay.
- Carve out the jawline to achieve the desired shape.
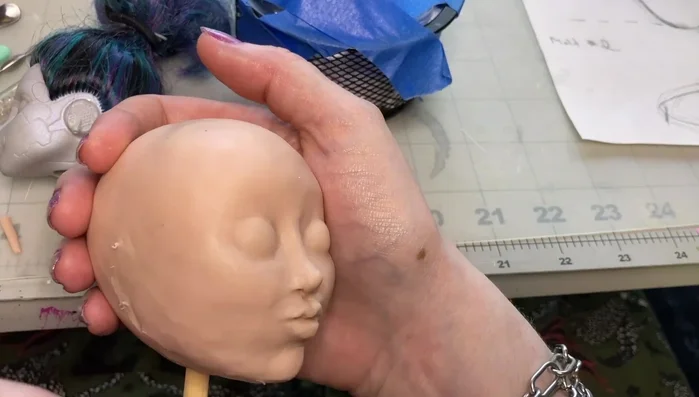
Sculpting the Facial Features - Refine the eyebrow bones for added definition.
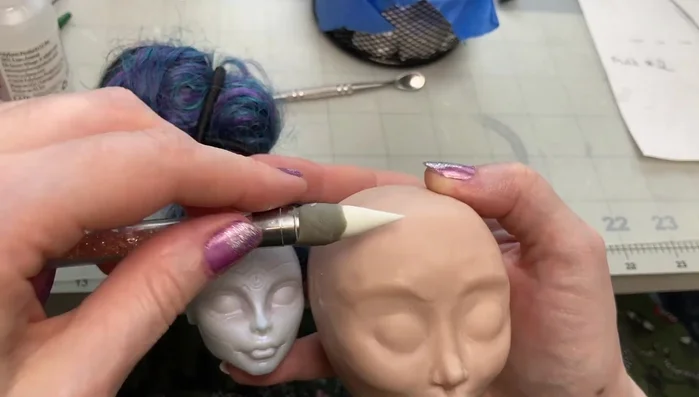
Sculpting the Facial Features Refining and Finishing
- Smooth out the entire head using a silicone tool, clay softener, and a soft brush to remove lumps and fingerprints.
Refining and Finishing Baking the Doll Head
- Bake the clay head according to the manufacturer’s instructions.
Baking the Doll Head

Read more: Hang Your Clay Creations: The No-Hole Hanger Method
Tips
- Use Super Sculpey for easier sculpting.
- Use a rounded tapered silicone tool and a tool for moving clay to blend and smooth clay seamlessly.
- Flipping the head upside down aids in checking for balance and sculpting hard-to-reach areas.