Paper airplanes are a timeless source of childhood fun, but have you ever wished you could make one that returned to you? Forget chasing after your creations – learn how to craft a fascinating boomerang paper airplane! This simple DIY project requires only a single sheet of paper and a few minutes of your time, transforming ordinary paper into an extraordinary flying toy. It's the perfect activity for kids and adults alike, offering a delightful blend of creativity and aerodynamics. The satisfying whoosh of flight, followed by the clever return, will quickly captivate you.
This guide will walk you through the surprisingly easy steps involved in building your very own boomerang paper airplane. Forget complicated designs and confusing instructions; we’ll break down the process into clear, concise steps, complete with accompanying images to ensure success. Let's get started and learn how to make this amazing, returning paper airplane!
Preparation and Safety Guidelines
- A4 sheet of paper (or A5)
- Always throw the boomerang paper airplane in a wide-open space, away from people, windows, and fragile objects. Ensure there's ample room for it to fly and return.
- Avoid throwing the airplane with excessive force. A gentle, controlled throw is more effective for boomerang flight and prevents damage or injury.
- Supervise young children closely when they are making or throwing the paper airplane. Keep a safe distance from the flight path.
Step-by-Step Instructions
Prepare the Paper
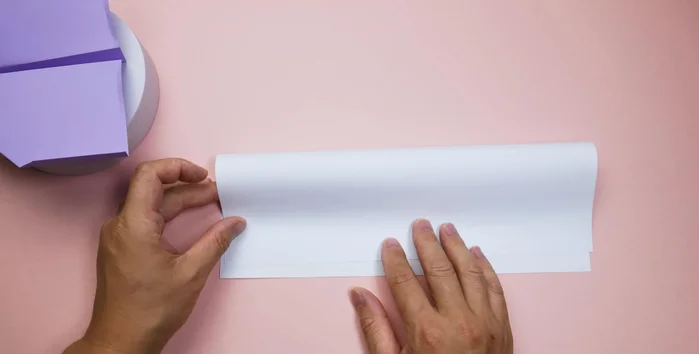
- Fold the paper in half lengthwise, ensuring even folds on both sides. Press down the crease firmly.

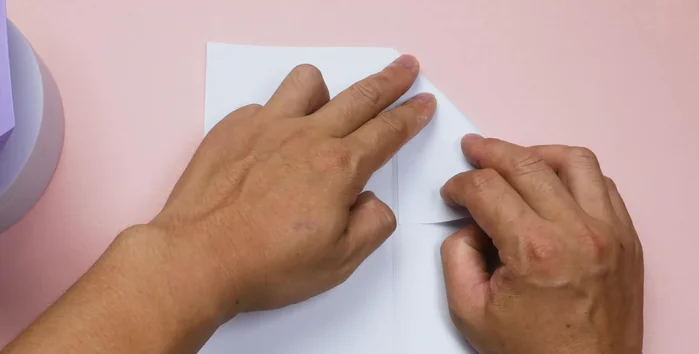
Prepare the Paper Create the Basic Triangle Shape
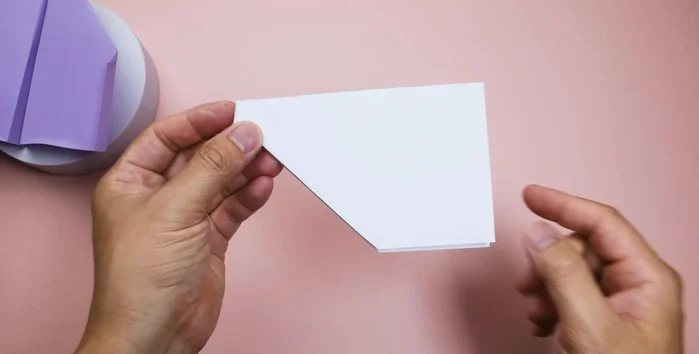
- Unfold the paper. Fold the right side down to the center at a 45° angle, creating a diagonal line. Repeat on the left side. You should have a triangle at the top.
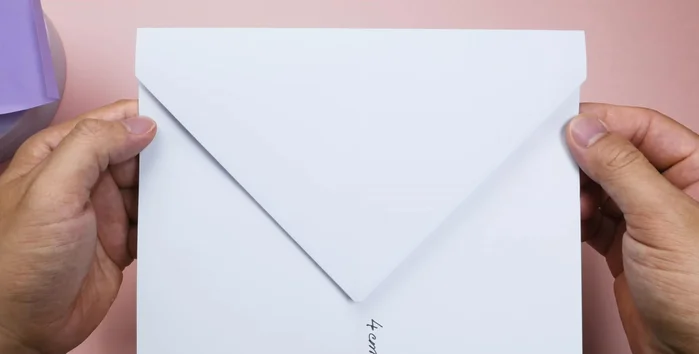
Create the Basic Triangle Shape Mark and Fold for Boomerang Shape
- Mark a point 40 mm from the bottom of the paper. Fold the paper in half, aligning the top of the triangle with the marked point. Flatten the paper.
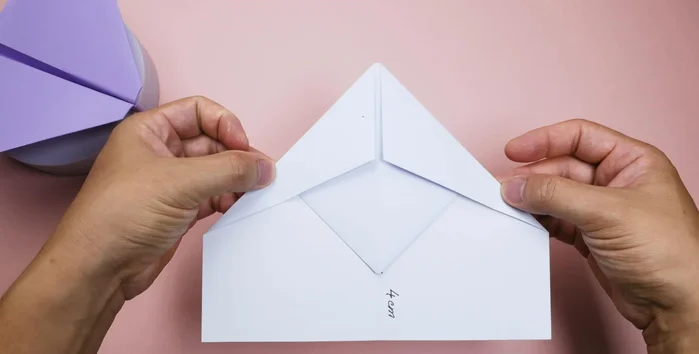
Fold the Wings
- From the middle, fold the right wing down at a 45° angle. Repeat with the left wing. You should have a balanced triangle.
- Open the two wings of the triangle and fold them back inwards evenly on both sides.
Fold the Wings Refine the Wing Shape
- Fold the triangular section in the middle upwards to tighten the wings.
- Fold the top of the airplane down to the marked position, then unfold. Fold the front part along the crease, extending it with a pen if needed, and fold downwards. Secure both wings inward.
Refine the Wing Shape Final Fold and Wing Adjustment
- Fold the paper in half again, then fold the airplane wings.
- Fold the wings horizontally, parallel to the body, ensuring they are aligned and flat.
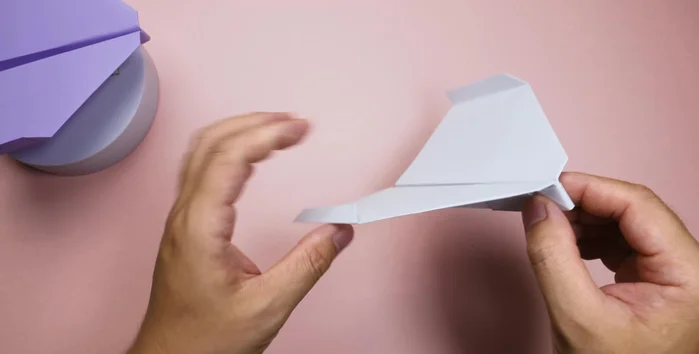
Create Airflow Channels and Tail Bend
- Fold a 10mm section at the ends of the wings to create airflow channels. Unfold the airplane.
- Bend the tail section at the marked position. Press the paper flat for optimal performance.
Create Airflow Channels and Tail Bend
Read more: Easy Origami Paper Box Tutorial: Step-by-Step Guide
Tips
- Always throw the airplane at a 20-30° angle from the horizontal plane; don't throw it straight up.
- Throw the airplane slightly to the left or right; don't throw it straight ahead.