Capture the magic of a city sunset without the need for years of art school! This easy cityscape painting tutorial is designed specifically for beginners, focusing on a simple yet stunning silhouette technique. Forget complex shading and intricate details; we'll be focusing on capturing the dramatic interplay of light and shadow to create a captivating sunset scene against a city skyline. No prior painting experience is necessary – just a willingness to experiment and have fun. We'll be using readily available materials, making this a perfect project for anyone wanting to explore their creative side.
This tutorial will guide you through the process step-by-step, allowing you to create a beautiful sunset silhouette painting in just a few easy stages. Get ready to transform a blank canvas into a vibrant urban landscape bathed in the warm glow of the setting sun, leaving you with a piece of art you'll be proud to display. Let's begin!
Preparation and Safety Guidelines
- 12 by 16 primed canvas
- blending brush
- flat brush
- filbert brush (optional)
- liner brush (optional)
- hair dryer
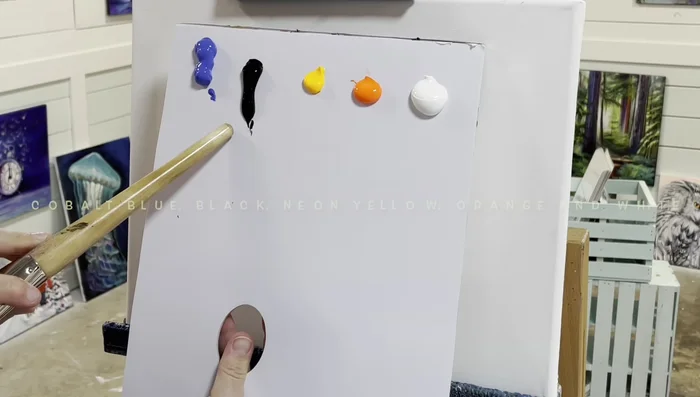
- Acrylic paints (Cobalt blue, Titanium white, Luminous yellow, Neon orange, Mars black)
- Always work in a well-ventilated area, especially when using acrylic or oil paints. Fumes can be harmful.
- Protect your work surface with newspaper or a drop cloth. Acrylic and oil paints can stain.
- Wash brushes thoroughly after use with soap and water (or appropriate solvent for oil paints). Improper cleaning will ruin your brushes.
Step-by-Step Instructions
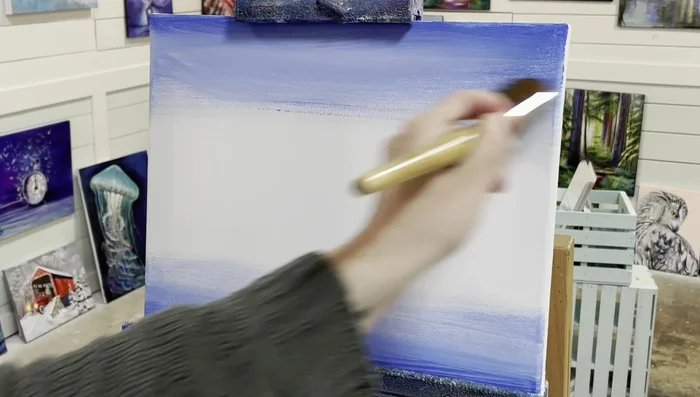
Create the Sky and Water Background
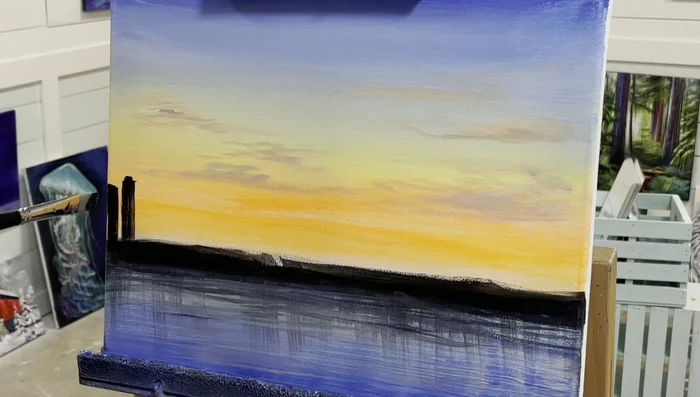
- Create the sky and water background using a large blending brush. Start with cobalt blue at the top, gradually blending it lighter towards the bottom with white, creating an ombre effect.

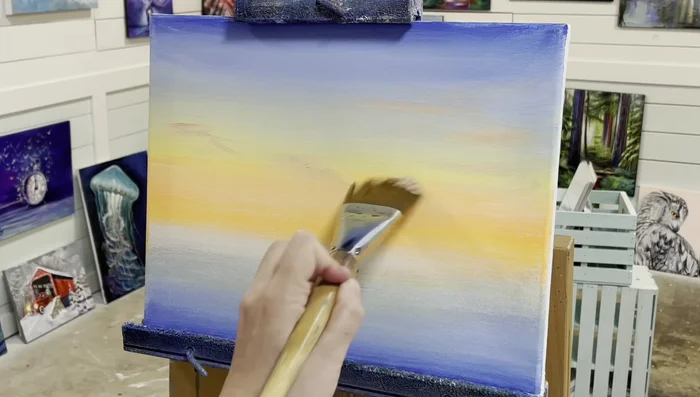
Create the Sky and Water Background Paint the Sunset
- Add luminous yellow and neon orange to the top section to create a sunset effect, blending softly into the blue and white.
Paint the Sunset Add Sky Shadows
- Add a touch of blue, yellow, orange, and white mixture to create soft purple shadows across the sky.
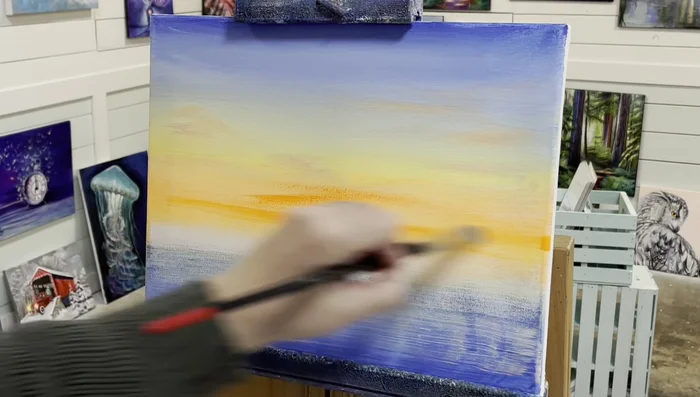
Add Sky Shadows Create Water Texture
- Create ripples and highlights in the water by lightly dragging the brush with a blue, yellow, orange, and white mixture. Dry with a hair dryer before the next layer.
Create Water Texture Enhance Sunset Vibrancy
- Add another layer of neon orange to the top for vibrancy.
Enhance Sunset Vibrancy Paint the Horizon and Water Shadows
- Create the horizon line with a thick stroke of black paint, smoothing it across. Add shadows and ripples in the water with black paint, softening the edges.
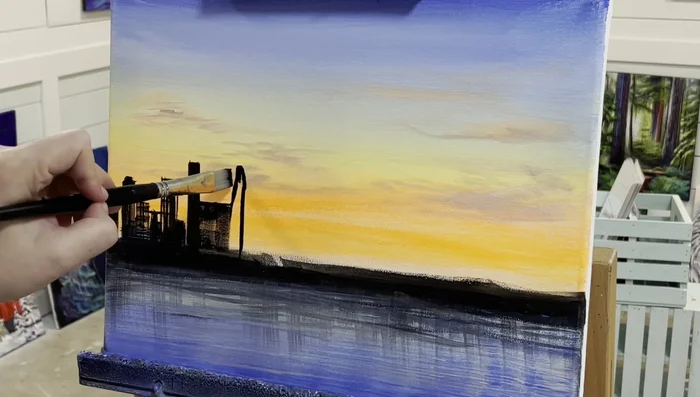
Paint the Horizon and Water Shadows Paint the Buildings
- Paint the buildings using a flat brush with black paint. Leave small spaces to simulate windows and lights. Use the flat edge for straight lines and turn the brush sideways for thinner buildings.
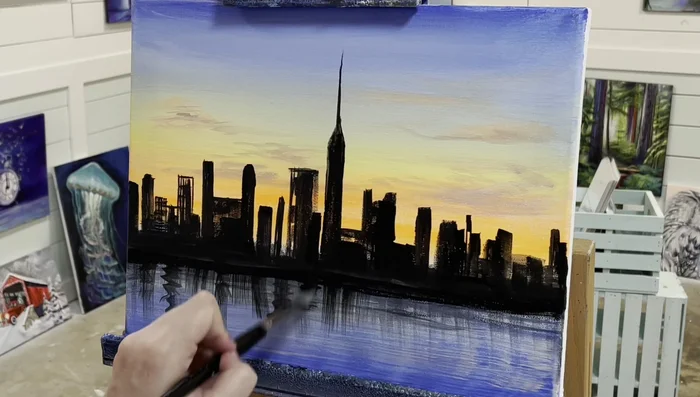
Paint the Buildings Add Window Details
- Add subtle details like window grids using light dragging of the brush.
Add Window Details Add Water Reflections
- Add reflections and shadows in the water using black paint, using flicks and drags to create movement.
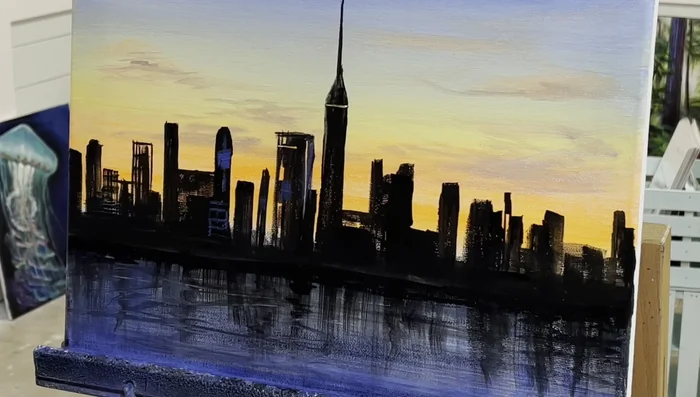
Add Water Reflections Add Building and Window Highlights
- Add highlights to buildings and windows using white and luminous yellow, creating a grid pattern with dots and short strokes.
Add Building and Window Highlights Intensify Sunset Background
- Add another layer of neon orange between buildings for a more intense sunset effect.
Intensify Sunset Background


Read more: 7 Top Paint Color Trends for 2024: A Complete Guide with Free Downloadable Resource
Tips
- Don't worry about perfectly straight buildings; imperfections add character.
- Experiment with different shades and colors. Tint your black with other colors for variety.
- Use different brush techniques (tapping, pulling, flicking) for varied effects in the water.
- Create layers and heights with buildings to add depth.