Unleash your inner artist and transform ordinary air-dry clay into extraordinary home décor with this comprehensive guide to sculpting captivating face sculptures. Forget expensive art classes and embrace the therapeutic and rewarding experience of creating unique, personalized pieces for your living space. Air-dry clay is readily accessible, incredibly versatile, and allows for a surprising level of detail, making it the perfect medium for both beginners and experienced sculptors alike. From subtle nuances to bold expressions, the possibilities are endless.
This guide will walk you through each step of the process, from preparing your clay and sketching your design to achieving realistic features and adding the final touches. Whether you envision a serene angel, a mischievous imp, or a striking portrait, get ready to bring your creative vision to life. Let's dive into the step-by-step instructions and create stunning face sculptures to proudly display in your home.
Preparation and Safety Guidelines
- Air dry clay
- Cardboard
- Tin foil
- Hot glue gun
- Dowel
- Rolling pin (optional)
- Table knife
- Damp cloth
- Paintbrush (various sizes)
- Water
- Acrylic paints (optional)
- Varnish (optional)
- Wood blocks (optional)
- Drill (optional)
- Sandpaper (optional)
- Wood stain (optional)
- Air dry clay can crack if it dries too quickly. Avoid direct sunlight, heat, or drafts during drying. Ensure even drying by turning the sculpture periodically.
- Always work in a well-ventilated area as air dry clay dust can be irritating to the lungs. Consider using a dust mask, especially for prolonged sculpting sessions.
- Air dry clay is not food safe. Keep away from children and pets to prevent accidental ingestion.
Step-by-Step Instructions
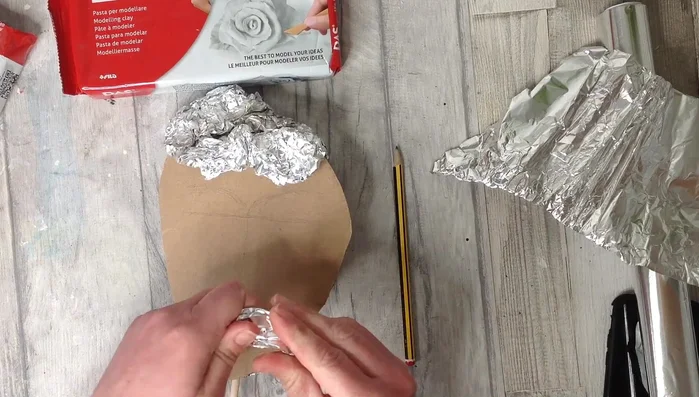
Create the Armature
- Create a base using cardboard and a dowel for support. Cover the entire structure with tin foil using hot glue to create a 3D armature.
- Gradually build up the structure using tin foil and hot glue, sculpting the basic shape of the face (brow bones, nose, chin, cheeks). Refer to references (mirror, photos, sketches) as you go.

Create the Armature Apply and Sculpt the Clay
- Apply air dry clay in small sections, building up the sculpture gradually. Use your hands to mold and sculpt the clay, blending it directly onto the tin foil armature.
- Add details like the nose, lips, and eyes, using tools like a table knife and your fingers to shape and smooth the clay. Use a damp cloth to prevent sections from drying out while working on other areas.
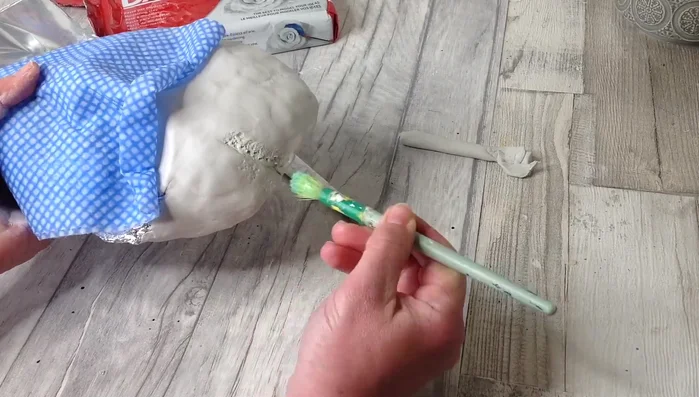
Apply and Sculpt the Clay Add Texture and Detail
- Add texture using various tools such as a paintbrush, old toothbrush, or even scrunched-up tin foil to create a unique effect. A slightly dampened brush helps smooth out the clay.
Add Texture and Detail Dry and Repair
- Allow the sculpture to dry completely in a cool place. Repair any cracks that appear by dampening the crack, adding fresh clay, and smoothing it out. Let it dry again.
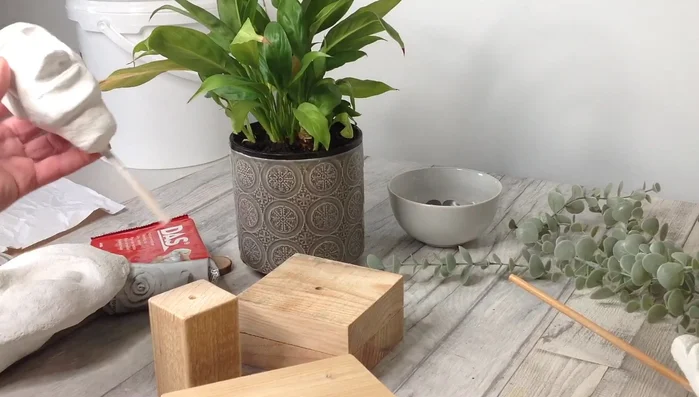
Dry and Repair Finishing and Display
- Once dry, paint, varnish, or leave the sculpture as is. For display, create a stand using wood blocks, drilling holes and attaching them with glue.
Finishing and Display


Read more: Hang Your Clay Creations: The No-Hole Hanger Method
Tips
- Plan ahead and work out each step before starting.
- Use references (mirror, photos, sketches) to help guide your sculpting.
- Don't add too much water when smoothing the clay to minimize cracking.
- Use small sections of clay and blend them thoroughly.
- Experiment with different textures to add personality to your sculpture.