Embrace the magic of winter with this easy-to-follow acrylic painting tutorial! Capture the serene beauty of a snow-dusted landscape on your canvas, even if you're a complete beginner. Transform a blank canvas into a breathtaking winter wonderland, complete with sparkling snow, frosty trees, and perhaps even a cozy cabin nestled amongst the pines. This tutorial is designed to guide you through the process, regardless of your skill level, providing clear instructions and helpful tips to achieve stunning results. You'll learn simple techniques to create texture, depth, and that magical winter glow.
Prepare to unleash your creativity and bring the enchantment of winter indoors. This step-by-step guide will walk you through each stage of creating your own personalized winter scene, from sketching the initial outline to adding the final delicate touches of glistening snow. Let's begin transforming your vision into a beautiful piece of art!
Preparation and Safety Guidelines
- 12x16 white primed canvas
- Acrylic gesso
- Titanium white acrylic paint
- Light blue violet acrylic paint
- Large round chalk brush
- Filbert brush (number 8 recommended)
- Mop brush
- Liner brush
- Fan brush
- Always work in a well-ventilated area. Acrylic paints, while water-based, can still release fumes that may cause discomfort or allergic reactions.
- Protect your work surface. Acrylic paint can stain fabrics and surfaces. Use a drop cloth or a dedicated painting surface.
- Clean brushes thoroughly with soap and water immediately after use. Acrylic paint dries quickly and can become difficult to remove once hardened.
Step-by-Step Instructions
Winter Sky Background
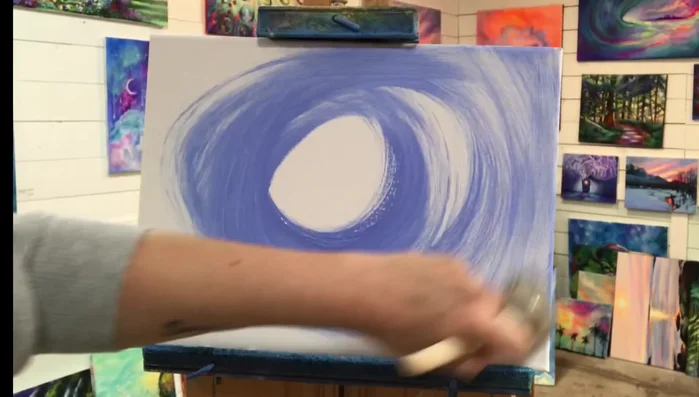
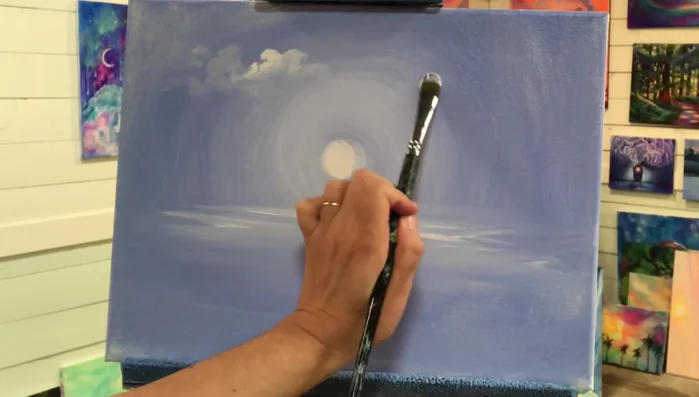
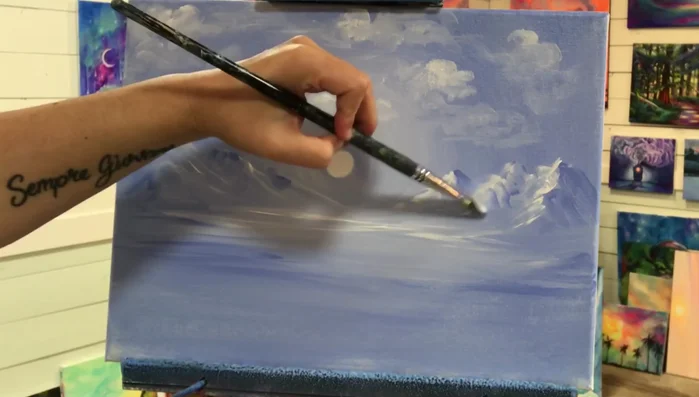
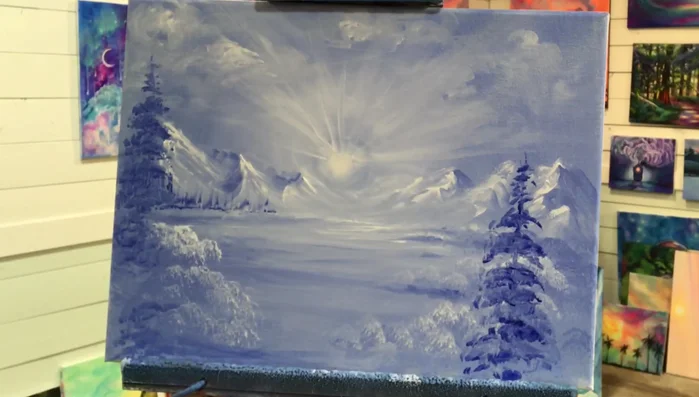
- Create a winter sky background. Using a large round chalk brush and light blue violet, paint big circles covering the entire canvas except for the middle portion where the moon will be.

Winter Sky Background Sky Blending and Horizon
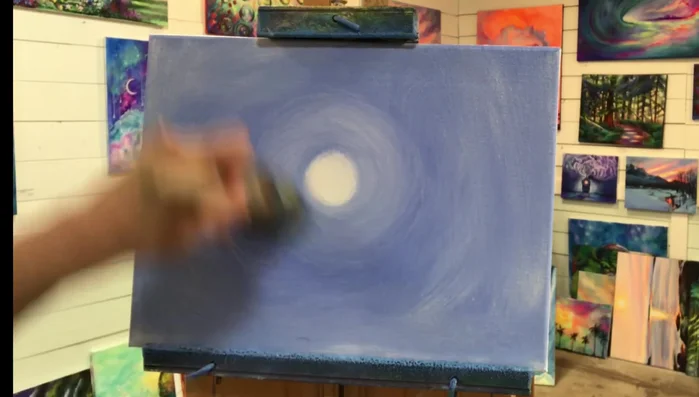
- Blend the sky. Add white to the light blue violet on your brush and continue painting circles, gradually adding more white to create a smooth, seamless blend from dark to light.
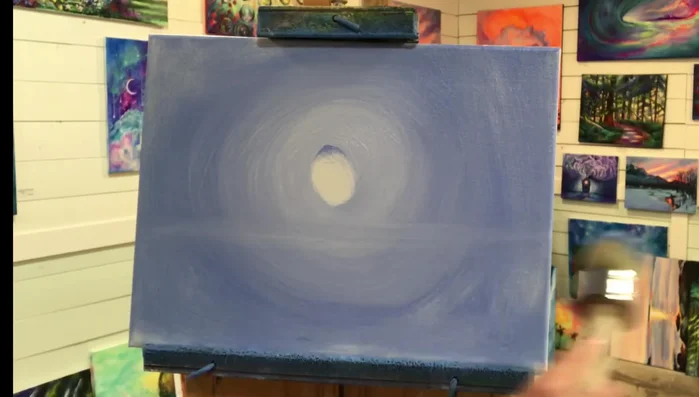
- Define the horizon. Using the same brush, create a horizon line under the moon by pulling the brush back and forth.
Sky Blending and Horizon Moon and Water/Snow Highlights
- Smooth and add highlights. Use a filbert brush to smooth the edges around the moon and add soft ripples or highlights to suggest water or snow.
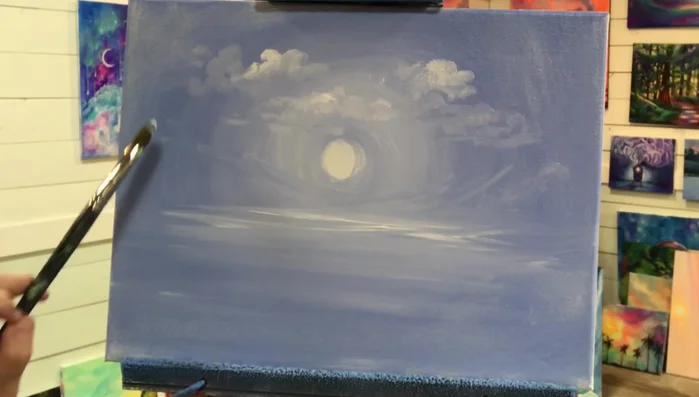
Moon and Water/Snow Highlights Clouds
- Create soft clouds. Use a filbert brush flat on the canvas, tapping, pushing, and gently smudging titanium white to create soft, puffy clouds.
Clouds Mountains and Initial Snow
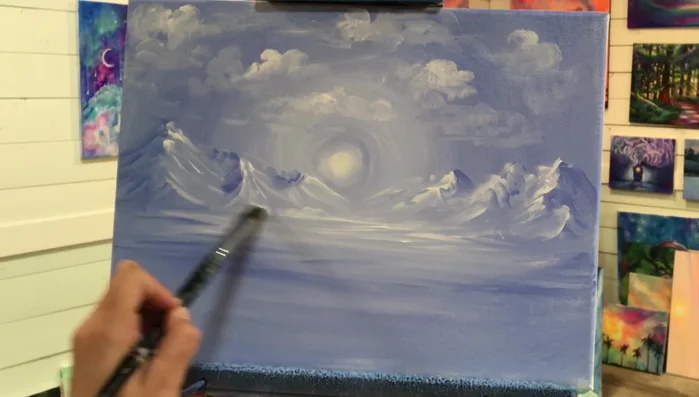
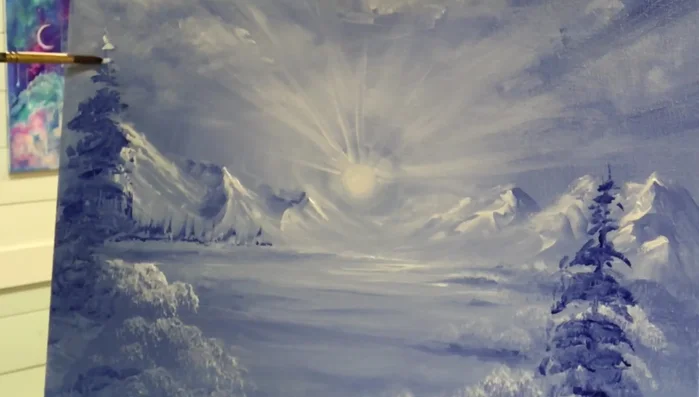
- Paint the mountains. Use a filbert brush and titanium white, painting diagonally and sweeping to create mountain ranges. Add snow to the mountains by lightly touching the canvas with white on the brush tip.
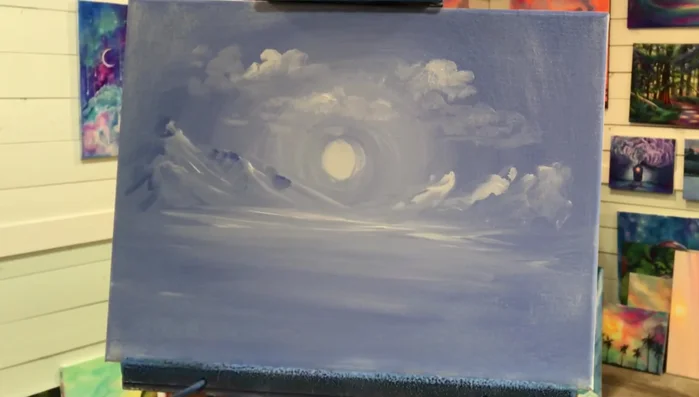
Mountains and Initial Snow Mountain Shadows
- Add shadows to the mountains. Use light blue violet to add shadows to the mountains, leaving spaces of lighter shade to create depth.
Mountain Shadows Refine Moon and Clouds
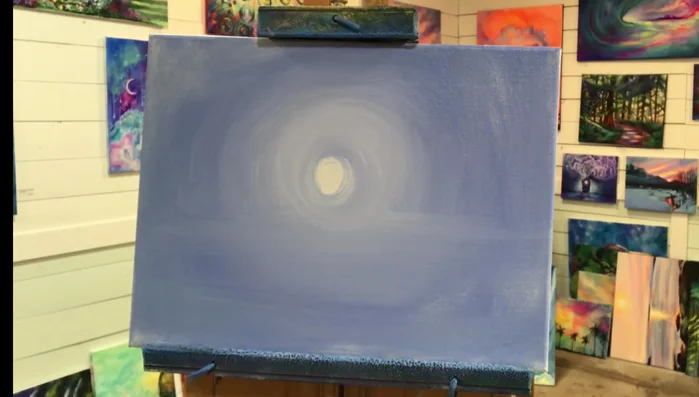
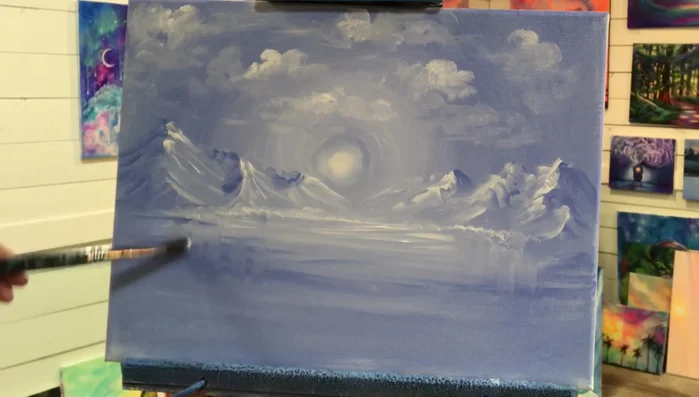
- Refine the moon and clouds. Add more clouds and subtly define the moon by painting a light layer of light blue violet around it.
Refine Moon and Clouds Hazy Layers
- Layer with titanium white. Apply thin layers of titanium white without water to blend smoothly with the wet underpainting, creating a soft, hazy effect.
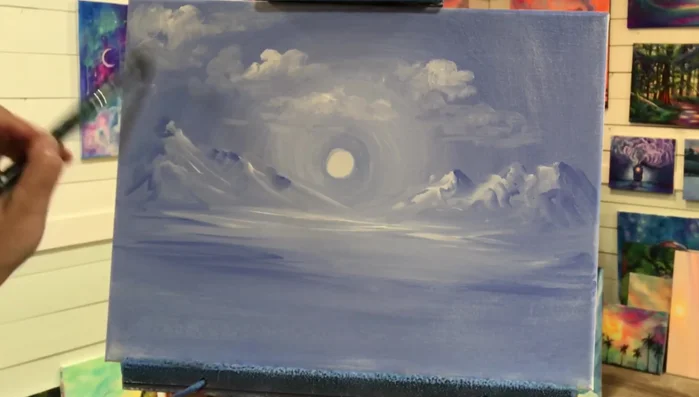
Hazy Layers Foreground Bushes and Perspective
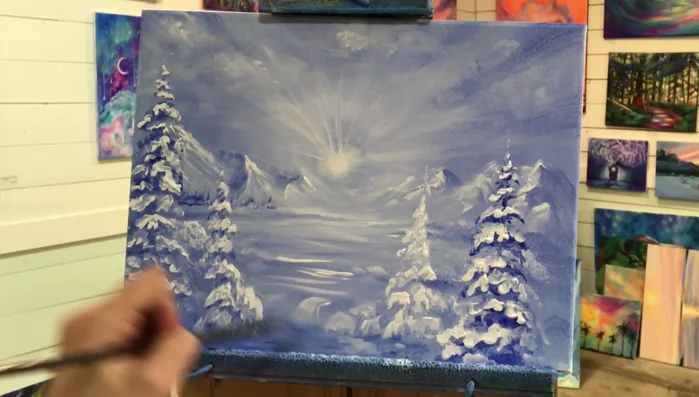
- Add bushes and foliage. Use a mop brush and white paint, tapping to create bushes at the base of the mountains. Use a larger mop brush for bushes in the foreground to create perspective.
Foreground Bushes and Perspective Water Reflections and Experimental Details
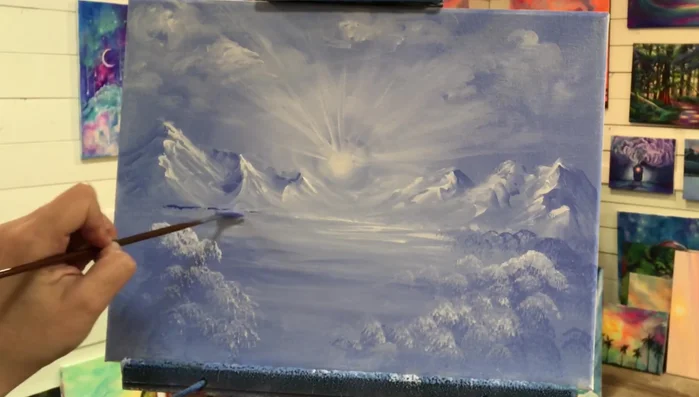
- Create reflections and details. Pull and flick the brush to create reflections in the water and experiment with brushstrokes to develop the painting's details and elements.
Water Reflections and Experimental Details Distant Trees
- Paint trees. Use a fan brush and ultramarine blue, using light flicks and taps to create trees in the distance. Use a smaller brush for details like branches.
Distant Trees Snow on Trees
- Add snow to trees. Layer snow onto the trees using white paint, leaving spaces for contrast and creating a heavy, sagging look.
Snow on Trees Waterfall Base
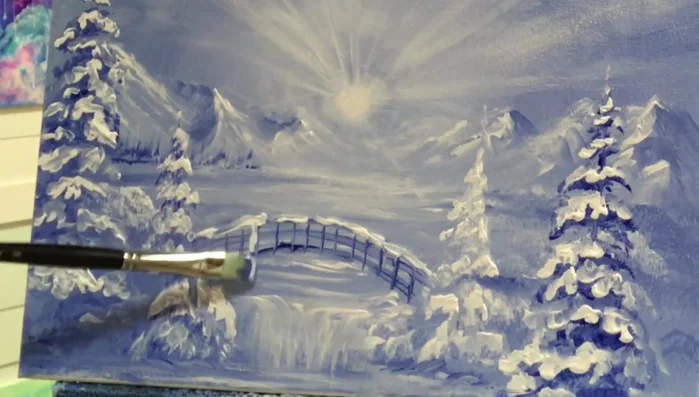
- Paint the waterfall. Using a round or liner brush, apply thick amounts of white paint by tapping, dragging, and rolling the brush to create a layered waterfall. Leave spaces to suggest depth and shadow.
Waterfall Base Refine Lighting and Shadows
- Refine and add details. Add more layers of white and blue to enhance the lighting and shadows, softening harsh lines to achieve a balanced look.
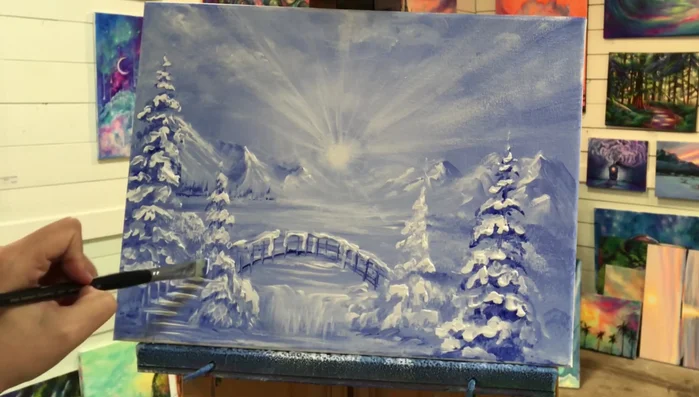
Refine Lighting and Shadows Bridge
- Paint a bridge. Use a fan brush and white paint to create a bridge with railings, adding layers to achieve depth and shadows.
Bridge Snow on Bridge and Railings
- Add snow to the bridge and railings. Add a layer of snow to the bridge and railings using light taps and pulls, varying thickness to create dimension.
Snow on Bridge and Railings Staircase
- Paint a staircase. Create a staircase using white lines and a blue underlayer for contrast, softening edges as needed.
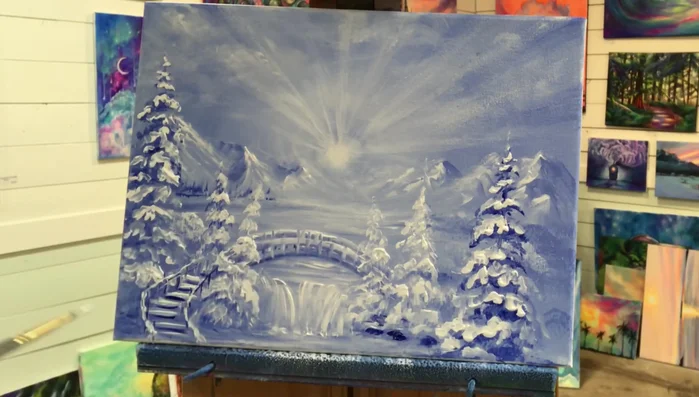
Staircase Final Touches and Harmonious Composition
- Final touches. Add finishing touches such as more snow, adjusting shadows, and enhancing details to create a harmonious and visually appealing composition.
Final Touches and Harmonious Composition

Read more: 7 Top Paint Color Trends for 2024: A Complete Guide with Free Downloadable Resource
Tips
- Use heavy-bodied acrylics for brighter, richer colors.
- Prepare your canvas with gesso for better paint adhesion and vibrancy.
- Don't be afraid to experiment with different brush types and techniques. It's okay to make mistakes and adjust your composition as you go.
- Balance detail and blur. Don't over-detail every aspect of your painting. Soften backgrounds to draw attention to focal points.
- Layer your paint for depth and vibrancy. Thin layers of paint can fade over time, while layering heavy-bodied paints creates richer and more durable colors.