Acrylic painting, with its vibrant colors and quick-drying nature, offers a captivating medium for artists of all skill levels. But true mastery lies not just in bold strokes and sweeping compositions, but in the meticulous attention to tiny details – the subtle glint of light on a polished surface, the delicate texture of a flower petal, the intricate pattern of a bird's feather. These minute elements are what elevate a painting from good to exceptional, transforming a simple representation into a truly immersive experience. They are the key to realism and the expression of intricate emotion.
Overlooking these details can significantly impact the overall impact of your artwork. This step-by-step guide will walk you through practical techniques and strategies for mastering these crucial elements, from precise brushwork and color mixing to effective layering and glazing. Get ready to unlock a new level of precision and detail in your acrylic paintings.
Preparation and Safety Guidelines
- Acrylic paints
- Round brushes (small and slightly larger)
- Gesso Masonite (or smooth canvas)
- Water
- Always work in a well-ventilated area. Acrylic paints contain solvents that can be harmful if inhaled.
- Wear appropriate safety gear, including gloves and eye protection, to prevent skin and eye irritation from paint and solvents.
- Clean brushes and palettes thoroughly with water and soap immediately after use to prevent paint from drying and becoming unusable.
Step-by-Step Instructions
Surface Preparation
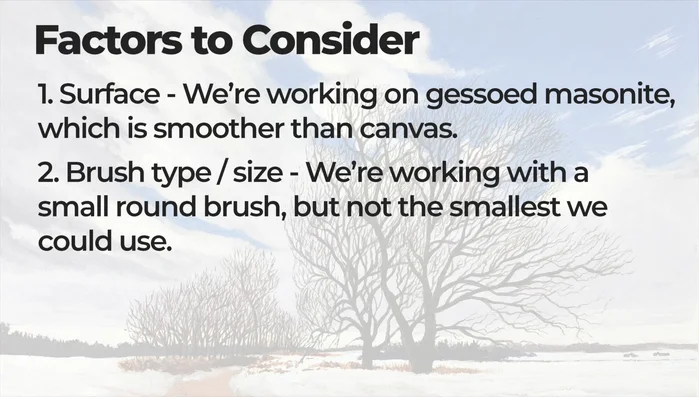
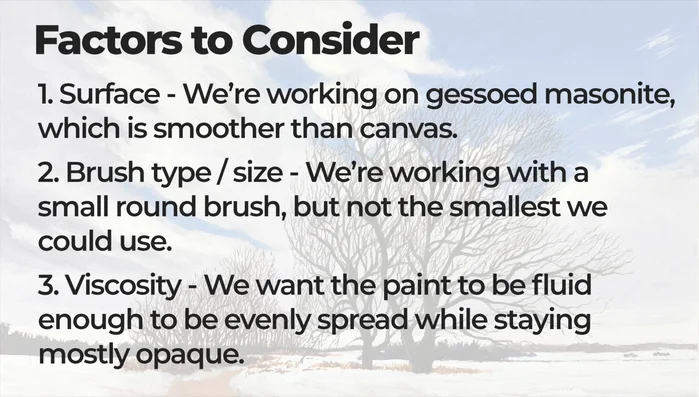
- Use a smooth surface like gesso Masonite for easier control.

Surface Preparation Brush Selection
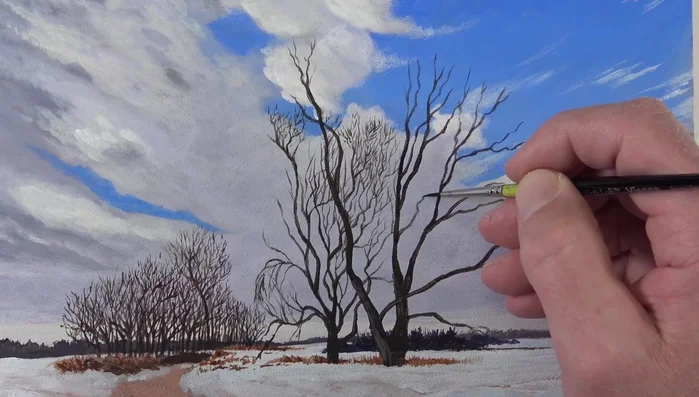
- Select a small to medium round brush. A slightly larger brush can offer better control than the tiniest brush available.
Brush Selection Paint Preparation
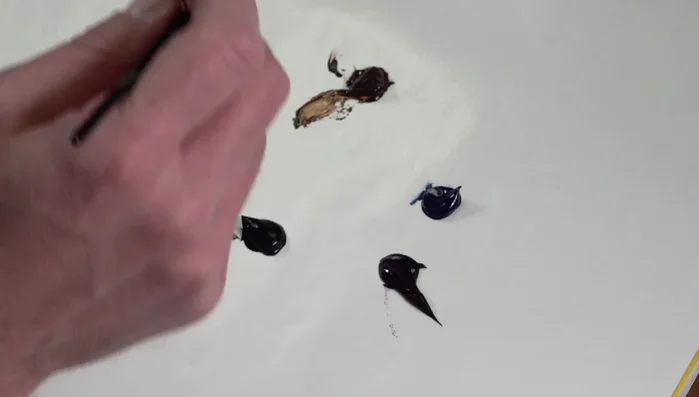
- Thin your heavy body acrylics with water to achieve a balance of fluidity and opacity. Avoid making it too watery, as it will affect adhesion and transparency.
- The example uses burnt umber, Payne's gray, and a touch of dioxazine purple for a natural branch color.
Paint Preparation Initial Branch Application
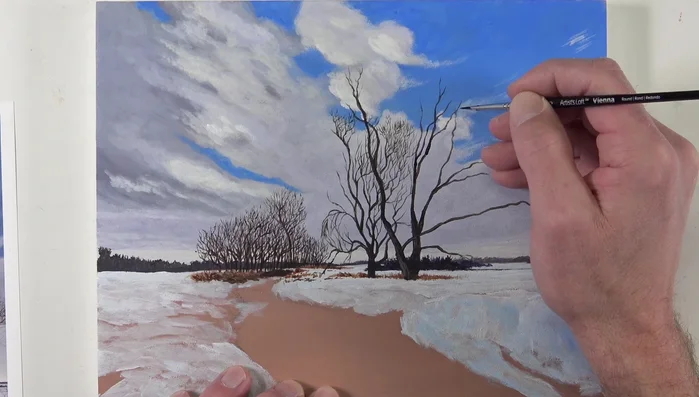
- Pull strokes outward from larger branches and the trunk, allowing them to taper naturally. Avoid scrubbing back and forth.
- Follow the organic direction of branches, creating bends and unexpected changes for a natural look. Don't paint every single branch; focus on creating the illusion of density.
Initial Branch Application Layering and Refinement
- Start with light applications and gradually add darker areas for depth and contrast.
Layering and Refinement Final Touches
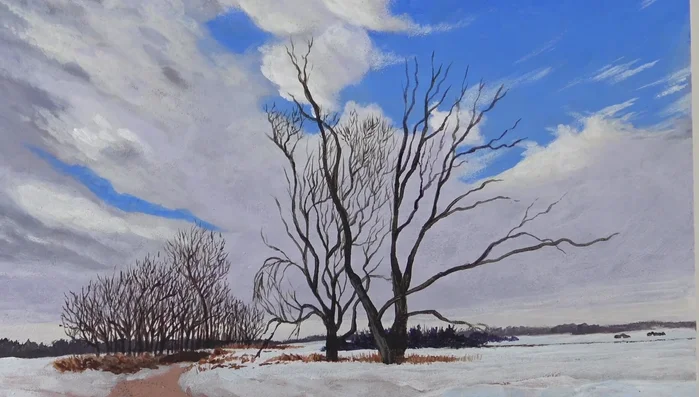
- Once the basic branches are complete, add highlights and shadows to the larger branches and trunk to enhance form and realism.
Final Touches


Read more: 7 Top Paint Color Trends for 2024: A Complete Guide with Free Downloadable Resource
Tips
- A smoother surface is beneficial for intricate detail.
- Don't always use the smallest brush; a slightly larger one can provide better control.
- Find the right paint consistency – fluid enough to spread evenly, but opaque enough to be visible.
- Work slowly and deliberately; patience is key.
- Step back from your painting periodically to assess progress and prevent overworking.