Give your old shirts a stylish new life with this fun and easy DIY fabric collage cuff bracelet tutorial! Tired of those unworn shirts gathering dust in your closet? Instead of letting them languish, transform them into unique and fashionable accessories. This project is perfect for upcycling enthusiasts and anyone looking for a creative outlet, showcasing how a simple thrifted shirt can be repurposed into a statement piece. It's a fantastic way to reduce textile waste and express your personal style, resulting in a truly one-of-a-kind bracelet.
This tutorial guides you through the process of creating a beautiful fabric collage cuff bracelet using only a thrifted shirt and some basic crafting supplies. We'll explore how to select the perfect fabric pieces, prepare your shirt material, and assemble your bracelet with a secure, comfortable closure. Ready to get started? Let's dive into the step-by-step instructions below!
Preparation and Safety Guidelines
- Thrifted shirt
- Scissors
- Sewing machine
- Black thread
- Gold thread
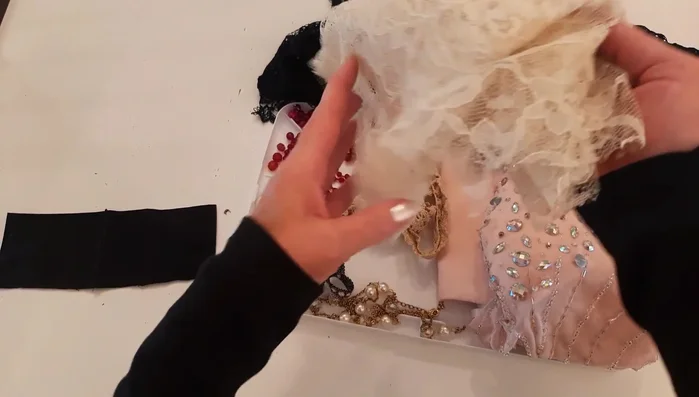
- Lace
- Scarf (with lace and fringes)
- Embellishments (crochet trim, earring, beads, necklace pieces, rhinestones)
- Needle
- Wire cutters
- Marker
- Always use sharp scissors and a rotary cutter with caution to avoid cuts. Keep fingers away from blades.
- Fabric glue or adhesive may be irritating to skin. Wear gloves if necessary and ensure good ventilation.
- If using a sewing machine, be mindful of loose clothing or long hair to prevent accidents.
Step-by-Step Instructions
Prepare the Cuff
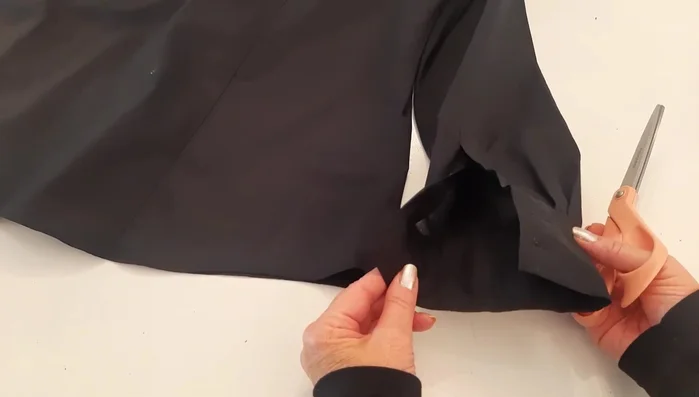
- Cut off a cuff from a thrifted shirt sleeve, slightly above the seam.
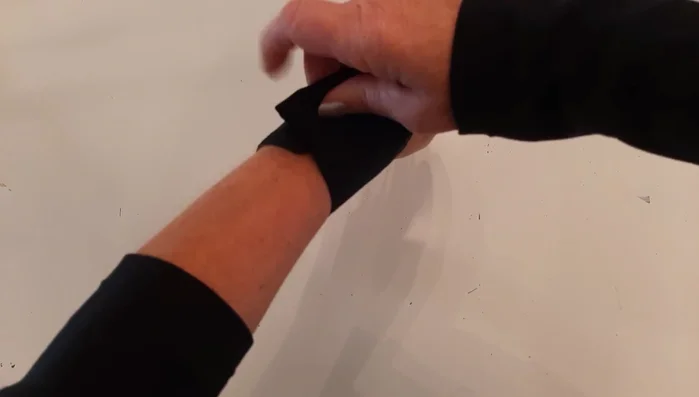
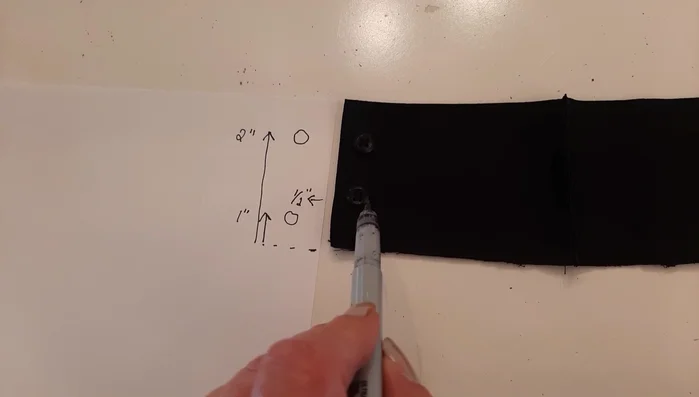
- If the cuff is too large, pinch it to determine how much to remove. Mark or eyeball the amount (about an inch in this example). Fold the cuff in half (right side out), stitch along the marked line to reduce the size.
- Remove existing buttons from the cuff. Note the buttonhole positions for later replacement.

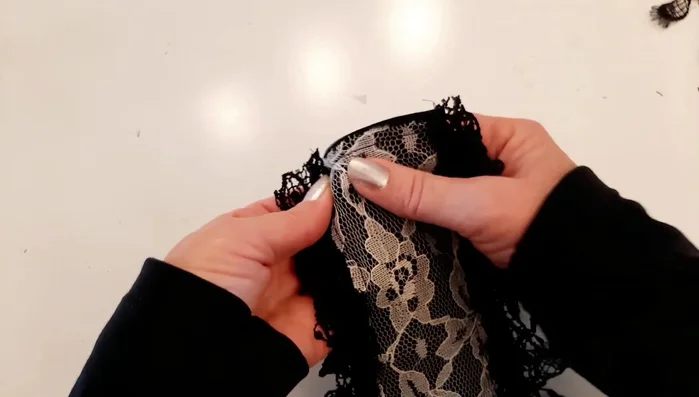
Prepare the Cuff Apply Base Lace
- Sew a sheer lace piece to the cuff, covering the buttonholes temporarily. Stitch around the lace edges using a straight stitch.
- one for the top, one for the bottom. Sew these onto the cuff, overlapping slightly.
- Make small slits in the lace to create openings for the buttonholes.
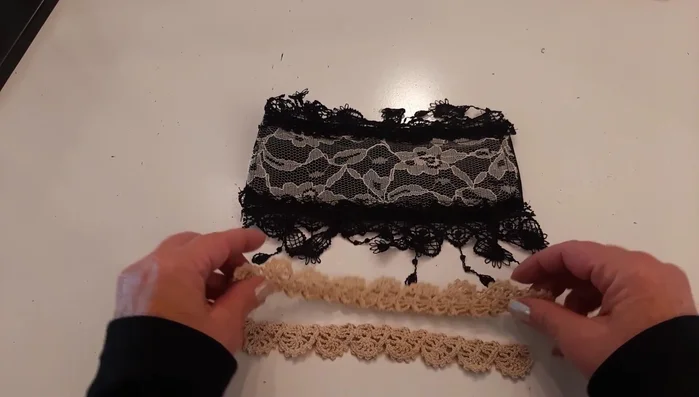
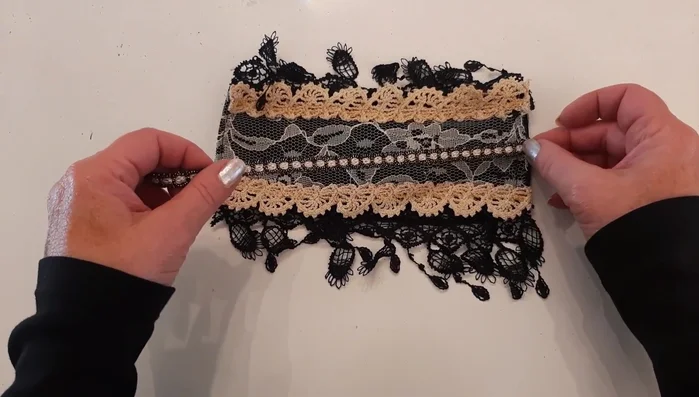
Apply Base Lace Add Decorative Trims
- Sew a scalloped crochet trim to the top edge of the cuff using a zigzag stitch.
- Sew a black and cream/gold fringed trim down the center of the cuff using a large zigzag stitch.
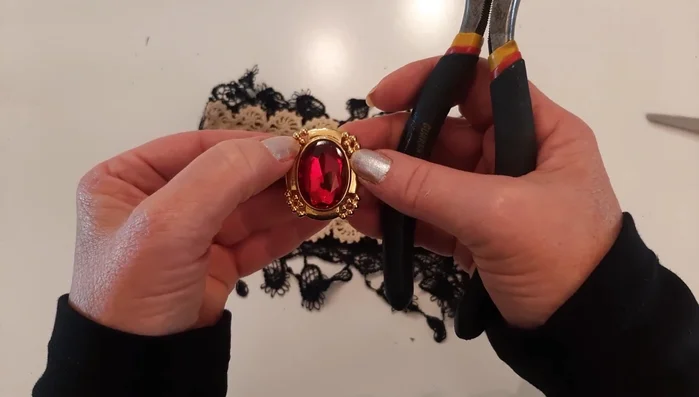
Add Decorative Trims Attach Central Embellishment
- Hand sew the earring to the center of the cuff, using gold thread. Weave the thread between the cuff layers to secure it instead of tying off frequently.
- Sew short necklace pieces with beads onto either side of the earring.
Attach Central Embellishment Add Finishing Touches
- Cut and sew small rhinestones onto the cuff for added sparkle.
- Create small clusters of red beads and sew them to the cuff, tying in with an existing red embellishment.
- Sew replacement buttons onto the cuff, using the original buttonhole positions as a guide.

Read more: DIY Tiered Tassel Earrings: A Quick & Easy Jewelry Tutorial
Tips
- Consider using thread colors that complement the embellishments and hardware.
- Weaving the thread between cuff layers provides stronger, more secure stitching than frequent tying off.
- Don't be afraid to experiment with different materials and placement of embellishments to achieve a unique look.