Delicate, vibrant, and utterly captivating – seed bead flower earrings are a testament to the artistry achievable with tiny, shimmering beads. These miniature masterpieces offer a unique blend of elegance and intricacy, perfect for adding a touch of handmade charm to any outfit. Whether you're a seasoned crafter or a curious beginner, the beauty and versatility of these earrings make them a rewarding project. Their seemingly complex designs are surprisingly accessible, transforming simple beads into blooming floral wonders.
This tutorial provides a comprehensive, step-by-step guide to crafting your own stunning seed bead flower earrings. From gathering the necessary materials to perfecting the delicate petal formations, we'll walk you through each stage, ensuring you create a pair of earrings that are as unique and beautiful as you are. Let's dive into the process and bloom your own creative masterpiece!
Preparation and Safety Guidelines
- 11/0 seed beads (3 colors)
- Ear wires
- Size 0 Nemo beading thread (0.006 in or 0.15 mm)
- Needle
- Always use sharp, high-quality beading needles to prevent breakage and injury. Avoid using dull needles which can cause you to push too hard, leading to needle pricks.
- Be mindful of small parts. Seed beads are tiny and pose a choking hazard, especially for children and pets. Keep them out of reach when not in use.
- Work in a well-lit area to avoid eye strain and ensure precise bead placement. Using a magnifier can also be helpful for detail work.
Step-by-Step Instructions
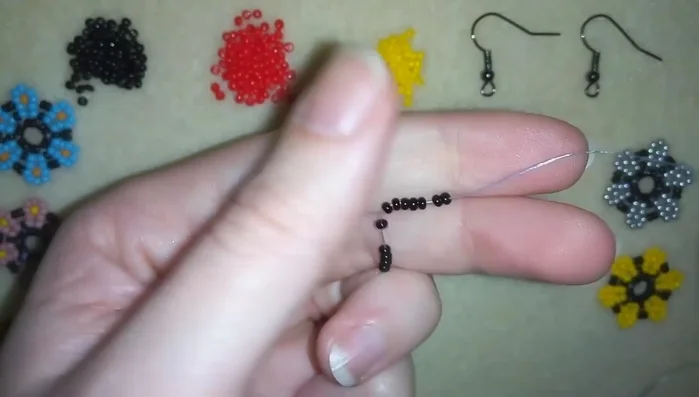
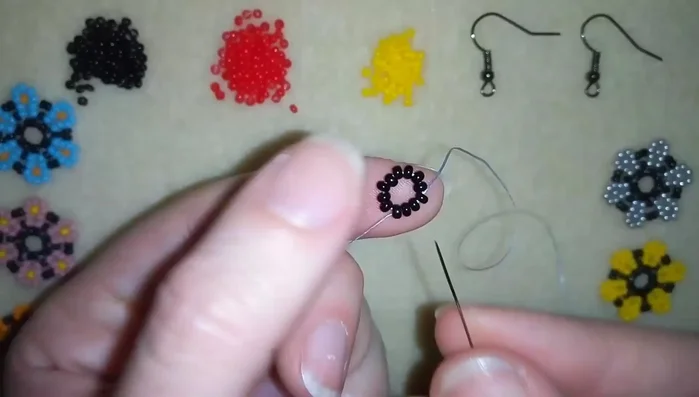
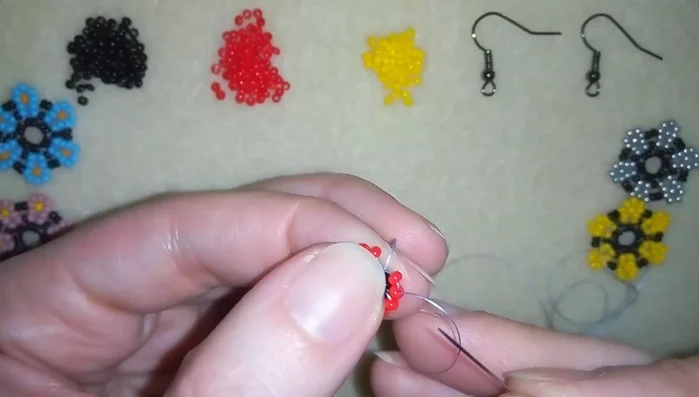
Create the Base Circle
- Create a circle of 12 black seed beads.

Create the Base Circle Form the First Layer of Petals
- Add two red beads, going back through two black beads to create a petal shape.
- Repeat step 2, creating more petal shapes around the black bead circle.
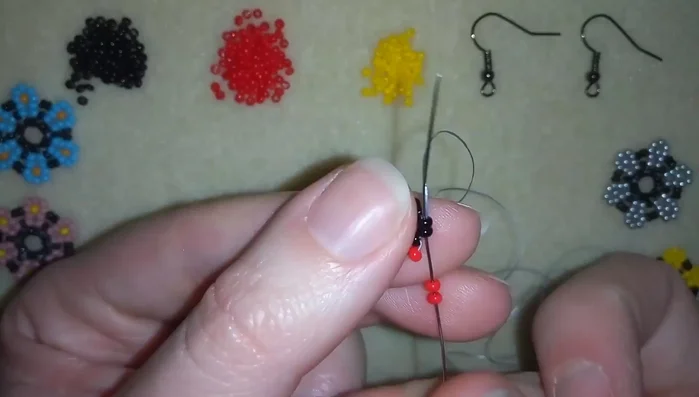
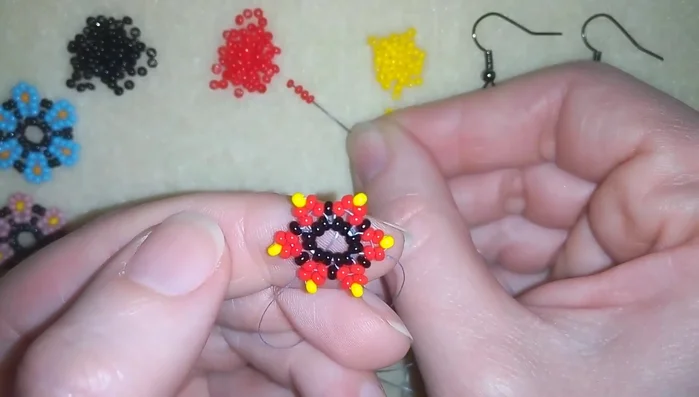
Form the First Layer of Petals Create the Second Layer of Petals
- Flip the work and go through the first two red beads, adding one red, one yellow, and one red bead to create the next layer.
- Continue adding the red-yellow-red bead sequence, interspersed with single black beads, to form the flower petals.
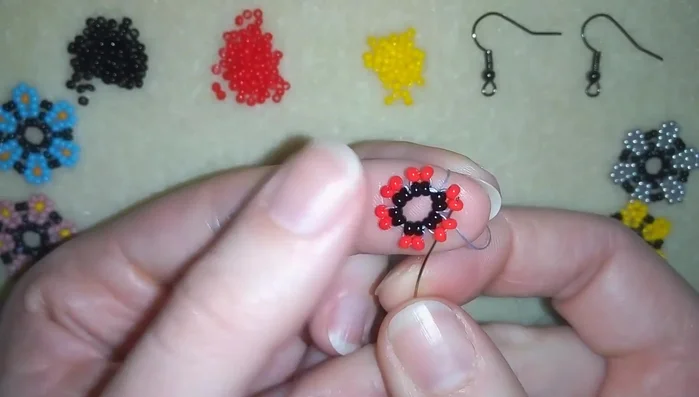
Create the Second Layer of Petals Add Accent Beads to Petals
- Add five red beads to the next petal.
- Repeat step 6 for the remaining petals.
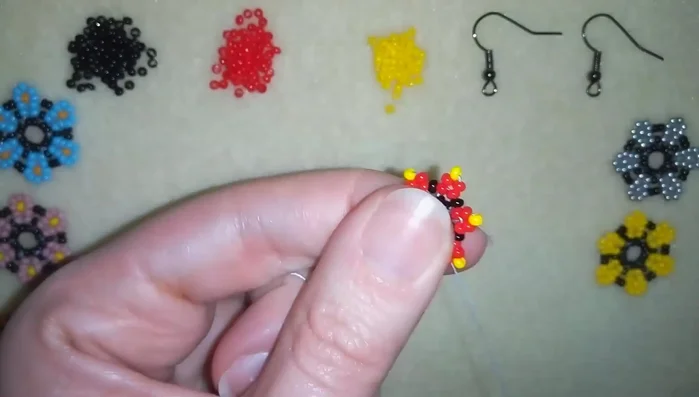
Add Accent Beads to Petals Complete the Flower Top
- Exit at the top of the flower and add two black beads, going through the following two beads, to complete the top.
- Repeat step 8 to finish the top of the flower.
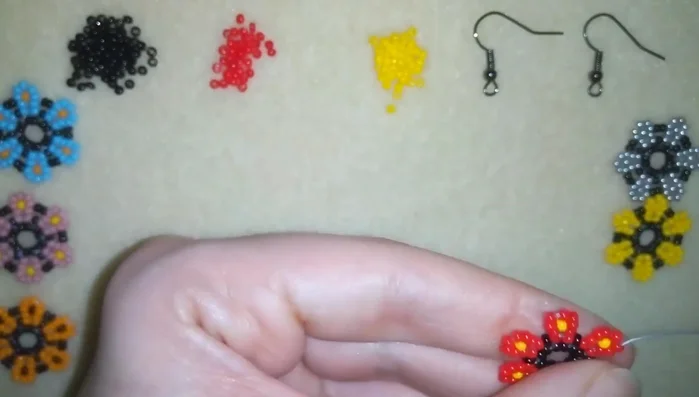
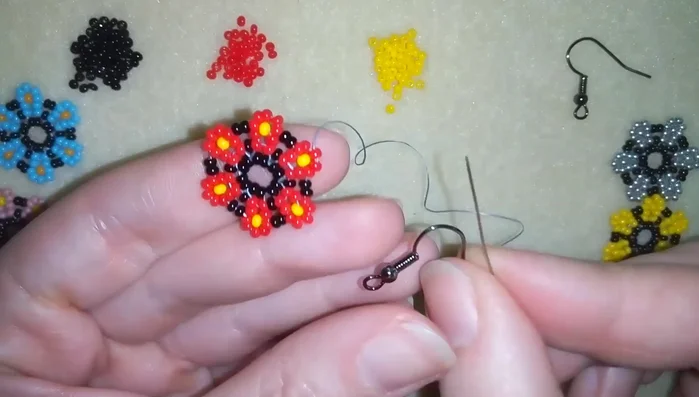
Complete the Flower Top Attach Ear Wires
- Attach the ear wire by adding one seed bead, the ear wire, and another seed bead. Secure by going back through the beads and making knots at the back.
Attach Ear Wires

Read more: DIY Tiered Tassel Earrings: A Quick & Easy Jewelry Tutorial
Tips
- Don't worry if the circle doesn't look perfect at first; it will come together as you add more beads.
- Pull the beads slightly towards the center of the work to keep the shape neat.
- Reinforce the ear wire attachment by making several knots at the back of the earring.