The ocean's treasures are more than just pretty souvenirs; they're the perfect components for creating unique and personalized jewelry! Seashells, with their infinite variety of shapes, sizes, and colors, offer a limitless palette for crafting beautiful earrings and necklaces. Whether you've collected a bucketful of shells from your last beach trip or are sourcing them from a craft store, this DIY project is a fantastic way to transform simple shells into stunning accessories. Think delicate seashell earrings that whisper of summer breezes or a statement necklace that captures the essence of the sea.
This tutorial will guide you through the simple steps of creating both elegant earrings and a charming necklace, all using readily available materials. From selecting the perfect shells to adding finishing touches, we'll walk you through each stage, ensuring you'll soon be proudly wearing your handmade coastal creations. Ready to dive in? Let's get started with our step-by-step guide to crafting your own beautiful seashell jewelry!
Preparation and Safety Guidelines
- Waxed cord
- Necklace fasteners
- Beads (wooden beads recommended)
- Crimpers
- Jewelry pins
- Needle nose pliers
- Wire cutters
- Shells (with or without pre-drilled holes)
- Always wash seashells thoroughly with soap and water before crafting to remove any bacteria or residue from the ocean.
- Use strong, jewelry-making-grade adhesives designed for adhering to shells and metal findings. Avoid glues that might weaken or discolor over time.
- If drilling shells, wear safety glasses to protect your eyes from flying shell fragments.
Step-by-Step Instructions
Prepare Materials
- If shells don't have pre-drilled holes, drill them yourself. Wear a mask to avoid inhaling particles.

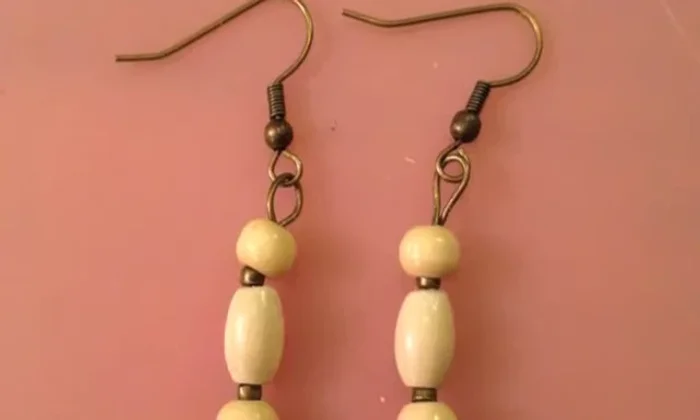
Prepare Materials Create Earring Components
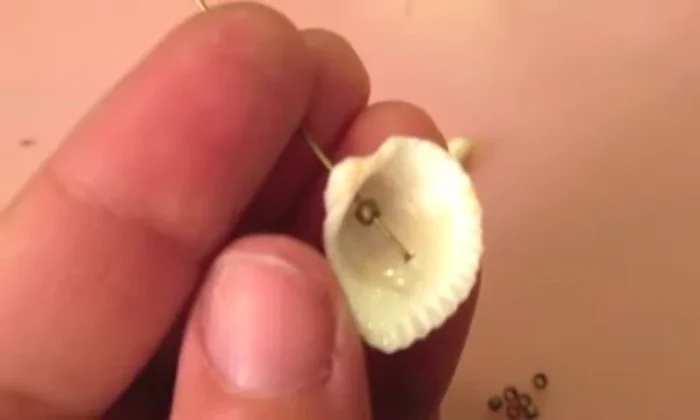
- Thread a crimper onto each jewelry pin, then insert the pin through the shell's hole.
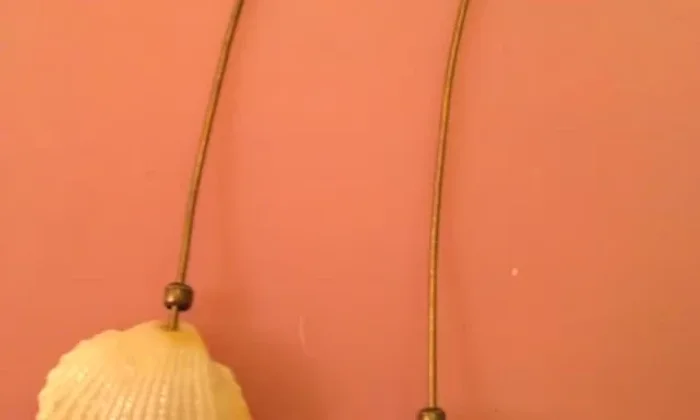
- Alternate crimpers and beads on the pin until you reach your desired length.
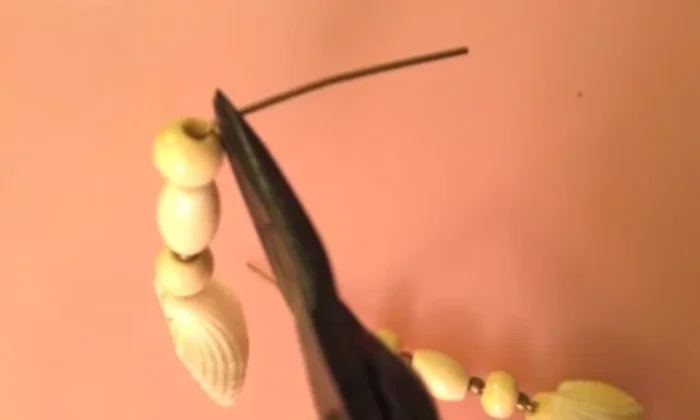
- Use needle nose pliers to bend the pin at a 90-degree angle, then curve the metal to form a loop. Cut excess wire.
- Slip an earring hook into the loop and use pliers to tuck the wire end into the top bead.
Create Earring Components Create Necklace Components
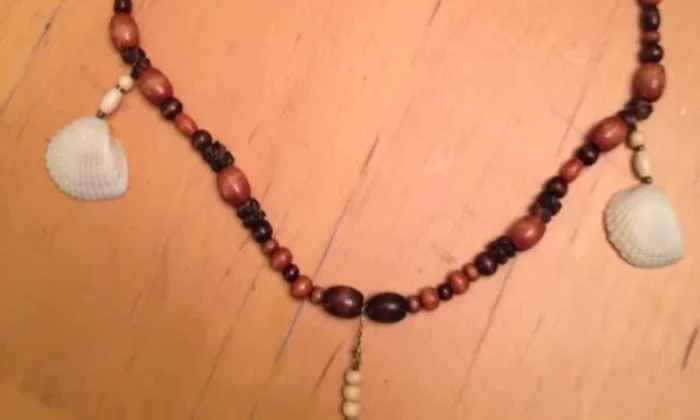
- Use waxed cord as the base. Create several elements similar to the earrings (using pins or gold bead wire).
Create Necklace Components Assemble Necklace
- Attach the shell elements to the waxed cord, incorporating a clasp and securing everything with gold bead wire and crimpers.
Assemble Necklace

Read more: DIY Tiered Tassel Earrings: A Quick & Easy Jewelry Tutorial
Tips
- Choose shells of similar size and color for a cohesive look.
- Practice creating the earring loops; it might take a few tries to get it right.
- Use gold bead wire for the necklace centerpiece for a more unique look.