Have you ever gazed at a beautifully crafted coaster and thought, "That would make amazing earrings?" The world of resin jewelry is bursting with creative potential, and today we're exploring the transformation of everyday objects into dazzling accessories. We'll delve into the surprisingly simple process of crafting stunning resin earrings, drawing inspiration from the intricate designs often found on coasters – from geometric patterns to nature-inspired scenes. Forget expensive, mass-produced jewelry; creating your own unique pieces is both rewarding and surprisingly accessible.
This guide will take you through a step-by-step journey, revealing the techniques and materials needed to turn your coaster inspiration into a pair of eye-catching earrings. Prepare to be amazed at the versatility of resin and unleash your inner artist as we explore everything from mixing colors and creating unique textures to adding embellishments and perfecting the finishing touches. Get ready to elevate your style with a pair of handcrafted resin earrings that are as unique as you are!
Preparation and Safety Guidelines
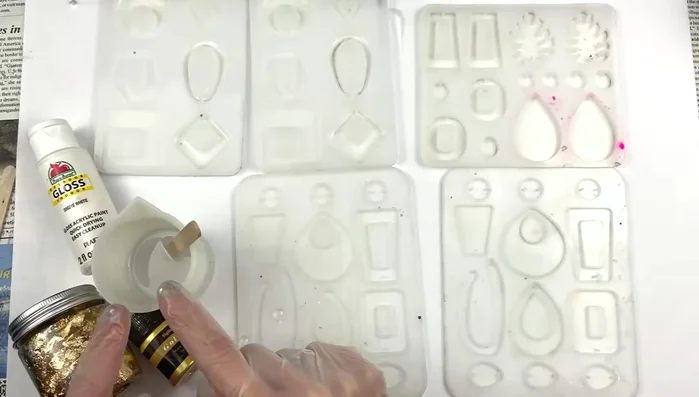
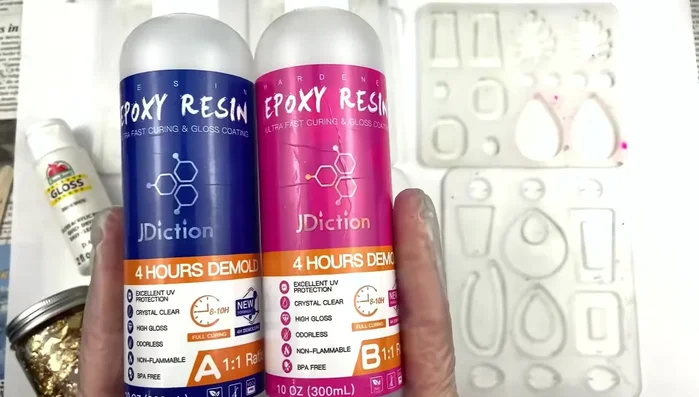
- Resin (Jay Dixon recommended)
- Epoxy
- Gold foil
- White paint (Apple Barrel recommended)
- Mica powder
- Mixing cups
- Mixing sticks
- Earring molds
- Heat tool
- Always work in a well-ventilated area. Resin fumes can be harmful if inhaled.
- Wear gloves to protect your skin from resin and its potential irritants.
- Use a designated workspace covered with a protective surface like newspaper or silicone mats, as resin can be difficult to clean up.
Step-by-Step Instructions
Resin Preparation
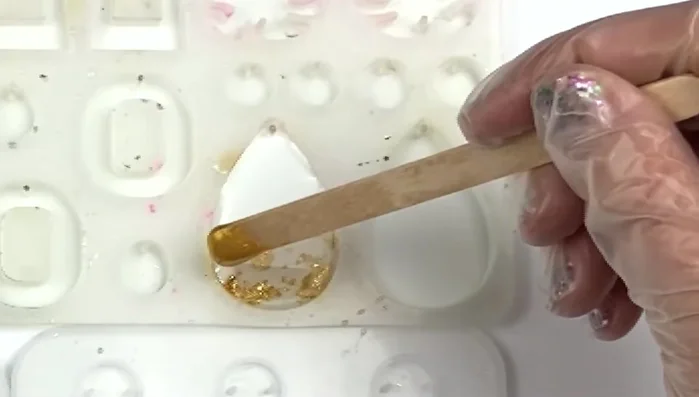
- Mix equal parts of resin (A) and hardener (B). Stir gently to avoid excessive bubbles.
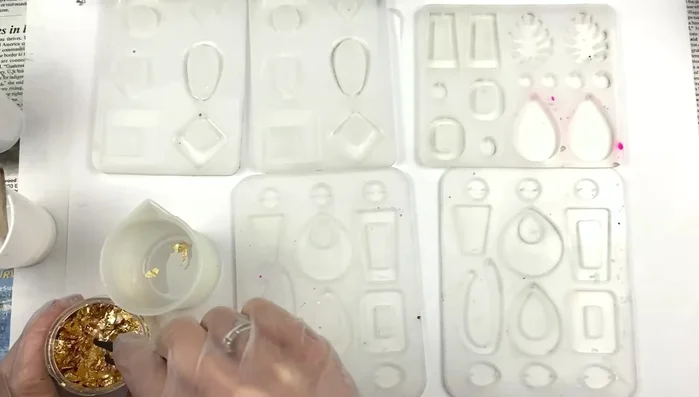
- one for white, one for gold, and one for clear with foil.
- Add white paint to one cup of resin until desired opacity is achieved.
- Add gold foil to the clear resin, ensuring even distribution.

Resin Preparation - Add a small amount of gold mica powder to the remaining resin for a subtle gold effect.
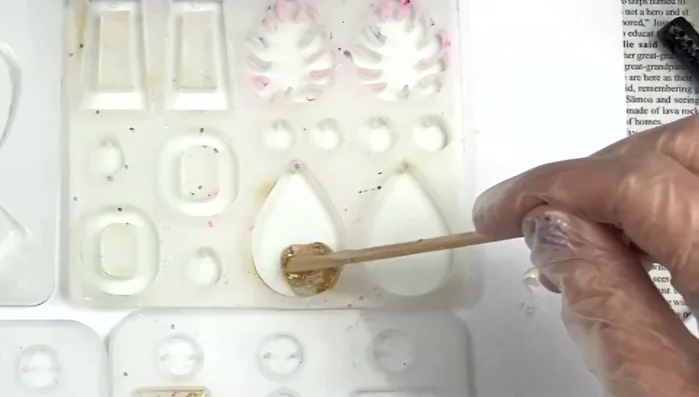
Resin Preparation Layering the Resin
- Pour the clear resin with foil into the mold, creating a diagonal line at the bottom.
- Add a line of white resin next to the clear resin, preventing them from mixing completely.
- Add a thin line of the gold resin between the white and clear resin.
Layering the Resin Bubble Removal
- Use a heat tool to remove any air bubbles.
Bubble Removal Curing and Demolding
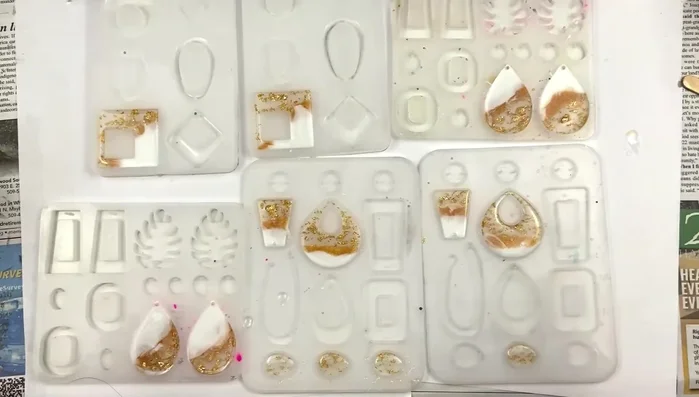
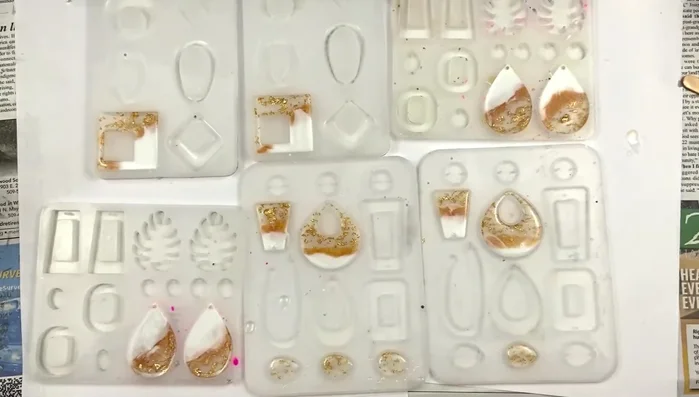
- Let the resin cure completely (approximately 24 hours).
- Unmold the earrings.
Curing and Demolding


Read more: DIY Tiered Tassel Earrings: A Quick & Easy Jewelry Tutorial
Tips
- Let the mixed resin rest for a while to reduce bubbles before using it.
- Don't add too much paint or it will become too thick.
- Avoid clumps of gold foil; separate them with your fingers if necessary.
- For thin molds, use less resin to avoid overfilling.
- Always wear safety gear (gloves, mask, eye protection) when working with resin.