Discover the beauty and simplicity of crafting your own unique Gaelic knot circle bracelet! This ancient Celtic symbol, representing eternity and interconnectedness, translates beautifully into a stunning piece of jewelry you can easily make at home. Forget expensive store-bought accessories – with just a few basic materials and a little patience, you can create a personalized bracelet that reflects your style and carries a touch of Celtic heritage. Imagine the satisfaction of wearing a piece you've handcrafted yourself, a wearable testament to your creativity.
This easy-to-follow tutorial will guide you through each step of the process, from gathering materials to securing the final knot. Let's embark on this fun and rewarding DIY jewelry-making adventure together, transforming simple cords into a charming and meaningful Gaelic knot circle bracelet. Get ready to unleash your inner artisan and prepare to be amazed by how easily you can create this elegant piece.
Preparation and Safety Guidelines
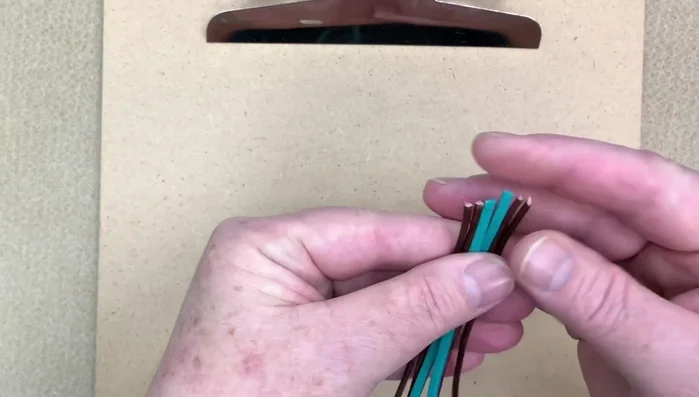
- 14-inch vegan suede (2 pieces)
- 14-inch 2mm round leather (4 pieces)
- Medium textured rings
- Small textured rings (13mm)
- Ribbon ends
- Small jump rings
- Toggle clasp
- Ruler
- Clipboard
- Sharp scissors
- Loctite superglue
- Sharpie
- Painter's tape
- Always supervise children when using sharp tools like wire cutters or pliers.
- Be mindful of potential allergies. Some wires or beads may cause skin reactions. Test a small area before extensive wear.
- Avoid wearing the bracelet while sleeping or engaging in strenuous activities to prevent damage or accidental injury.
Step-by-Step Instructions
Prepare the Materials
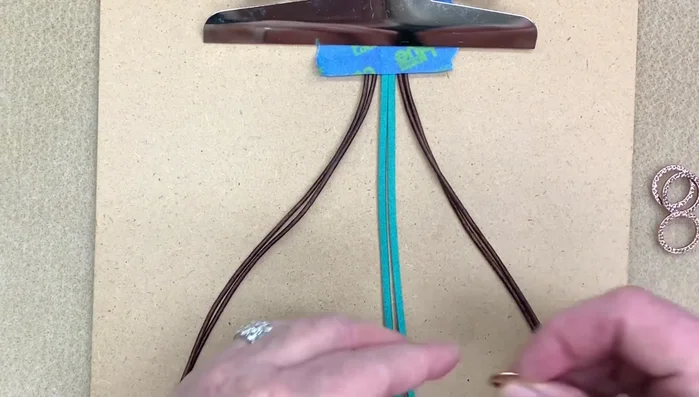
- Line up leather and suede pieces, overlapping slightly. Tape the last inch to secure.

Prepare the Materials Create the Gaelic Knot Base
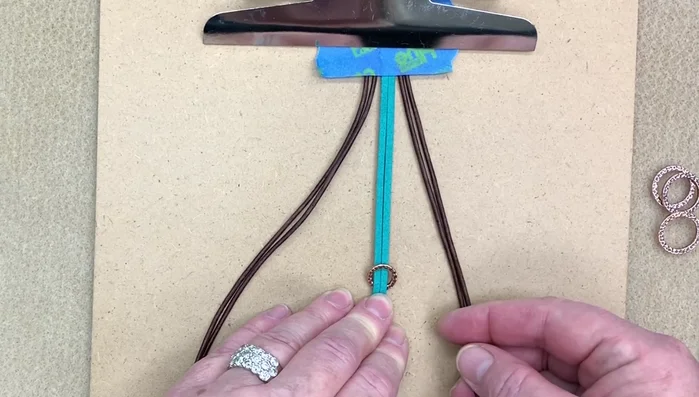
- Attach a small ring to the center pieces about 4 inches down.
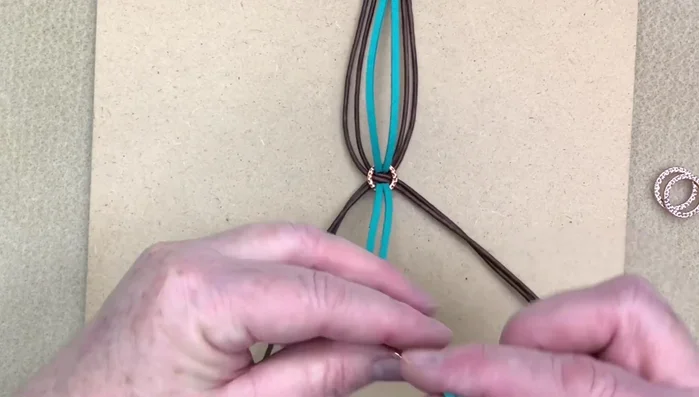
- Crisscross the outer leather pieces over the center, then thread the center pieces back up through the ring. Tighten.
- Repeat steps 2 and 3 with progressively larger rings, ensuring a tight, flat braid each time.
Create the Gaelic Knot Base Braid the Loose Ends
- Create a three-strand braid with the loose ends.
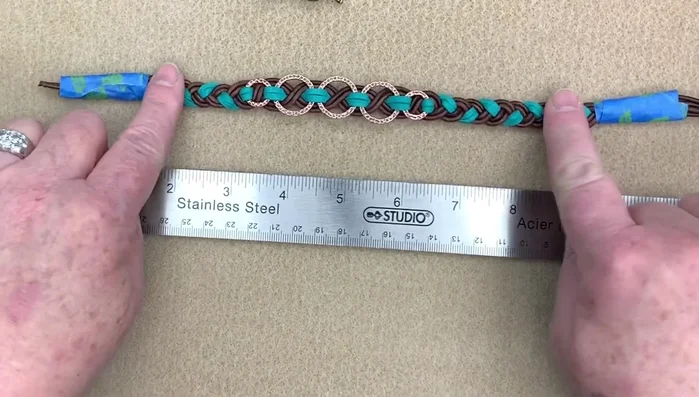
Braid the Loose Ends Measure and Cut the Braid
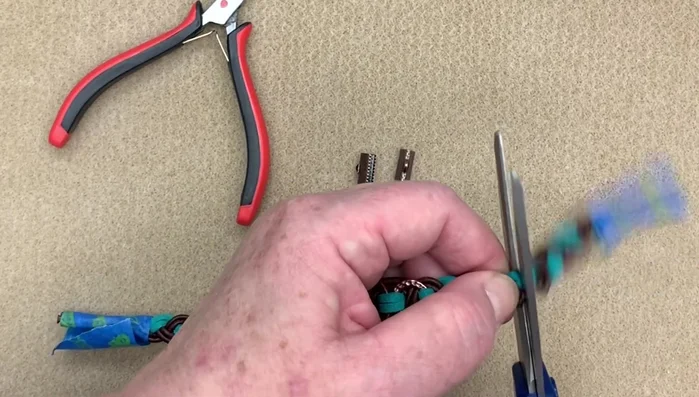
- Measure and mark the bracelet length (wrist size + allowance + ribbon end length). Cut the braid.
Measure and Cut the Braid Secure the Ends
- Secure the cut ends with ribbon ends, using glue for extra security.
- Add a small amount of Loctite glue to secure the jump rings and ribbon ends.
Secure the Ends Attach the Clasp
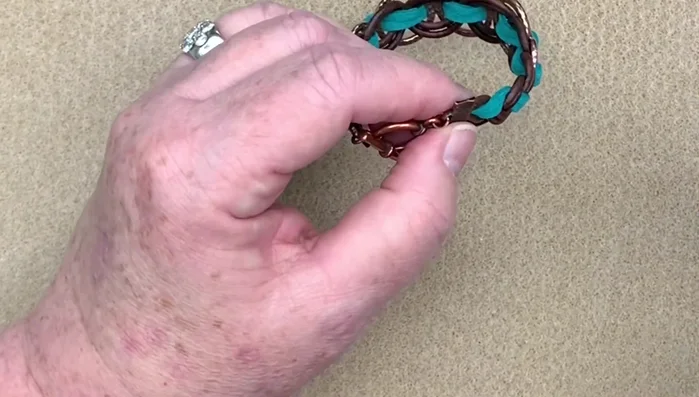
- Attach the toggle clasp using jump rings.
Attach the Clasp


Read more: DIY Tiered Tassel Earrings: A Quick & Easy Jewelry Tutorial
Tips
- Painter's tape provides better grip when working with multiple layers of leather.
- Always start crisscrossing with the same outer piece (right or left, depending on your preference).
- Keep the braid tight and straight to avoid gaps or unevenness.
- Add extra jump rings to the clasp to ease attachment.
- Use gel superglue sparingly to avoid sticking to leather.