Delicate, intricate, and undeniably eye-catching, filigree wire wrapped earrings are a testament to the artistry of jewelry making. Their airy, almost ethereal quality belies a surprisingly accessible crafting process, perfect for both beginners and experienced artisans looking for a new challenge. The shimmering elegance of these earrings makes them a versatile accessory, suitable for adding a touch of sophistication to everyday wear or serving as a stunning statement piece for a special occasion. This unique style allows for endless creativity, enabling you to personalize your design and create truly one-of-a-kind jewelry.
This tutorial will guide you through the creation of your own exquisite filigree wire wrapped earrings, step by step. We’ll cover everything from choosing the right materials and preparing your wire to mastering the essential techniques for shaping and joining the intricate filigree patterns. Prepare to be amazed at how easily you can transform simple wire into a pair of stunning, handcrafted earrings.
Preparation and Safety Guidelines
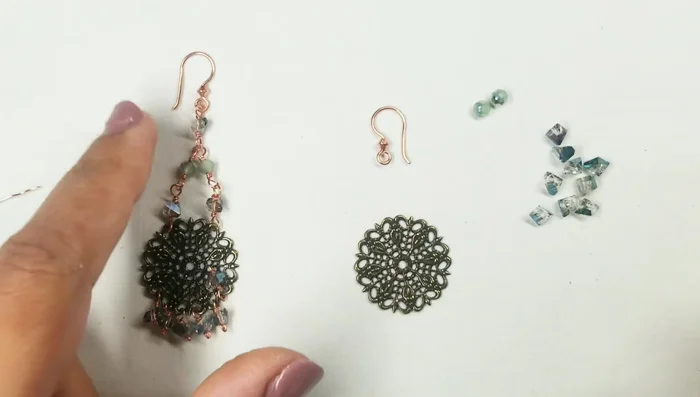
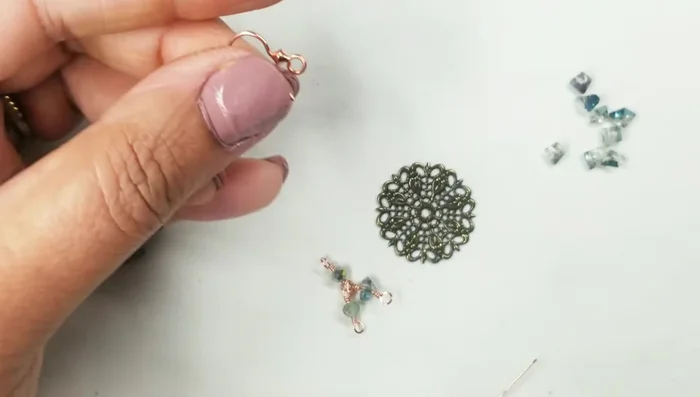
- Filigree discs
- 24 gauge copper wire
- 4mm round beads
- Trapezoid triangle crystals
- Ruler
- Flush cutter
- Bent nose pliers
- Chain nose pliers
- Round nose pliers
- Six-step bail making pliers
- Metal/Jeweler's file
- Always use sharp wire cutters to prevent bending or damaging the wire. Dull cutters can lead to pinched fingers.
- Be mindful of sharp wire ends. File or gently round off any sharp points after cutting to avoid injury.
- If using glue, ensure it's appropriate for both the metal wire and the beads/components you are using. Allow adequate drying time before handling.
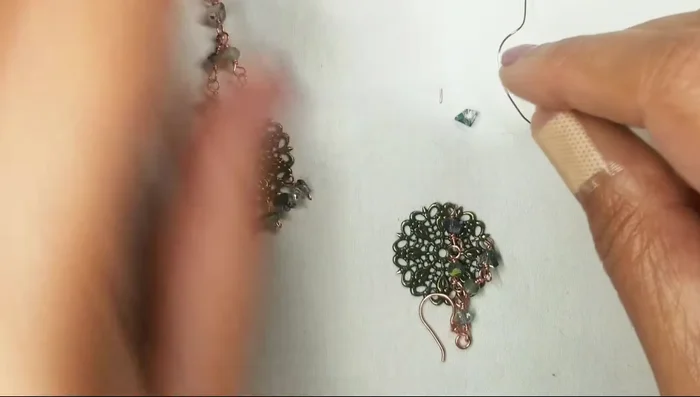
Step-by-Step Instructions
Prepare the Wire Wraps
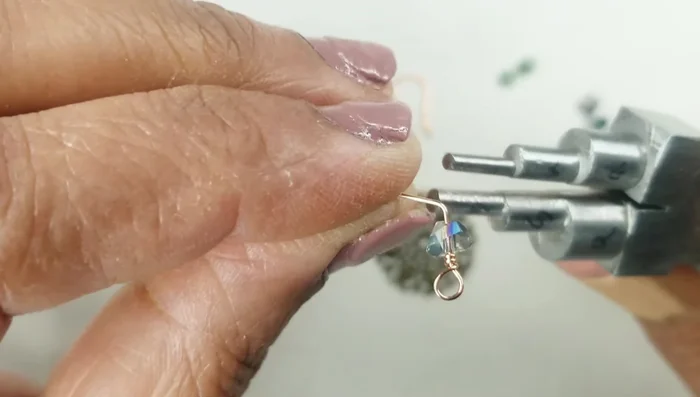
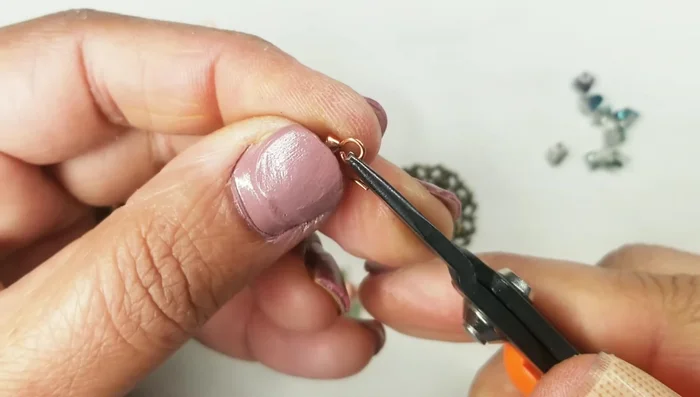
- Create the basic wire wrap for each bead. Leave about half an inch of wire, make a loop with six-step looping pliers, wrap two to three times around the bead, and tuck in the end.

Prepare the Wire Wraps Attach the First 4mm Bead
- Attach the first 4mm round bead and leave a gap for the next wrap.
- Fold the wire over the prong of the bead, flip it over, and wrap it around the smaller prong. Wrap three times and cut off the excess wire.
Attach the First 4mm Bead Attach the Second 4mm Bead
- Attach the second 4mm round bead using the same wire wrapping technique.
Attach the Second 4mm Bead Attach the Trapezoid Crystal
- Attach the trapezoid crystal to the wire, using the same wire-wrapping technique.
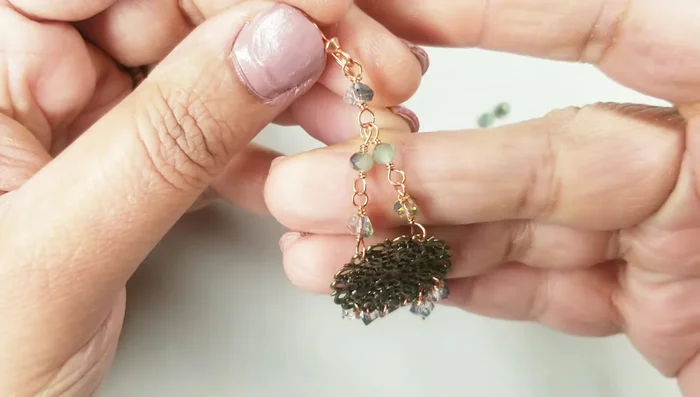
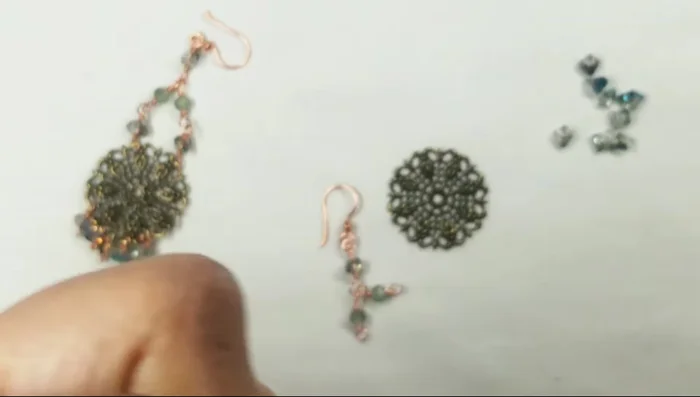
Attach the Trapezoid Crystal Attach the Ear Wire
- Attach the ear wire to the trapezoid crystal and close it securely.
Attach the Ear Wire Create the Second Earring
- Repeat steps 3-6 to create the second earring.
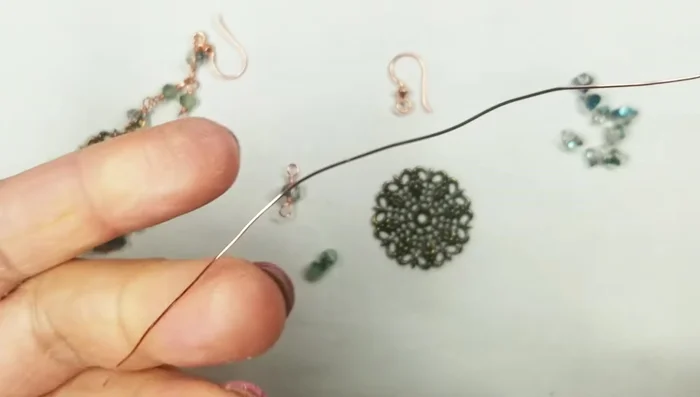
Create the Second Earring Create Wire Stoppers
- Create a wire stopper by coiling the end of a piece of 24 gauge wire and flattening it.
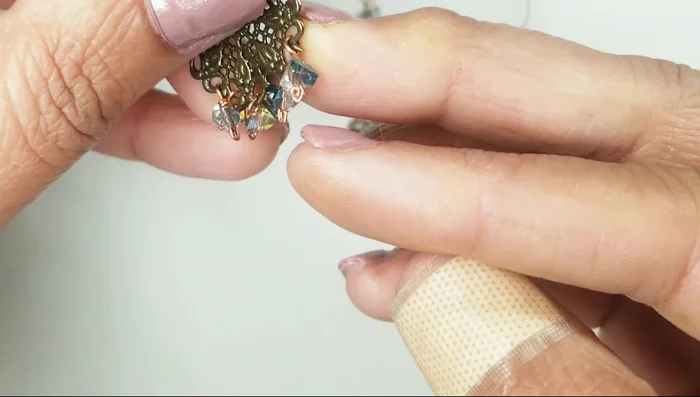
Create Wire Stoppers Add Dangles
- Add dangles to the bottom of each earring by sliding on a bead and creating a loop. Wrap three times on each side to secure the dangle.
Add Dangles
Read more: DIY Tiered Tassel Earrings: A Quick & Easy Jewelry Tutorial
Tips
- Use scrap copper wire to reduce waste.
- Practice your wire wrapping technique to get consistent loops and reduce wire waste.
- Thread beads onto the wire before making loops if working from a spool.
- You can choose to antique the earrings for a darker finish.
- Ensure consistent placement of the filigree disc on both earrings.