Have you ever admired those charming, handcrafted yarn earrings and wished you could make your own? Well, you're in luck! Creating beautiful, unique earrings from yarn is surprisingly simple, even for complete beginners. This guide will walk you through an easy and accessible technique using fish hooks, perfect for those just starting their crafting journey. No special tools or advanced skills are necessary – just some basic materials and a little bit of patience. You'll be amazed at the vibrant, personalized accessories you can create in just a short amount of time.
Forget expensive jewelry – unleash your creativity and craft your own statement pieces! This project offers a fantastic opportunity to experiment with colors, textures, and yarn weights, allowing you to personalize your earrings to perfectly match your style. Ready to get started and transform simple yarn into stunning earrings? Let's dive into the step-by-step process!
Preparation and Safety Guidelines
- Artistic wire (approx. 8-9 inches)
- Yarn
- Book (approx. 5 inches long)
- Scissors
- Flat nose pliers
- Round nose pliers (optional)
- Wire cutters
- Assortment of beads (with large holes)
- Sandpaper or file
- Dowel
- Always supervise children when working with small parts like earring hooks and jump rings. Choking hazards exist.
- Use hypoallergenic earring hooks if you have sensitive skin or allergies to certain metals.
- Clean your hands thoroughly before handling yarn to avoid transferring dirt or oils onto the finished earrings.
Step-by-Step Instructions
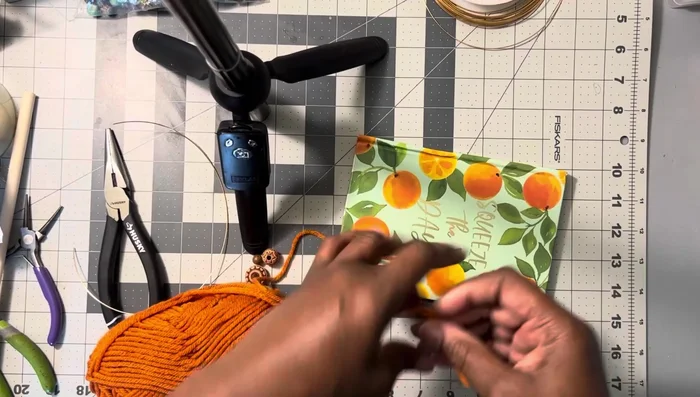
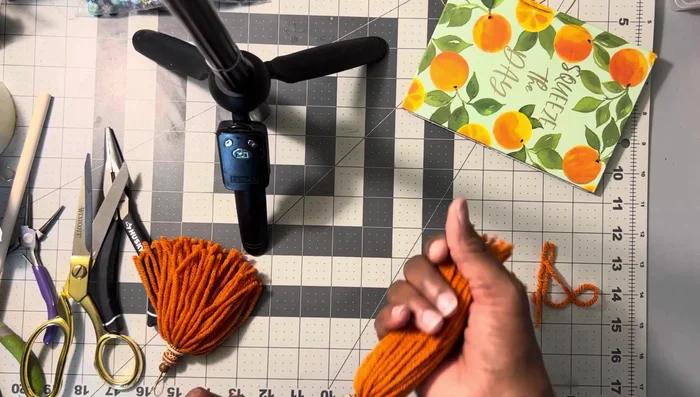
Prepare the Yarn
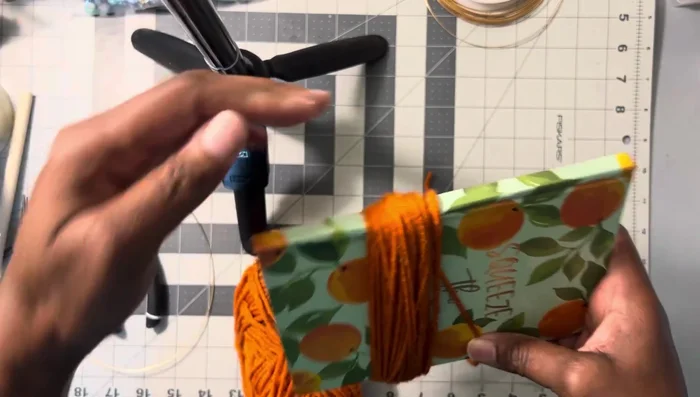
- Wrap yarn around book 50 times.
- Cut the wrapped yarn.

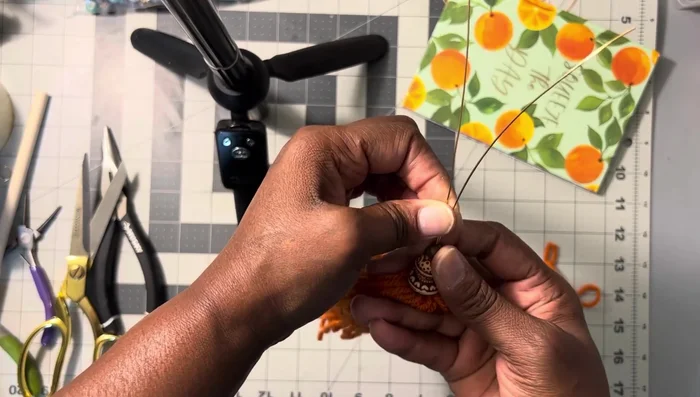
Prepare the Yarn Secure the Yarn Bundle
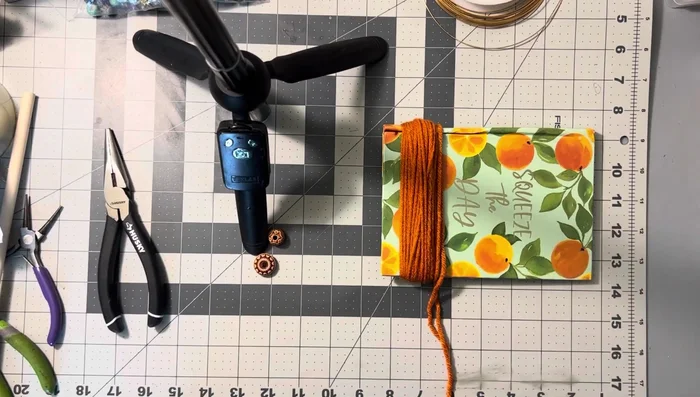
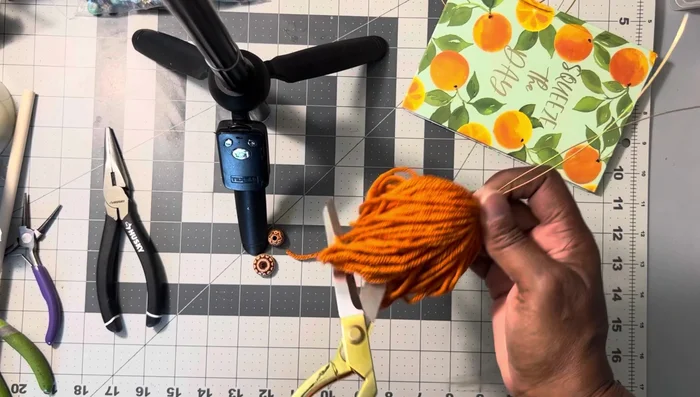
- Insert wire at the top of the yarn bundle, ensuring even distribution. Pinch and twist the wire three times to secure the yarn.
- Cut the excess yarn, leaving an uneven end which will be hidden later.
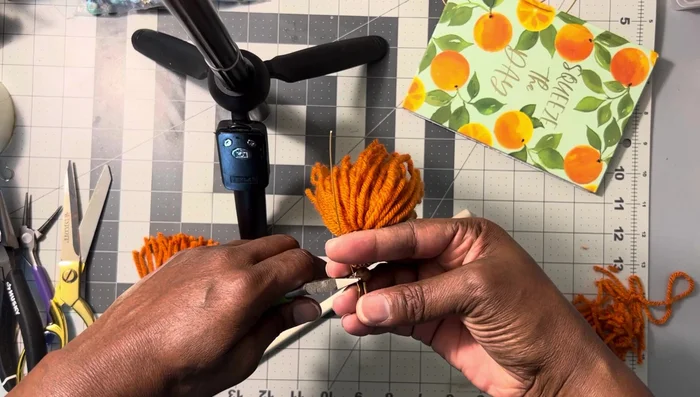
Secure the Yarn Bundle Add Beads
- Slide beads onto the wire (large bead first, to hide the wire).
- Push the beads down, holding them in place. Wrap another wire around the long wire end to secure the beads.
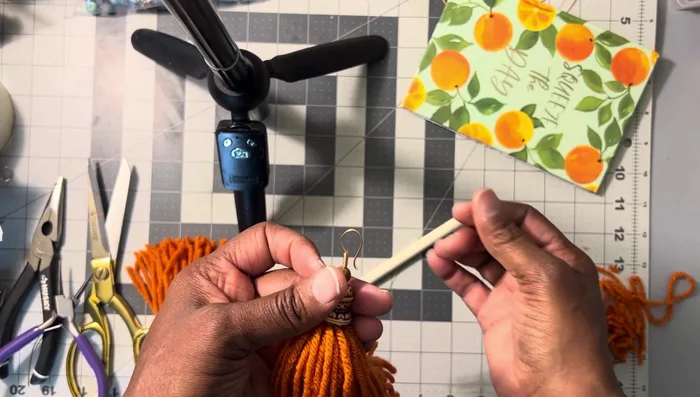
Add Beads Create the Earring Hook
- Cut the excess wire, leaving a short piece to form the earring hook. Create a small loop with the short wire piece, using the dowel to help shape it.
- Cut off the excess wire after creating the loop. Sand the end of the wire to make it smooth against the ear.
Create the Earring Hook Wear the Earrings
- Insert the earring hook into the earlobe, then push the earring back to secure it.
Wear the Earrings

Read more: DIY Tiered Tassel Earrings: A Quick & Easy Jewelry Tutorial
Tips
- Use a book of appropriate length to determine the earring length. Adjust the number of yarn wraps accordingly.
- The uneven ends of the yarn will be hidden by the beads. Don't worry about perfect symmetry when cutting the yarn.
- Secure the beads tightly with wire wrapping to prevent slipping.
- Use flat nose pliers to tightly crimp the wire around the beads.
- Sand or file the wire ends to smooth them for comfortable wear.