Tired of that plain, plastic tissue box cluttering your beautifully decorated space? Elevate your home décor with a touch of rustic elegance by crafting your own DIY wooden tissue box. This simple yet sophisticated project allows you to personalize your home with a handcrafted piece that perfectly complements your existing style, whether it's minimalist modern, cozy farmhouse, or something entirely unique. Using readily available materials and straightforward techniques, you can transform a basic box into a stunning statement piece. Forget generic store-bought designs; this project empowers you to create a functional and visually appealing addition to any room.
This guide provides a comprehensive, step-by-step approach to building your own elegant wooden tissue box, perfect for even beginner DIY enthusiasts. From selecting the right wood to adding the finishing touches, we’ll guide you through each stage with clear instructions and helpful images. So grab your tools and let's get started on transforming a humble tissue box into a beautiful centerpiece!
Preparation and Safety Guidelines
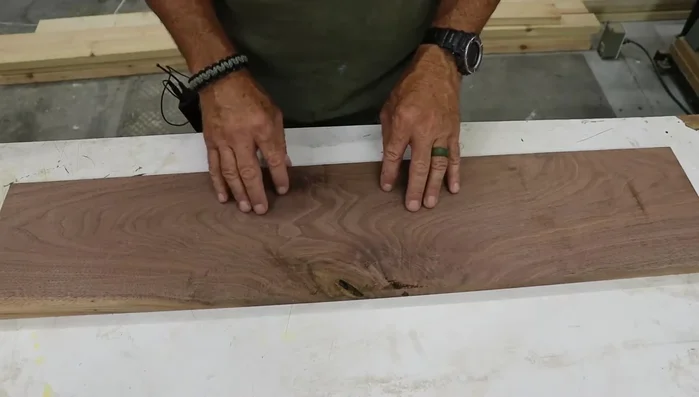
- Black walnut wood
- Thickness planer
- Planer sled
- Miter saw
- Table saw
- Dado stack
- Box joint jig
- Hot glue
- Chalk
- Scroll saw (or jigsaw)
- Router table
- Flush trim bit
- Round-over bit
- Belt sander
- Random orbital sander
- Sandpaper (120, 150, 180, 220, 300 grit)
- Lacquer finish
- Clamps
- Wet rag
- Always wear safety glasses when using power tools like saws or sanders to protect your eyes from flying debris.
- Use caution when handling sharp tools like chisels and knives. Keep your fingers clear of the blade.
- Ensure proper ventilation when using stains, paints, or varnishes to avoid inhaling harmful fumes. Work in a well-ventilated area or wear a respirator.
Step-by-Step Instructions
Prepare the Wood
- Plane the black walnut wood to a half-inch thickness using a planer sled.
- Plane the remaining wood down to 3/8-inch thickness using a planer sled.

Prepare the Wood Cut and Shape the Top
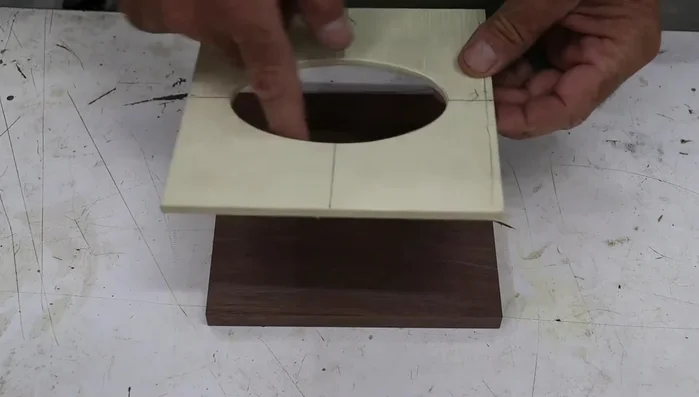
- Cut out the rough dimensions (7x7 inches) for the tissue box top from the half-inch thick wood using a miter saw.
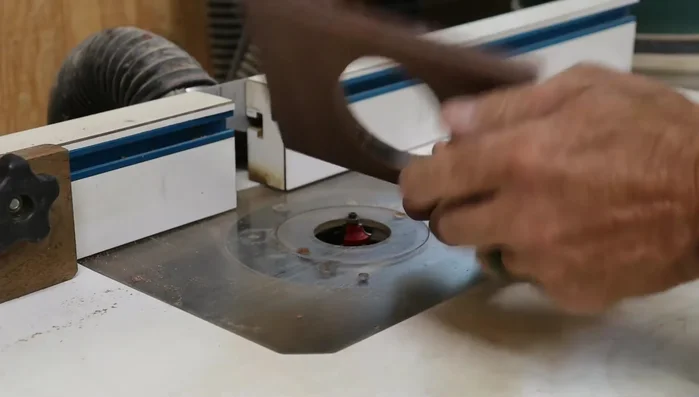
- Using a template, trace and cut out an oval from the center of the six and a quarter inch square top with a scroll saw (or jigsaw). Clean up the cut with a router table and flush trim bit.
- Use a round-over bit in the router table to round over the top and bottom of the oval, and create a subtle profile on the top edge.
Cut and Shape the Top Prepare the Sides
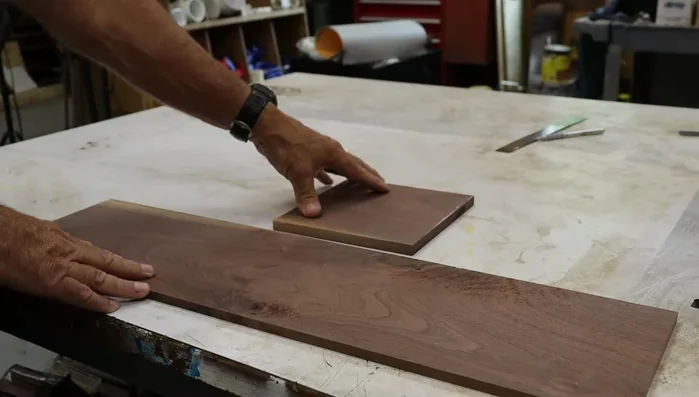
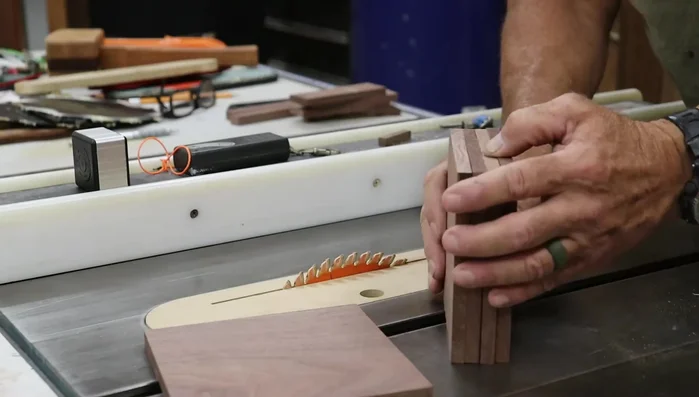
- Joint one edge of each side piece, then joint the other edge while cutting them to their finished lengths (5 3/16 inches wide and 5 1/2 inches long) at the table saw.
Prepare the Sides Assemble the Box
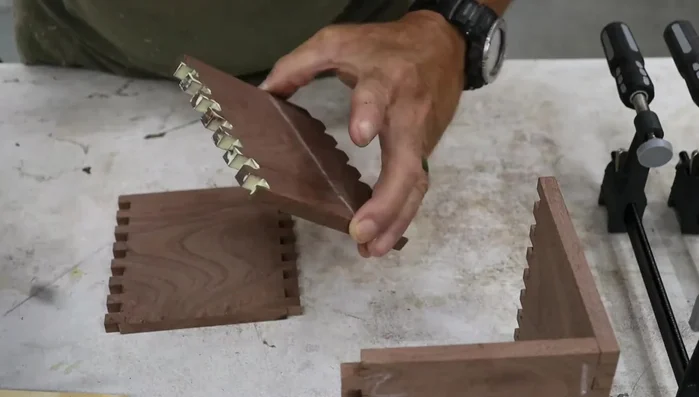
- Using a dado stack and box joint jig, cut the box joints on the sides (3 7/8 inches thick).
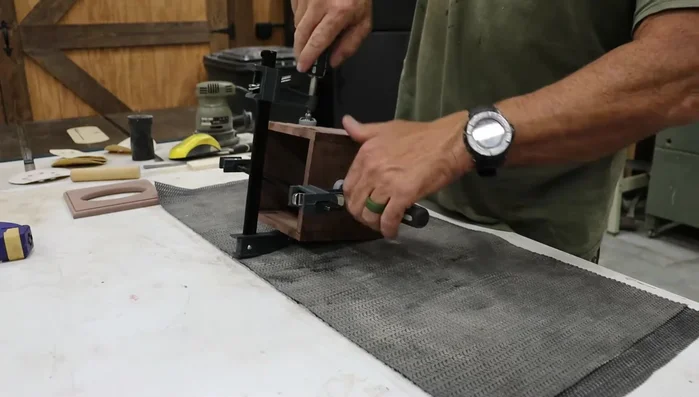
- Liberally apply glue to the box joints and carefully assemble the sides, wiping off excess glue with a wet rag. Clamp securely and let dry overnight.
Assemble the Box Sanding
- Sand the box and top with a belt sander (120 grit), then progress through the grits with a random orbital sander . Hand sand the top to 300 grit after gluing.
Sanding Attach the Top
- Center and glue the top to the box, ensuring a half-inch overhang on all sides. No additional fasteners are needed.
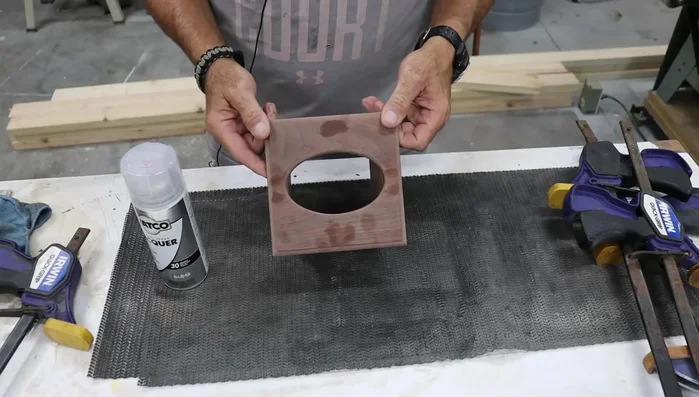
Attach the Top Finish
- Apply a high-gloss lacquer finish.
Finish


Read more: Build a Stunning Black Walnut Coaster Set: The Ultimate Furniture Protector
Tips
- Always use a planer sled when planing thin pieces of wood for increased safety and accuracy.
- Match grain patterns on the sides before cutting box joints for a visually appealing result.
- Be generous with glue when assembling box joints and use a wet rag to clean up excess glue.
- Raise the grain by spraying water before final sanding to achieve a smoother finish.