Tired of the same old bags? Yearning for a unique and eco-friendly accessory that reflects your personal style? Then look no further! This guide will show you how to create a stylish and surprisingly sturdy backpack entirely from repurposed t-shirts, transforming unwanted clothing into a trendy and sustainable everyday carry. T-shirt yarn is a fantastically versatile crafting material, allowing for creative freedom and a satisfyingly tactile experience. It’s also a wonderfully resourceful way to give old clothes a new lease on life, reducing textile waste and adding a personal touch to your wardrobe.
This DIY project is perfect for crafters of all levels, requiring only a few basic tools and a willingness to embrace a fun and rewarding process. Forget expensive, mass-produced backpacks – you'll be amazed at how easy it is to make your own. Let's dive into the step-by-step instructions to craft your own unique and eco-conscious t-shirt yarn backpack.
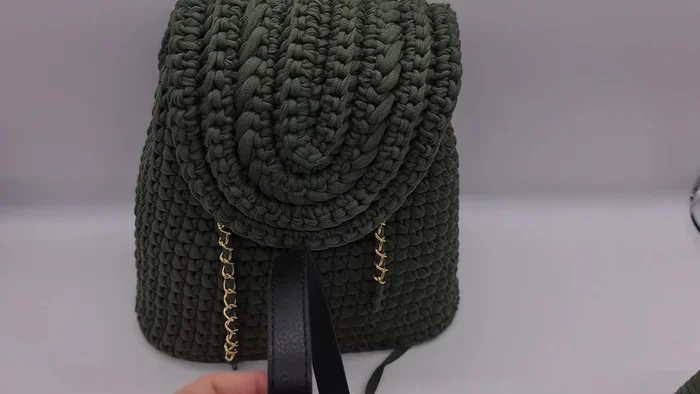
Preparation and Safety Guidelines
- T-shirt yarn
- Fake leather bottom
- Back lock
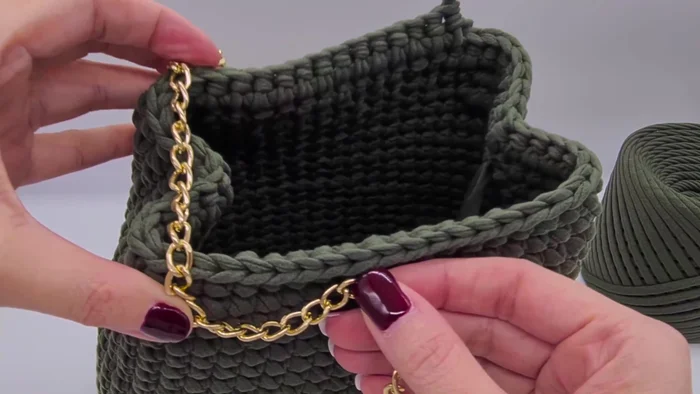
- Chain
- D-rings
- 3.5 mm crochet hook
- Darning needle
- Scissors
- Always use sharp scissors when cutting t-shirt yarn to avoid injury. Keep fingers clear of the blades.
- If using a sewing machine, be mindful of your fingers and ensure the machine is properly maintained and used according to the manufacturer's instructions.
- When working with needles, especially if crocheting or knitting with thicker t-shirt yarn, be cautious to avoid pricking yourself. Use blunt-tipped needles if possible.
Step-by-Step Instructions
Creating the Backpack Body
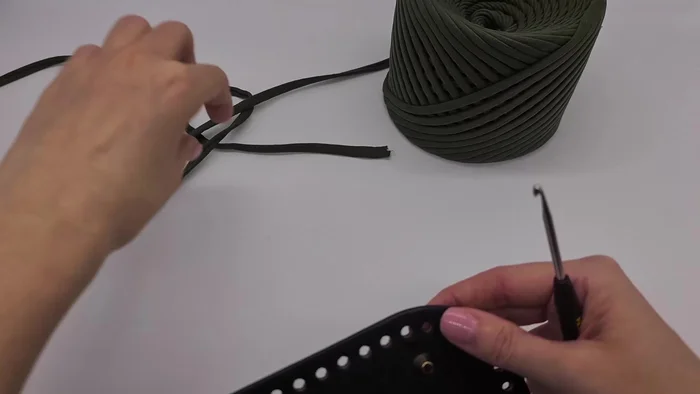
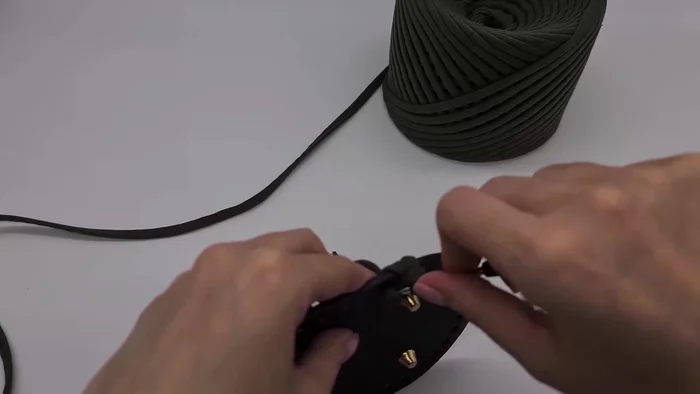
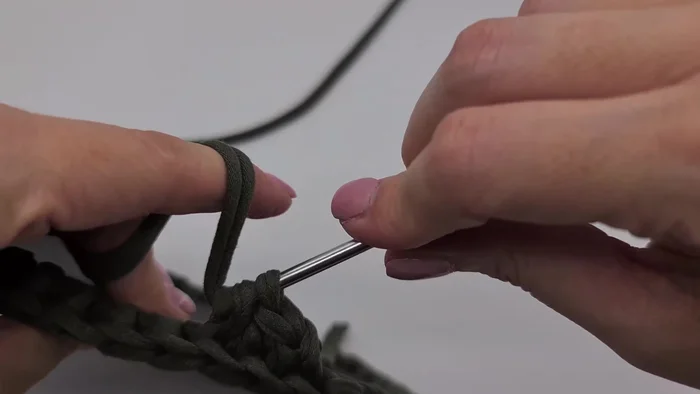
- Start at the back bottom; the back feet should face you. Pull the yarn through and make a chain stitch at the edge of the bottom.
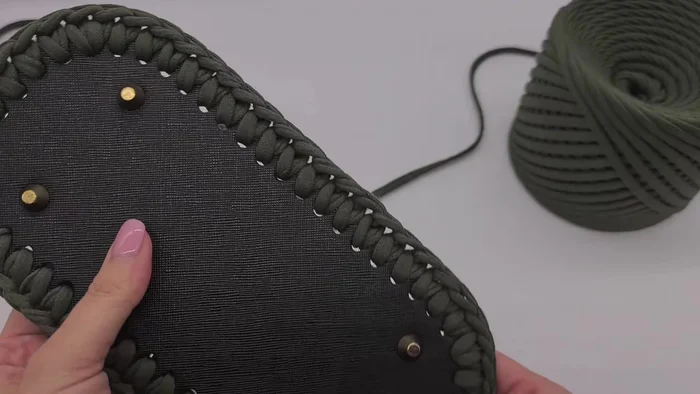
- Continue with single crochet through the bottom holes, pulling them up to the edge of the bottom.
- If the single crochet stretches too much, use double crochet in the edges.
- Finish the row, cut the yarn, and weave it through below the first single crochet of the row, pulling it through and bringing it back to the middle of the last stitch.

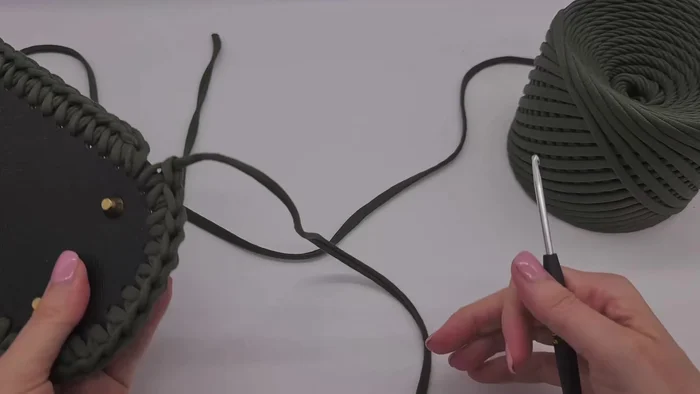
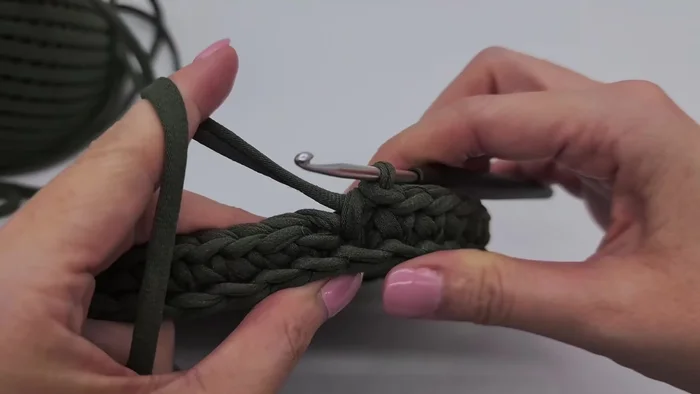
Creating the Backpack Body - For the sides, poke through below the loops, pull the yarn through, make a chain stitch, and continue with single crochet below the shown loop.
- Continue with single crochet below the loop.
- Continue with normal single crochet until the backpack reaches the desired height. Squeeze the sides occasionally to check the shape.
- Mark stitches next to each other when squeezing the back together using a piece of yarn. Create a line through these different layers.
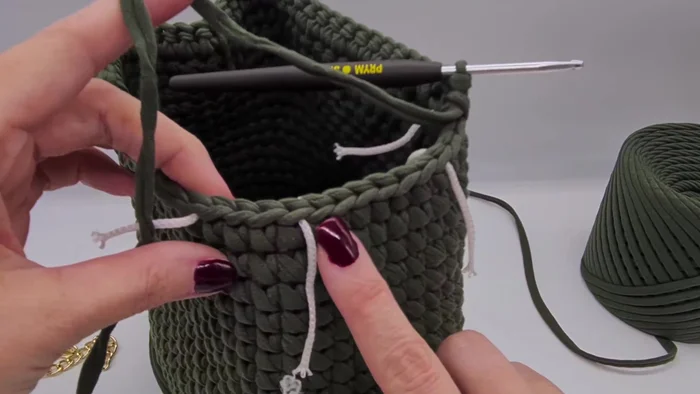
Creating the Backpack Body Creating the Backpack Top Opening
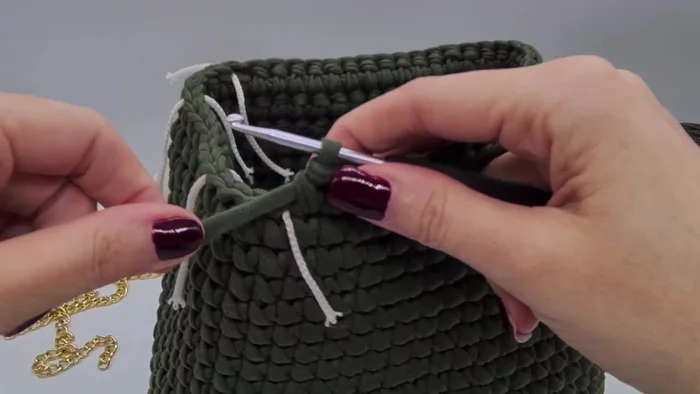
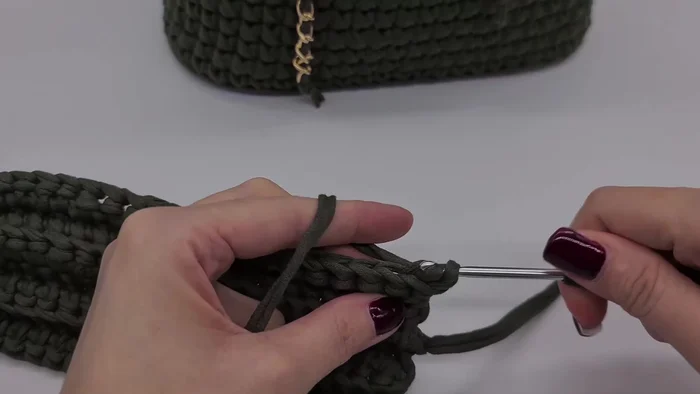
- Make chain stitches to create holes for the chain, poking into the loop behind the marked stitch. Don't use too much yarn tension to prevent small holes.
- Repeat this process on the other side, and sew in the ends.
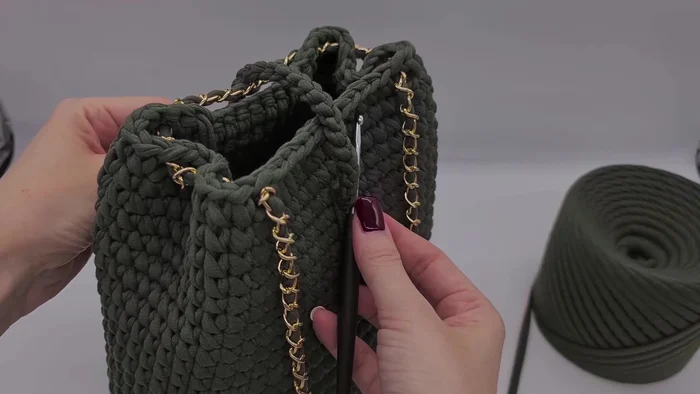
Creating the Backpack Top Opening Creating the Backpack Top
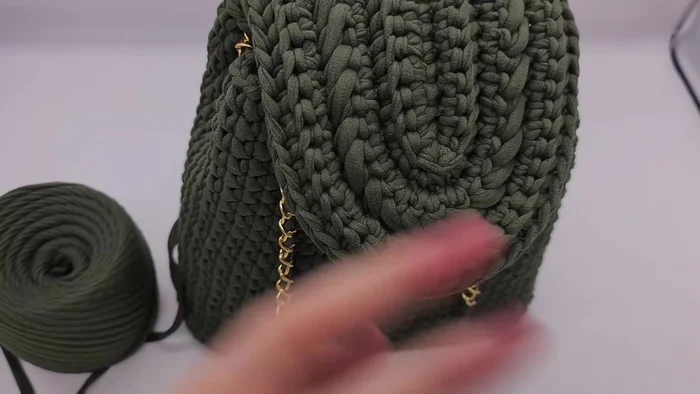
- For the chain, pull the thread through and make knots at the end.
- For the top of the backpack, start with a chain (adjust length depending on backpack size), and single crochet back and forth.
- In the next row, single crochet only in the back loop.
- To create a nice round edge, double all stitches at the tip in this row. Work in the back loop only and then make a second single crochet.
Creating the Backpack Top - Continue doubling stitches in the edge area, going back and forth with single crochet, chain for turning, and working in the back loop only.
- Create a pattern by making two single crochet, then poking into the row below and going back one stitch, pulling it through and closing the stitch; continue with single crochet and repeat the pattern.
- Continue adding rows until desired height is reached; hold the top of the backpack occasionally to check the width.
Creating the Backpack Top Attaching the Backpack Top
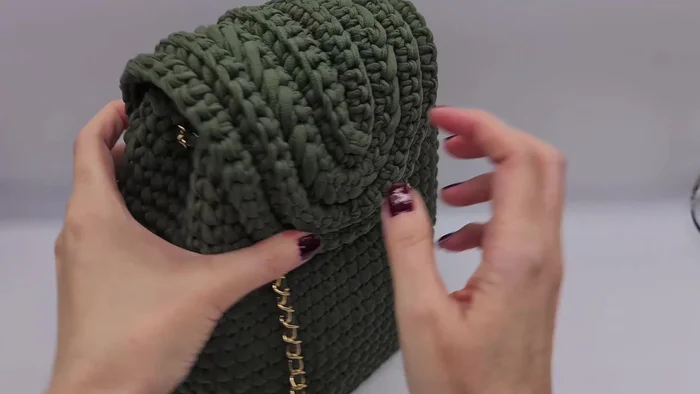
- Sew the top to the back of the backpack.
Attaching the Backpack Top Attaching the Clasp
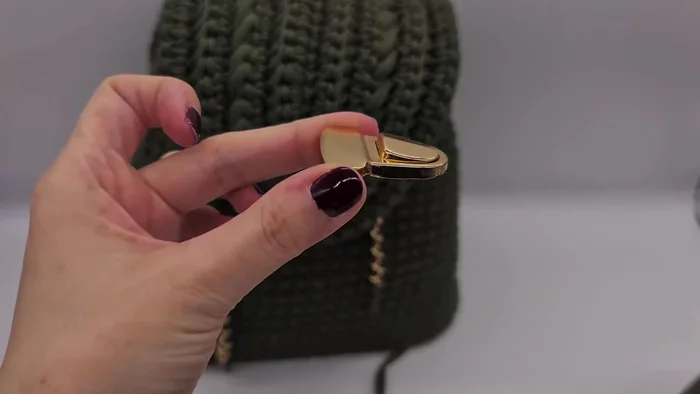
- Attach the lock by squeezing the upper part open and poking the lower part through the backpack, bending it around the spikes.
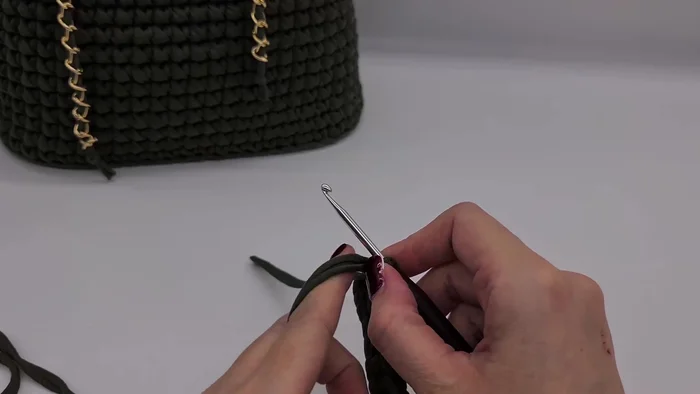
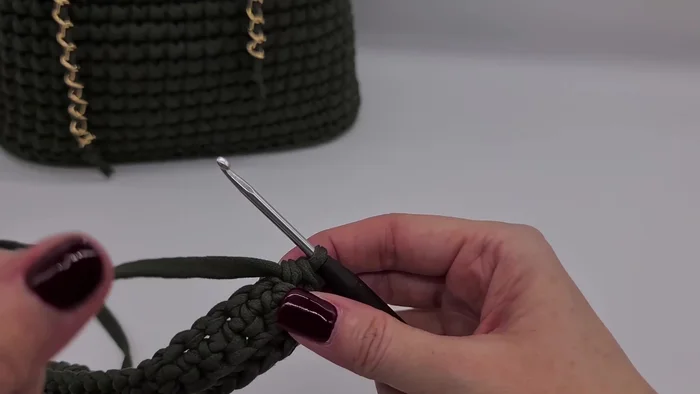
Attaching the Clasp Creating and Attaching Shoulder Straps
- For shoulder straps, create chains and attach d-rings. Single crochet the straps starting with a chain of 3, making two stitches, then a chain and continuing back and forth until the desired length is reached.
Creating and Attaching Shoulder Straps


Read more: Easy Color Block Crochet Blanket Tutorial for Beginners
Tips
- Squeeze the sides often to ensure a nice shape for your backpack.
- Don't use too much yarn tension when creating holes for the chain.